INTRODUCTION
The digital image is completely different from the chemical (analog) one to which many were used to, the characteristics are different. The terms below are the basics or the minimum you need to know to make the best use of any camera you already have, that you want to buy or replace. These pages are a stimulus to photographically document all cases of which you should have documentation, and the reasons are many, I will express only a portion of the digital information needed for anyone who is about to start to document, but I will also give information on the practical use for the more experienced. The intention is to continue with more articles, more detailed and specific for doctors and technicians. For every important topic that I will be using multiple images to be as comprehensive as possible, so that anyone should be able to understand and put into practice the information needed to make the most of their own equipment. You have to know the subject, “Digital Photography”, which is not just about cameras, lenses and flash, but also computer terms that are often found in the menu settings of digital cameras. Some settings are often overlooked or, not having some knowledge of ??computer terms, are incomprehensible. The topics with the most images will be mainly the settings and functions that can benefit medical records which, if clearly understood (the examples with pictures are often the most understandable), may also be useful for the use of the camera outside of the medical office or laboratory.
REASON
Clinical records have always been essential and have now developed to the point where we find applications both in the medical and technician offices, the reasons are many, I will mention the most important: use pictures to train or communicate with staff, exchange of information with dental technician, to show patients the work to be carried out in their mouth with photos (“now called marketing”), consultation among colleagues and, last but not least, for any medical-legal issues. Only good documentation with photos, x-rays and models can prove that we have done good work before any judge. All the archived documentation of the treated cases have allowed those who have been working as a lecturer or speaker to pass on their own experience. The increased use of the computer in the office allows all dentists and dental technicians to be able to document their work, digital documentation has big advantages over the “old” analog (on film) documentation. I would say that the possibility to see the pictures in real time and store them later directly in the patient’s file, or with the new “WI-FI” card we can transmit and store them directly in the patient’s file at the time they are taken, this allows us to view them on the screen (or on a screen positioned on the wall visible to the patient, or on the monitor now applied on many treatment units) and to discuss them in real time with the patient. If we want, we can also print them immediately, all this can be done with the patient sitting on our chair. If we want we can make a copy of the images to give to the dental technician or the patient, these copies will be exactly the same as the originals and, no matter the type of media you use to record images, such as: Compact-Flash, SD, Memory-Stick , XD-Picture, etc. All media will be readable on any computer. With analog equipment this was not possible, so I abandoned both film and analog cameras more than fifteen years ago. The choice of digital cameras is endless, among digital compact and dSLR we can choose between three hundred different models, but here we will quote the most widely used in medical and dental technician’s offices. Digital cameras fall into three categories:
The “Compact”, are, more or less, the size of a pack of cigarettes, and vary from one compact to another or from the difference of the lens or from the sensor, often, however, among the compact cameras only some fully meet our needs.
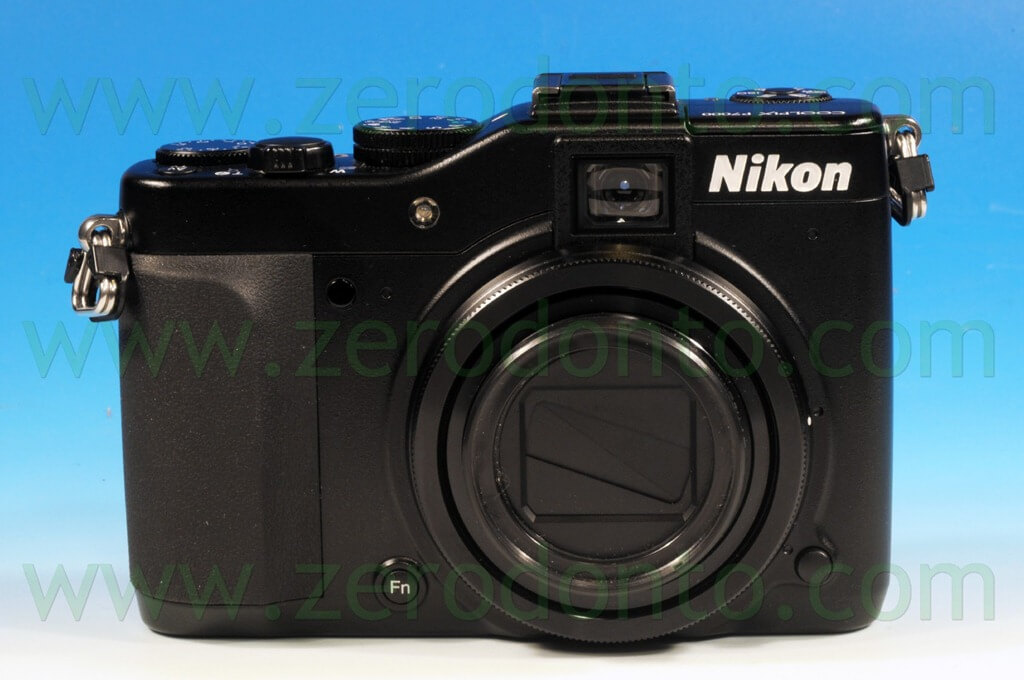
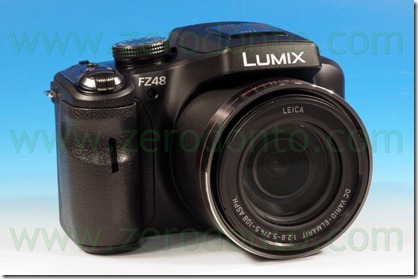
Then we have the “Bridge” ,that is, a cross between a compact and a dSLR, as some are almost as big as a dSLR with a standard lens.
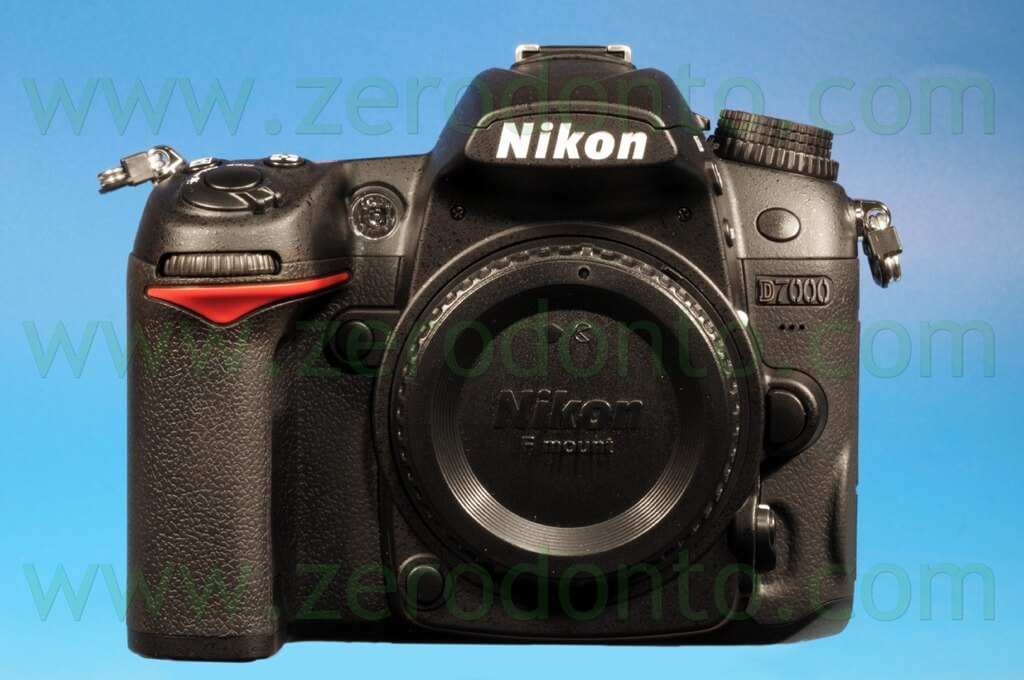
Lastly, the “dSLR” are bodies on which you can mount all the lenses that the camera’s manufacturer produces.
The reflex, if equipped with a dedicated macro lens and appropriate flash for macro photography, gives good results, or if we use the best macro lenses and the latest flashes that can be used wireless (cordless) on brackets with movable arms to direct the light where we need it the most, the results that can be achieved are outstanding.
As is well known in the medical office the possibilities of digital equipment are many, we can connect devices such as Scanner, Printer, video camera, Radiographic, web-cam, etc. to our computers, and, in the future, I will write more articles to learn about and how to use all the devices that we have available and how to make the best use of them in our office. This initial article wants to shed light on the cameras, after more than thirty years of work dedicated exclusively to medical and scientific photography, with photography experience with both doctors and technicians, hundreds of tests carried out on machines, lenses, flashes of various brands , I would like to share all my experience to allow you to obtain the best you can get from various cameras.
THEORY
I must first introduce some concepts to allow you to get the most from the cameras, either for those who already own one or for those who intend to buy one. We must, at least, speak of: lenses, focal length, aperture, depth of field, sensors, flashlight. There are many more topics to be covered, but I describe only those topics that I considered most essential to begin documenting properly, getting to know at least the basics of photography, as well as explaining a camera in its settings and buttons, this will help us whenever we need to change or touch a button on our compact or bridge or dSLR.
Let’s start with the lens, we find this on any camera, usually integrated on compact or bridge and can be either fixed focal length or zoom (i.e. more lenses in one lens), while with the reflex we can decide for ourselves which to use on our camera.
Any company that produces reflex cameras, I will list some of the most famous, Nikon, Canon, Pentax, Minolta, Panasonic, Sony, etc.produces about 50-60 types of lenses, to meet the needs of any photographer, amateur or professional, in addition to the lenses with the same focal length, 100mm for example, but with different costs and different uses, this allows anyone to be able to buy a lens with a desired focal length and staying on budget.
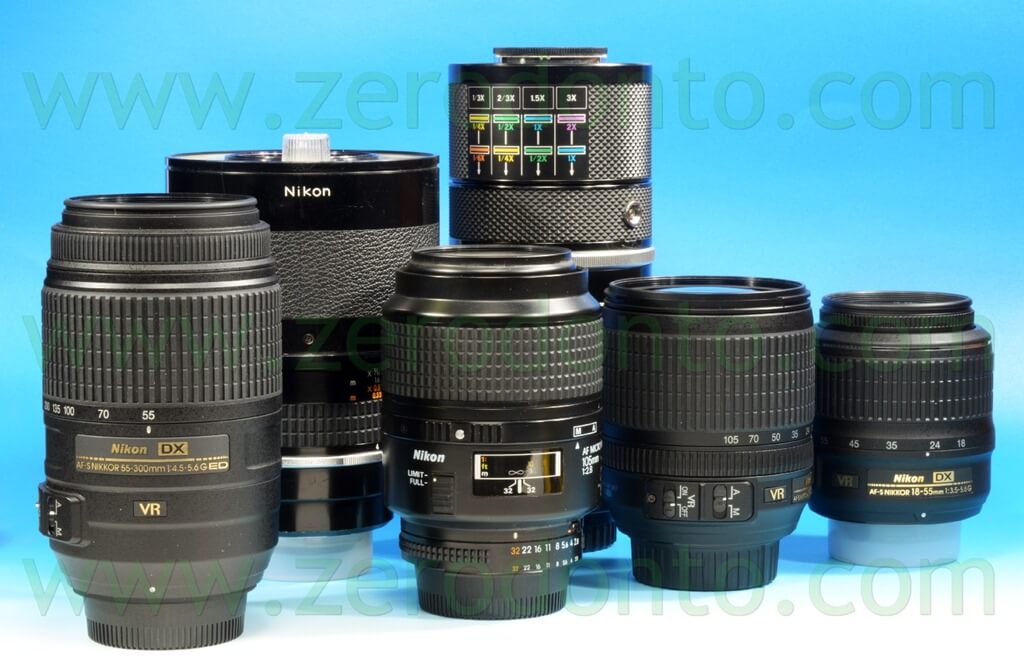
The lenses that most concern us for our work are mainly macro, these lenses have a pattern which is quite different from the lens systems for amateur use. Their lens system allows a sharper focus in the close-up (photo of mouth), with these lenses we get a higher magnification than with other amateur lenses.
Often these lenses also have a larger diaphragm allowing you to get sharper close-ups with.
The lenses are distinguished from one another by the focal length, which varies from one lens to another.
The focal lengths are distinguished in wide-angle, whose focal lengths range from 14mm to 45mm, and the angle of view varies from about 180 ° degrees up to 65 °.
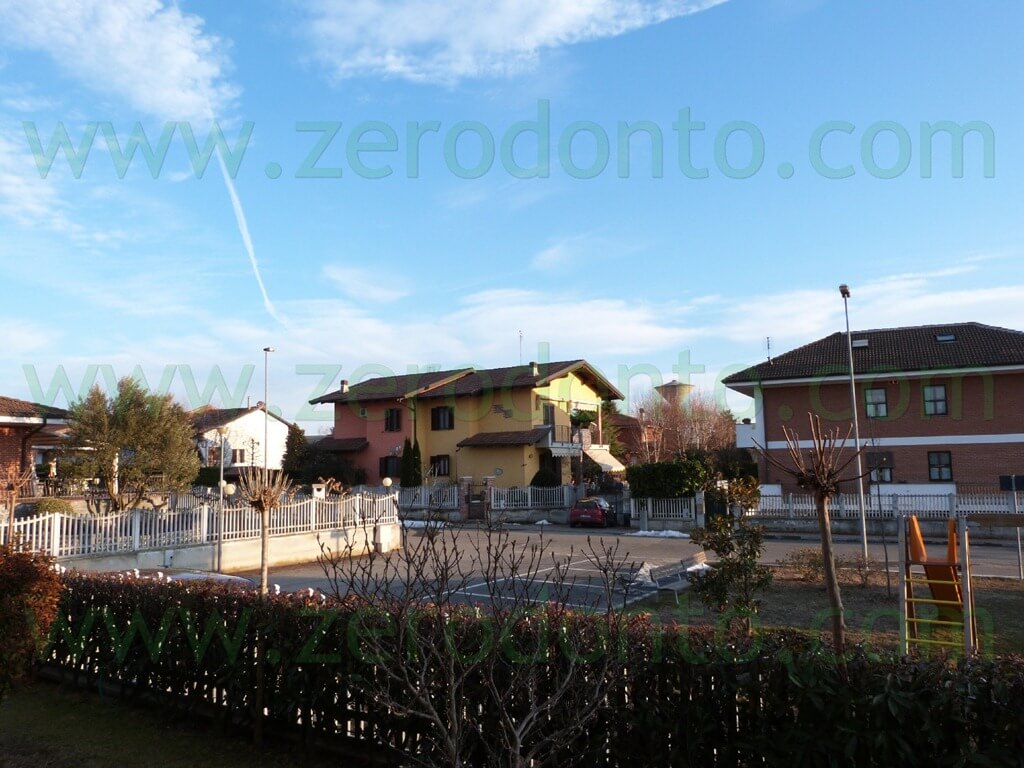
Then there is the category of normal lenses where the focal length varies from 45mm to 85mm, and the angle of view varies from 60 ° to about 40 °.
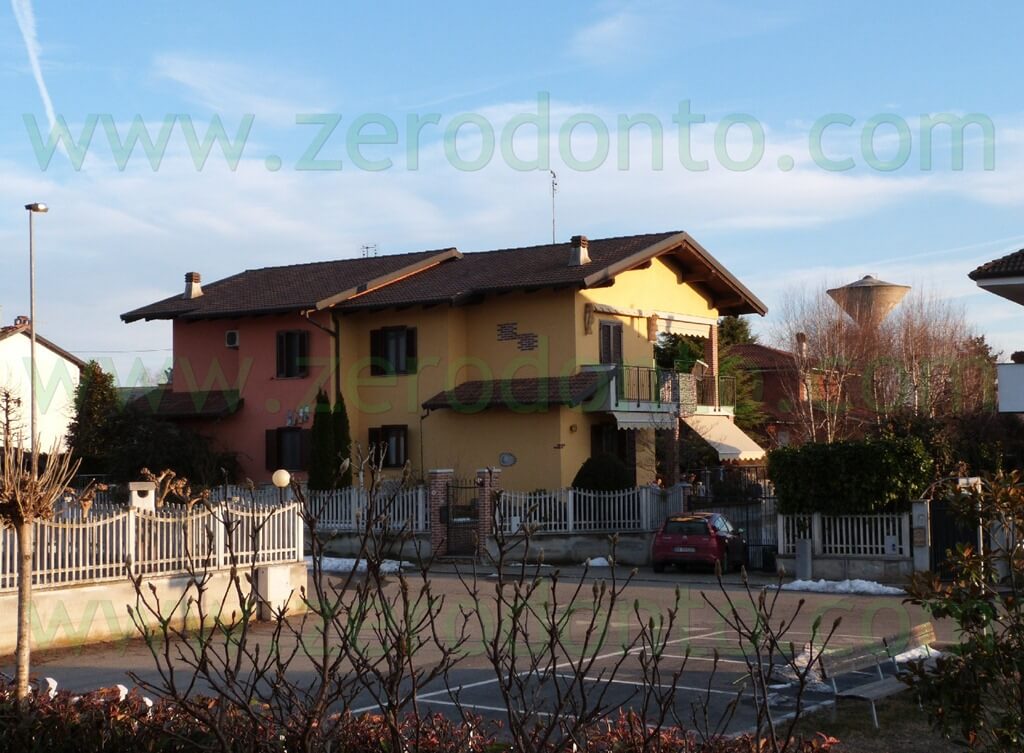
The category of telephoto lenses whose focal length ranges from 85mm up to 400mm, and the angle of view varies from 40 ° to 18 °.
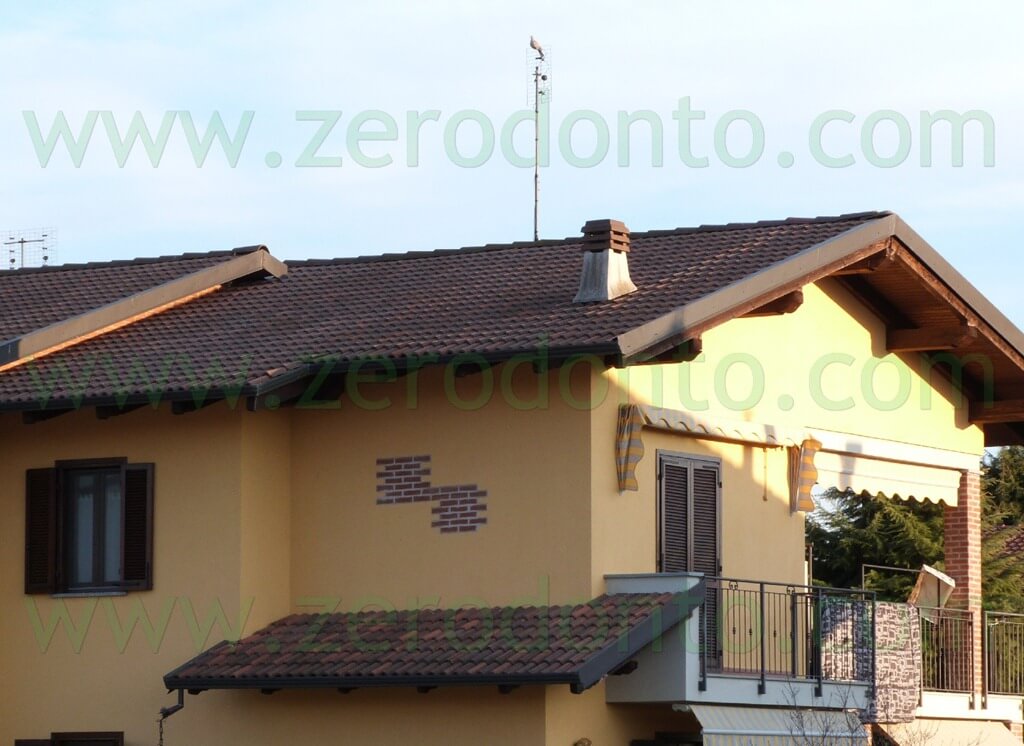
Finally, there is the category of super telephoto lenses that can go up to 2000mm, these will only be mentioned here because they are typically for advanced photography and professionals.
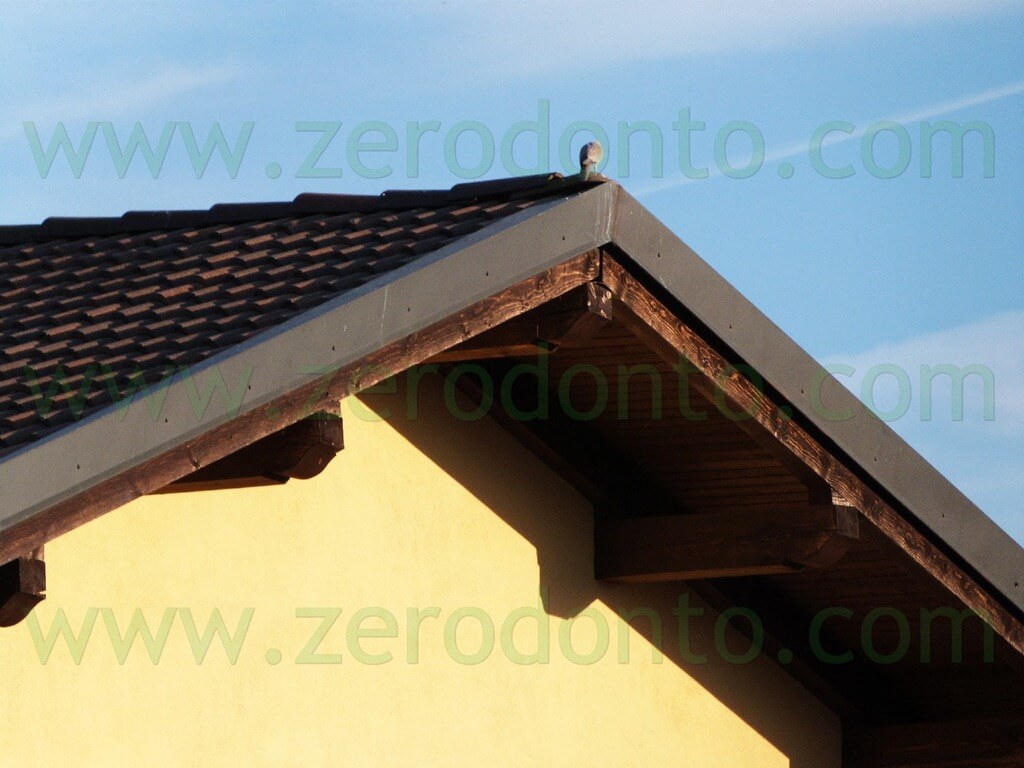
Focal lengths are normally 16mm, 28mm, 35mm, 50mm, 85mm, 100mm, 135mm, 200mm, 300mm, 400mm etc. There are also intermediate focal lengths like 60mm, 45mm, 120mm etc. each manufacturer chooses the focal lengths it deems appropriate for its cameras.
In the lens catalog there are, in addition to fixed focal lengths, many zoom lenses that have become increasingly used and combined with the dSLR.
Among the most common are the zoom 18-55mm, 18-105mm, 18-135mm, 55-200mm, 18-200mm, 18-300mm, etc. Just check the catalogs and you will notice the wide choices available.
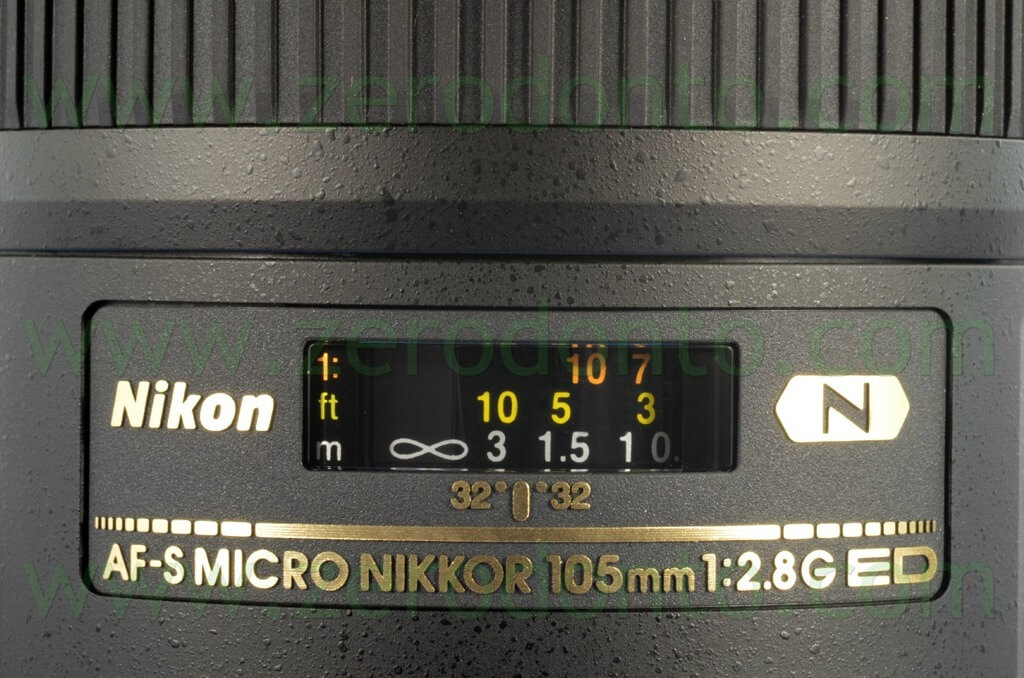
However, the lenses that interest medical and technician offices are mainly those with a focal length of about 100mm, the best included among those that I recommend are the 105mm Micro Nikkor VR f.2.8,
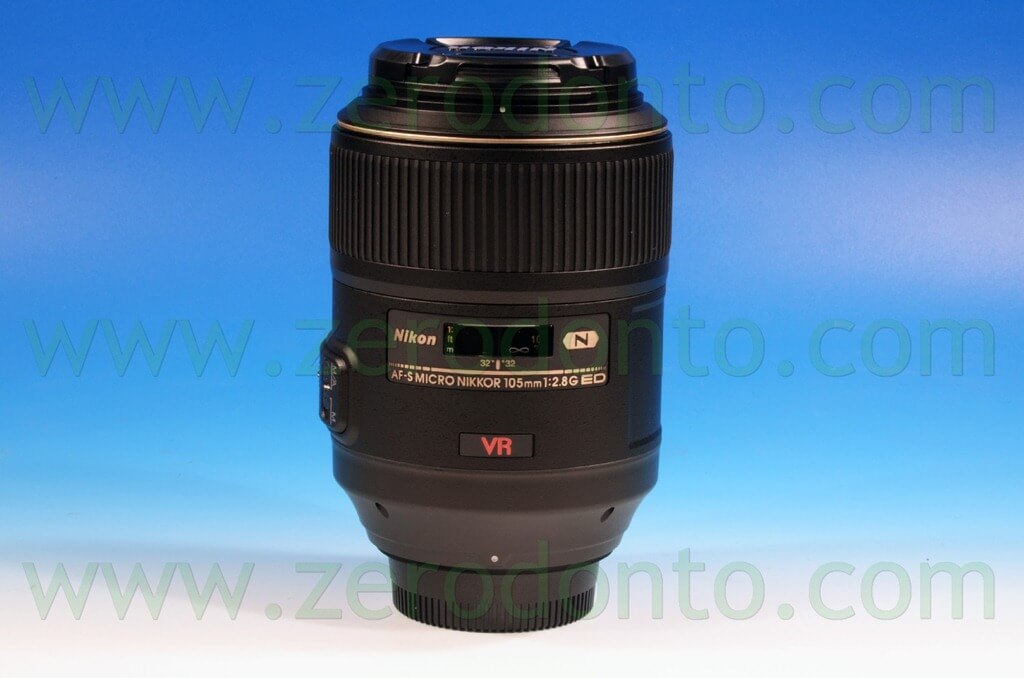
and the 100mm Canon macro Ultrasonic II F2.8.
Not to dwell on all the 100mm focal lengths, basically every brand has its own macro lens with a focal length of around 100mm like Nikon, Canon, Minolta, Pentax, etc. Then there are “universal” brands, that is, optical manufacturers, for example, Sigma, Tamron, Tokina, Elicar, etc. that produce both fixed focal lenses, zoom, and macro lenses, and each of these companies produces lenses for Nikon, Canon, Pentax, Minolta, etc.
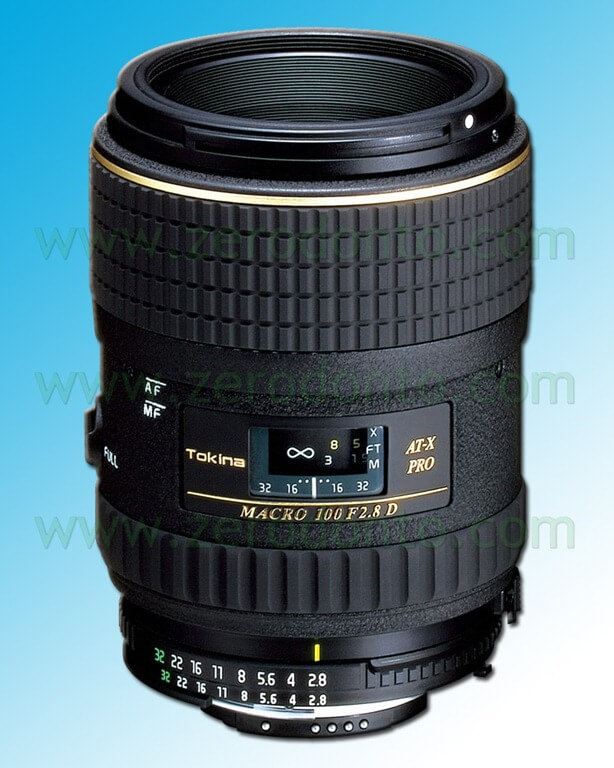
The difference between the original lenses and the “universal” ones is often in the price and a lower quality compared to the original lenses. Normally, the choice must be made either based on the price, for those who want to start taking pictures but cannot spend very much, or quality, spend a little more to buy the original lenses made by the manufacturers of the cameras that one chooses Nikon, Canon , Pentax, Minolta, Sony, etc.
In my experience, if a macro lens is the right one you will not have to replace it again whereas those who buy the “universal” lenses will sooner or later have to replace it and, therefore, lose money.
Inside the lenses we find a mechanism that is defined by the term “Diaphragm”, it consists of sheets that let more or less light in, it has the same functions of the human eye, with poor light the diaphragm expands to let more light pass, on the other hand, if we are out on a day with plenty of light the iris of the eye is closed to the minimum to be able to see without being blinded.
In the macro Dentistry and Dental technology documentation you should try to use the smallest aperture possible, for two simple reasons, the first is to get the maximum sharpness and it is greater with smaller apertures, the second reason is due to the distance of focus which we normally use for photos of the mouth.
I will now explain depth of field so as to be more understandable. Consider a macro lens with a focal length of 105mm,
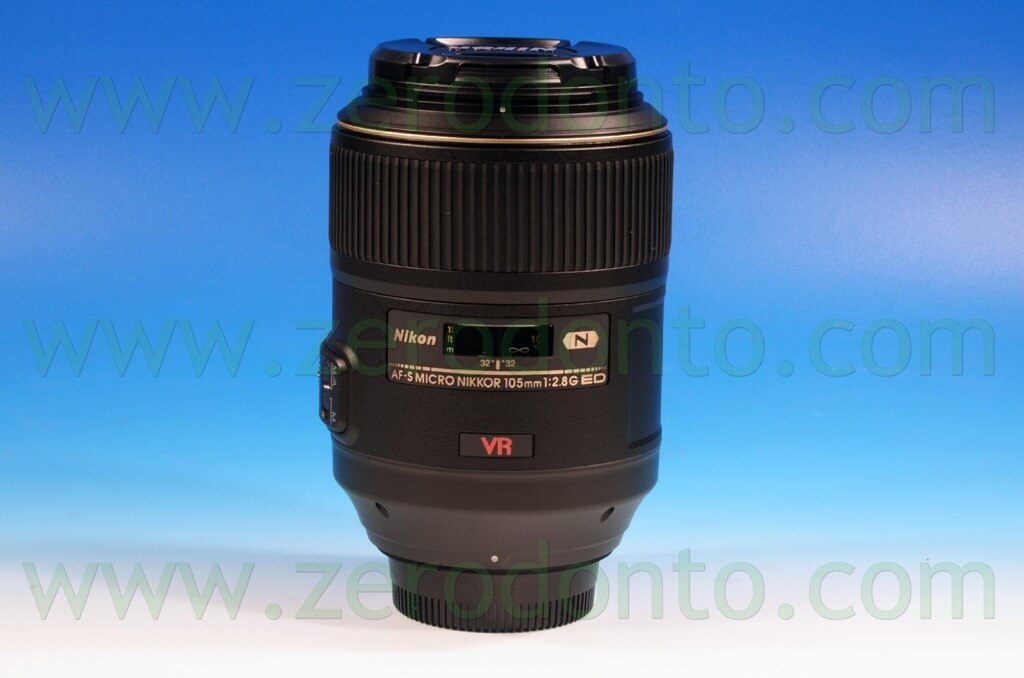
the diaphragms that we can use are: “f”.2.845.6811162232.

The letter “f” indicates the diaphragm. If we take a picture with a wide aperture such as f 2.8 and the same photo with the aperture f32, we have two different photos, one has very little sharpness and the second shot with f32 has maximum sharpness. In each picture that we take, independently of the diaphragm chosen, everything that is in focus is called “depth of field” (sharpness), this sharpness is normally all the space that we see in focus, behind an in front of the point that we have focused on. Let me explain with an example: if you take a picture of the front of the mouth of a patient, with a fully closed aperture (f32) and focus on the patient’s bicuspids, after shooting we will see in focus both the incisors and the molars, the overall sharpness is called the depth of field, to be precise the depth of field is all that is in focus behind and in front of the point of focus, (from the bicuspids).
Now I will explain the concept with images. Let’s take a picture with the aperture f2.8, wide open
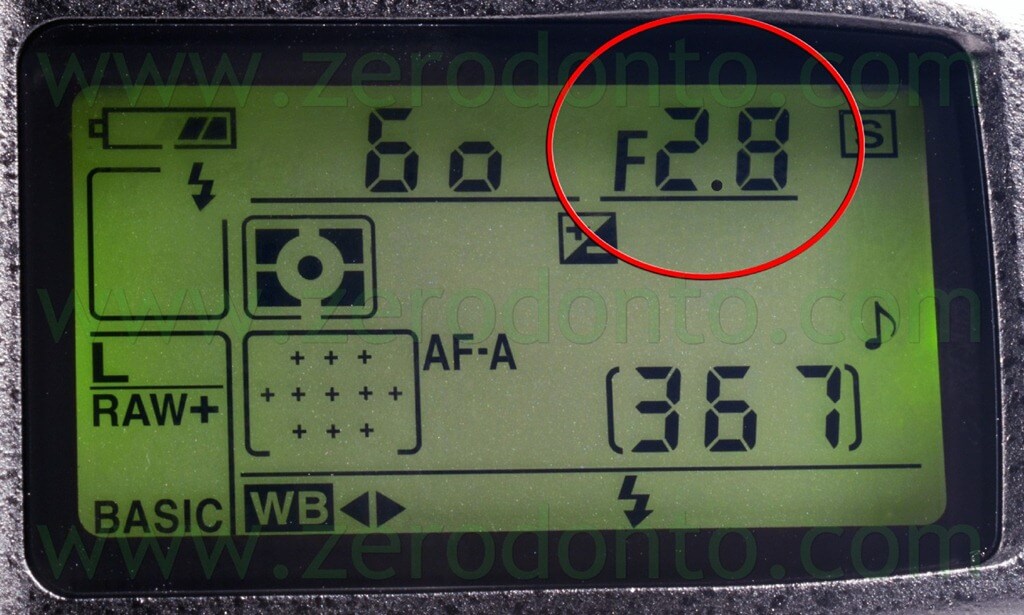
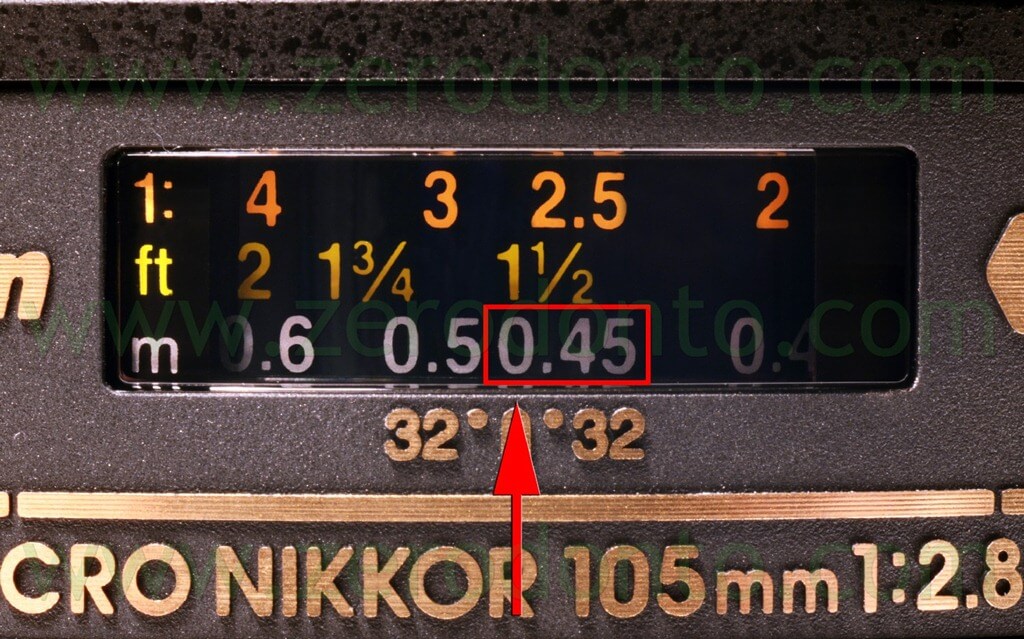
and manual focus set to 45 cm on the lens,
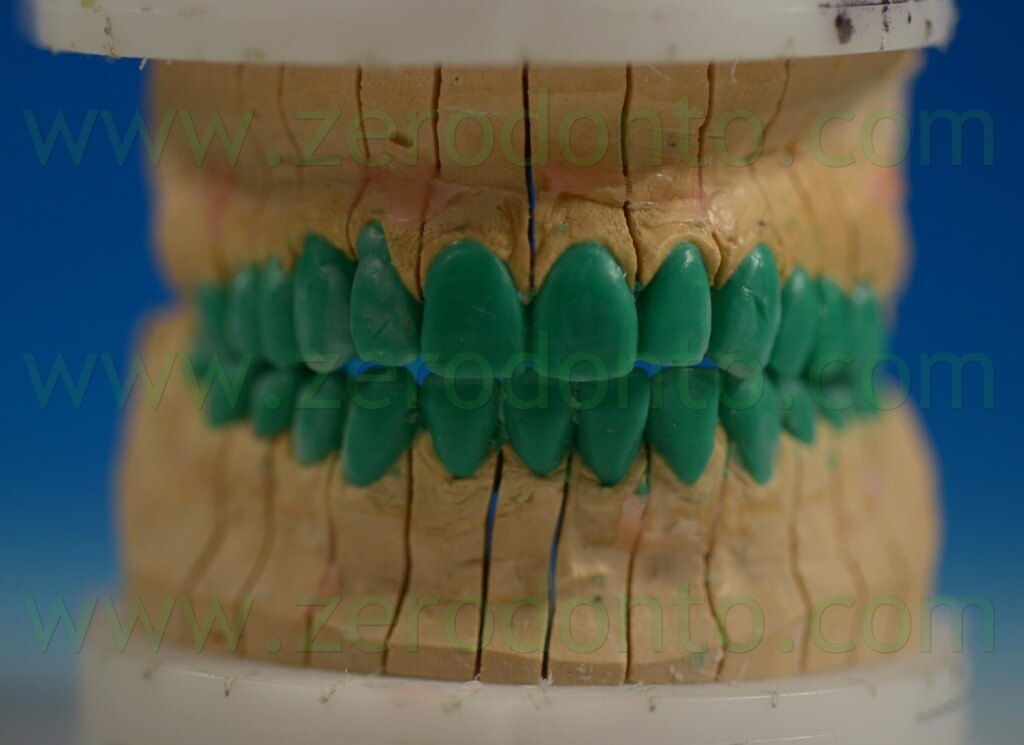
without changing the focus I approach the model until I see the bicuspids in focus.
This is the result.
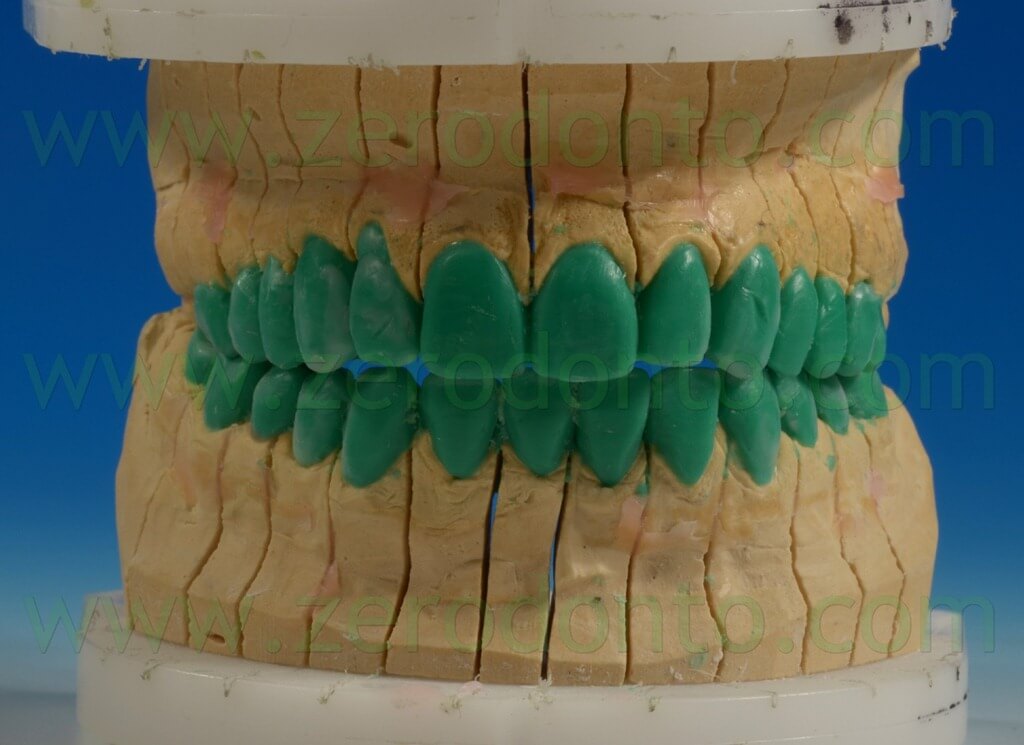
We now take the same picture varying only the diaphragm, closing it up to f.32 maximum closure.
This is the result.
All that we see in focus behind and in front of the point of focus (bicuspids) is defined with the term “depth of field”.
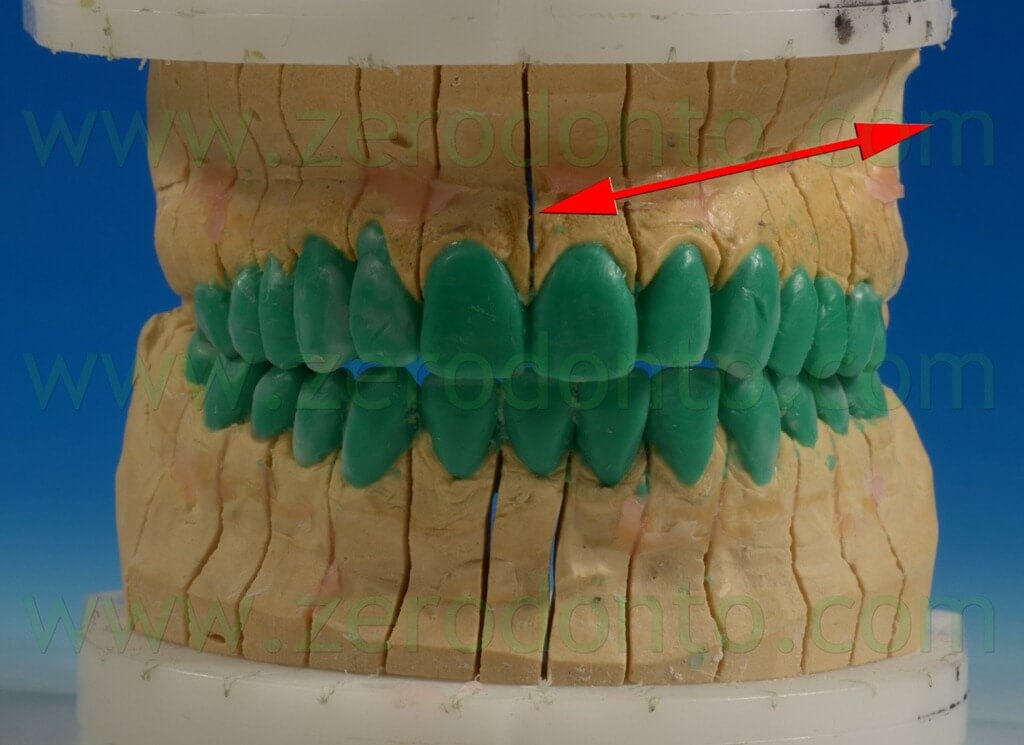
The depth of field in macro photography is always very limited in relation to amateur photography, this is due to the increasingly close working distance to the object.
If you take a picture from a distance of about two meters of any object we have at this distance, with the aperture wide open f2.8, the depth of field is greater than the first picture taken at 45cm on the model, if we take the same photo of the same object with the focus always at 2 meters but by varying the diaphragm up to f32 we will notice that the depth of field is increased further. If we perform a further photo but with focus on an object at a 10 meter distance, and with the diaphragm fully open f2.8, the depth of field increases further, both behind and in front of the object, if we execute a second photo without changing anything but passing from f2.8 to f32, the depth of field is high, we will see in focus almost from our feet to infinity. The point, therefore, is the more we move away from the object and the greater the depth of field (behind and in front of the 10mt). The closer we get to the subject the less depth of field, always behind and in front of an object 10 meters away. In amateur photography outside the studio we always get fairly clear pictures.
Medical and technical documentation is, unfortunately, at close range, the depth of field decreases to the point that when we take a picture of two incisors the space of overall sharpness is about 4mm in a mouth of an adult patient, if we take a photo of all the front teeth we will have a total of about 7cm of focus therefore the ideal starting point is the bicuspids.
In all medical and technical photography to be able to take advantage of the depth of field at the maximum we must always use an ideal point (in the picture of the model they were the bicuspids) to obtain the most depth of field. This concept should be used on any photo we take both in the studio and in the laboratory. Therefore we must learn to focus manually in order to decide for ourselves the ideal point, other than magnification, just to be repetitive, so we get a greater depth of field and in every photo we just have to set the magnification (e.g. front of mouth 45cm), close up to focus on the ideal point (bicuspids), you choose if those on the left or the right and when you see them in focus shot, only this way will you get the maximum depth of field.
COMPACT CAMERAS
Now that we have talked about the lenses, the focal angle, of the differences between the various lenses and the diaphragm, from which the depth of field derives, I will talk about the cameras, let’s start with “compact” and “bridge” digital cameras. The advantage of compact cameras is the cost, affordable enough for anyone who decides to start documenting, and the small size. I recommended these cameras especially for those who want to document but do not need a top quality camera, but is content with getting good photos. Often compact cameras offer good pictures but we cannot or should not accessorize them with supplementary flash or other lenses to try and reach the quality of the SLR.
The compact must be used with the right accessories, but by spending the least. In choosing the right compact, we have to take into account some important points. The market offers a wide range of compacts in addition to the aforementioned brands of dSLRs, Nikon, Canon, Pentax, Minolta, Sony, etc.. like Samsung, Fuji, Casio, Olympus, Epson, Agfa, Kodak, Hewlett-Packard, etc. ..
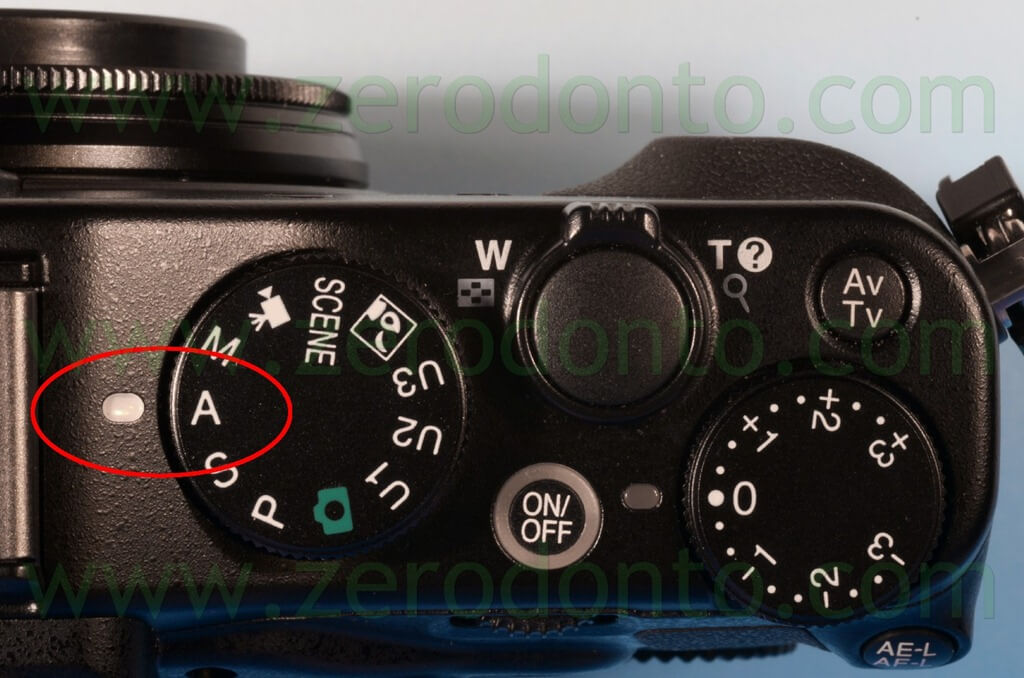
Many of these compacts are great for everyday use, but not very useful in the medical and technician field. The minimum and most important requirement is that the camera must satisfy the possibility of using the aperture priority mode, which is normally indicated with the letter “A”.
If you have to purchase or if you own a camera you must make sure that among the various programs there is an “A” program.
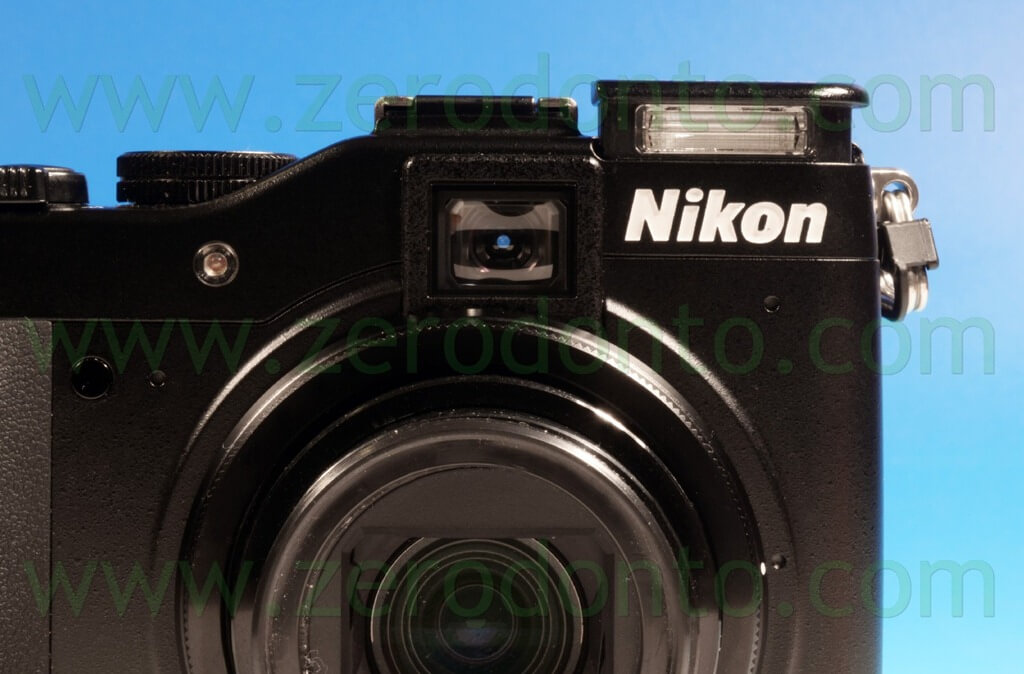
The flash must be as close as possible to the lens,
many compacts may have, among the characteristics of the screens, horizontal and vertical lines,
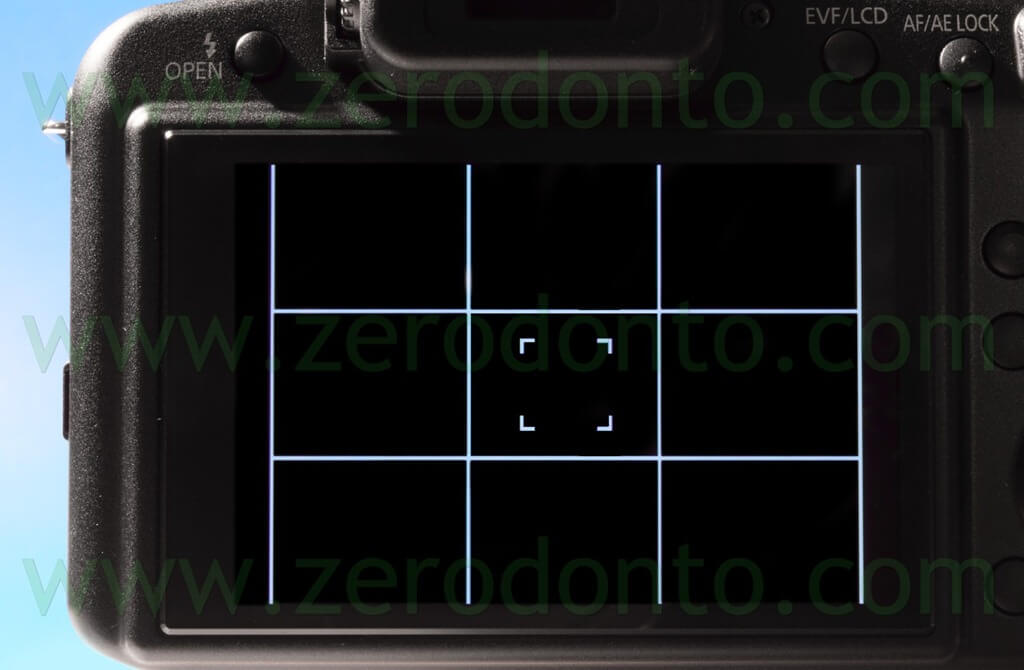
while shooting the lines of the screen will always allow us to get photos of the mouth and teeth straight on the occlusal plane.
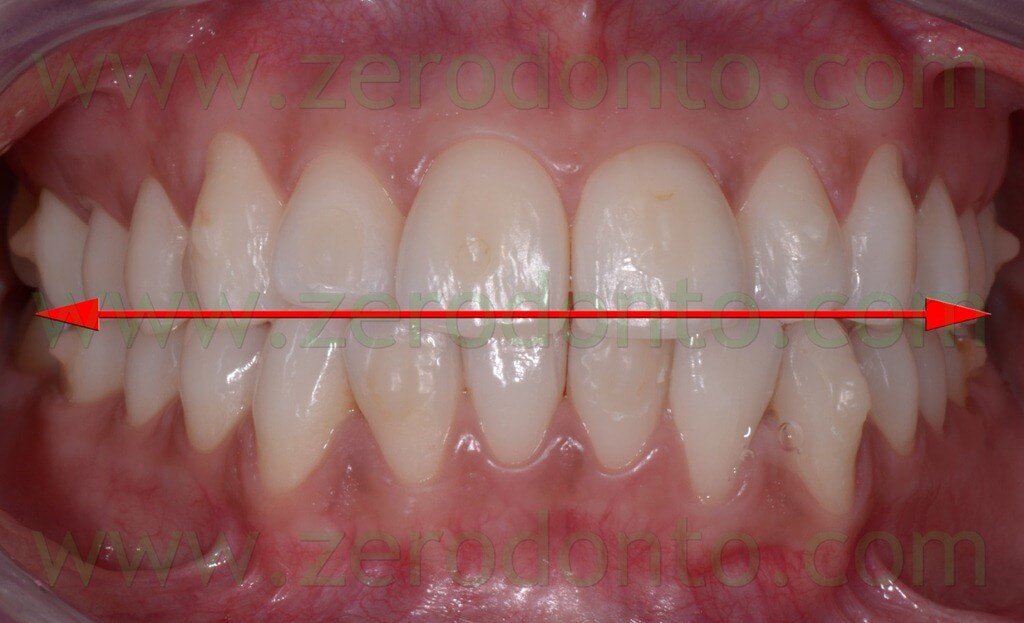
Each camera is then set, in order to obtain the maximum depth of field, colors and white balance, the latter is the most important setting, on every camera the “flash” must be set.

To be able to then get the picture as close as possible we have to add additional lenses to almost all compacts or
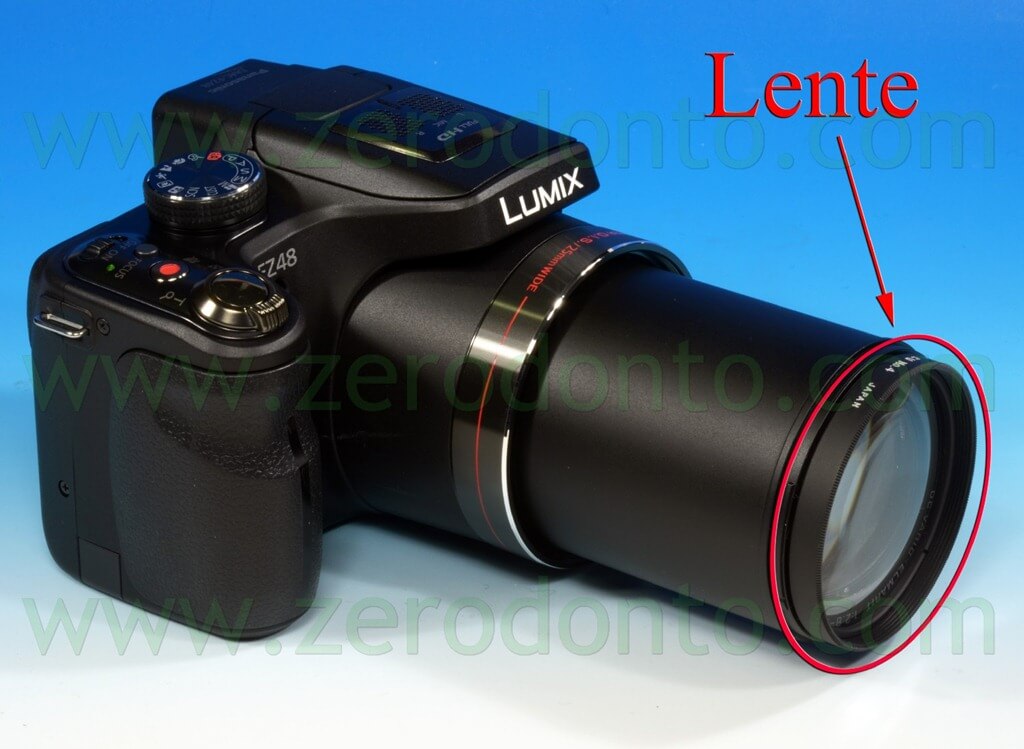
lens additions,
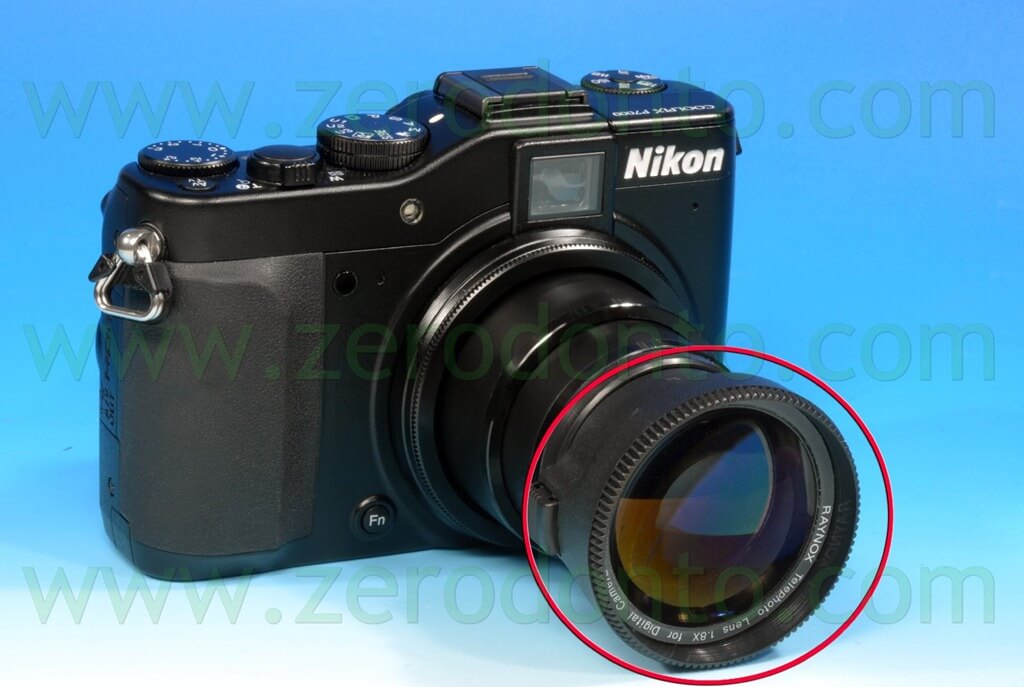
if you can buy those products from the same manufacturing house of the camera (check before buying).
With the Nikon compact cameras for medical documentation (series Coolpix series 900-990-995-4500-7000, etc.) they are always provided, including Panasonic, Kodak, Canon, and other brands have some cameras in their catalogs that have lenses which can be changed or lens additions.
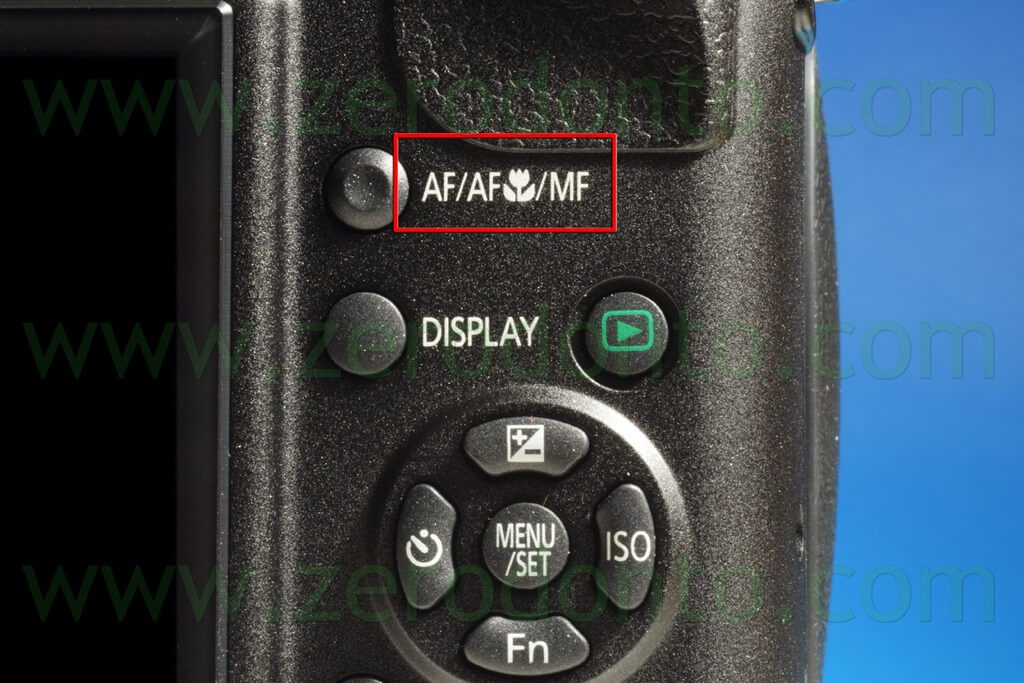
Almost all of the compacts can do up to 2cm macro, you must first set the camera on the macro symbol,
but in practical use to be able to zoom, in almost all compacts, the lens must be set to wide-angle,
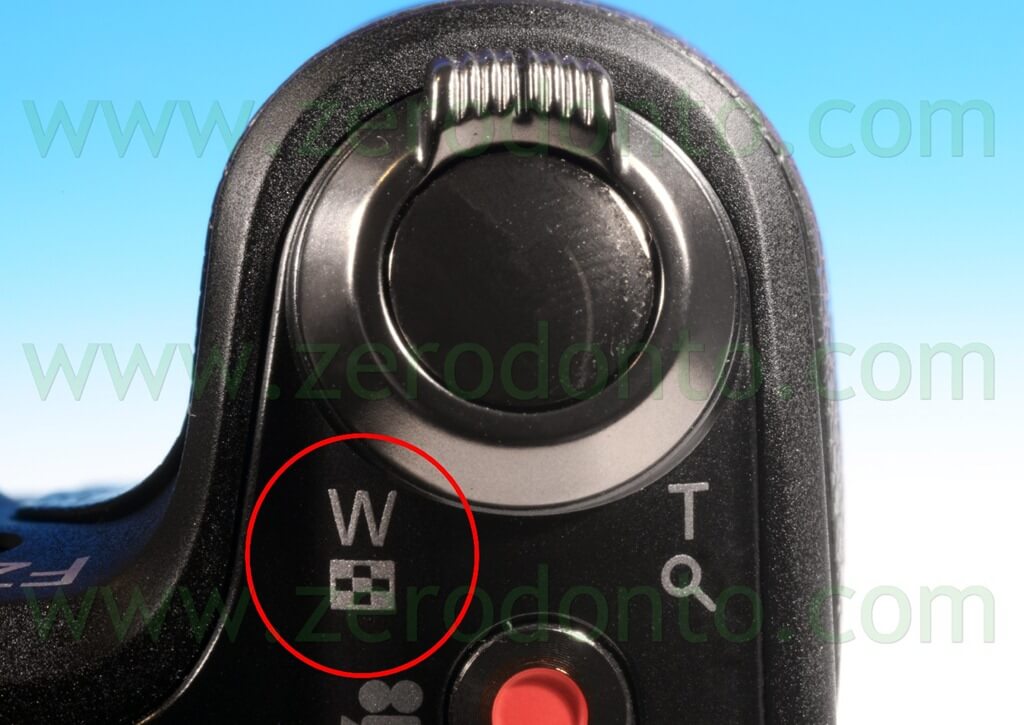
this lens position, in addition to being very close to the subject, always causes a deformed image in the end result, also we will end up with the camera almost in the patient’s mouth. Such a short distance (a few centimeters) does not allow us to take full advantage of the flash light, and if we try to focus while moving away, the flash still creates a strong shadow area on the opposite side of the flash itself, but if we change the lens or use the lens addition we can overcome the obstacle.
For each compact camera we must then find some positions(focal) of the lens for all the types of photos we will shoot, on some cameras some of the magnification is shown with the symbol 2x-3x-4x-5x-etc.
we will take note, on a sheet of paper, of the various positions, such as face 8x, frontal mouth12x, two teeth 15x, etc. Every time we will shoot a picture of the face, just set 8x with the “TeleWide” button, and then we move closer or farther until we almost focus on the subject on the screen of the camera, putting slight pressure on the shutter button the camera will focus automatically and also tells us it is in focus with a “beep” or with a green symbol.
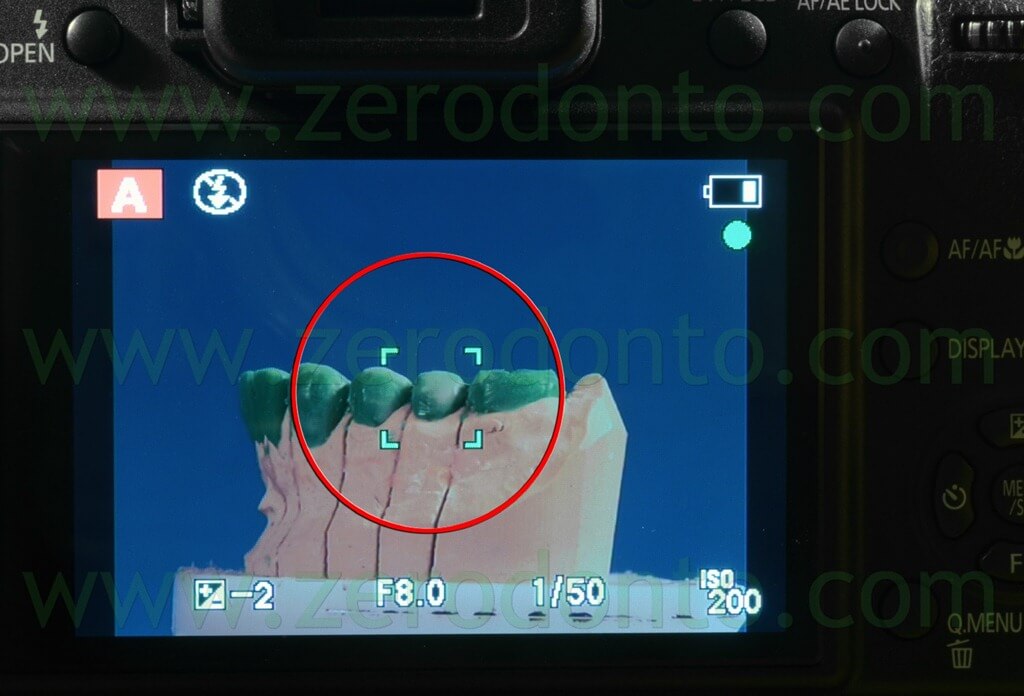
Of course, every compact camera must be tested and set before you start taking pictures, until you are sure to have had enough practice, so to not waste time when with the patient.
“BRIDGE”
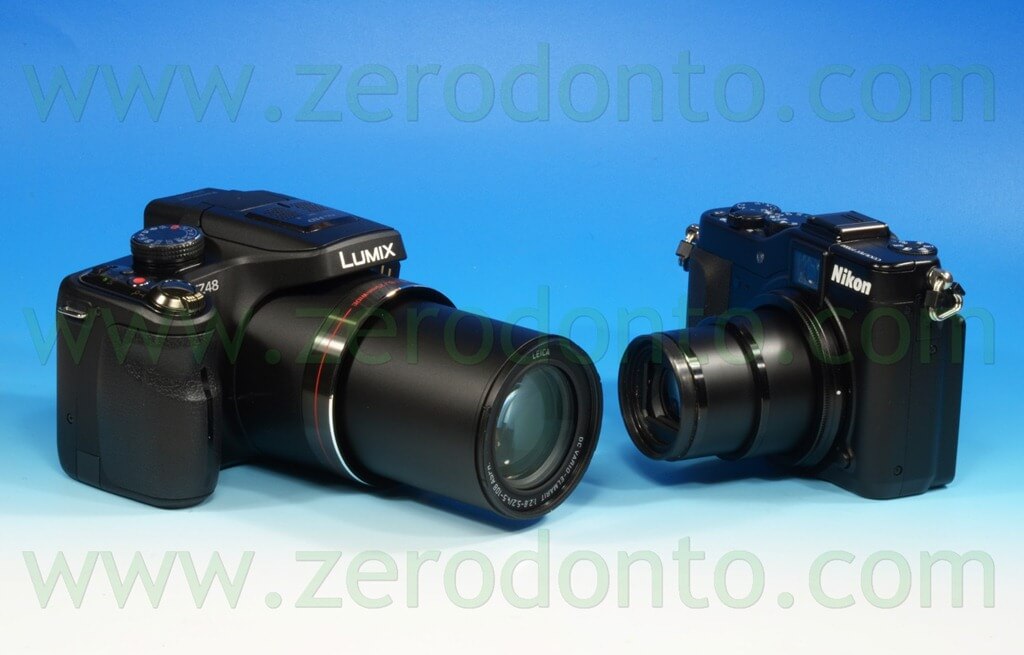
These cameras are larger than the compact cameras,
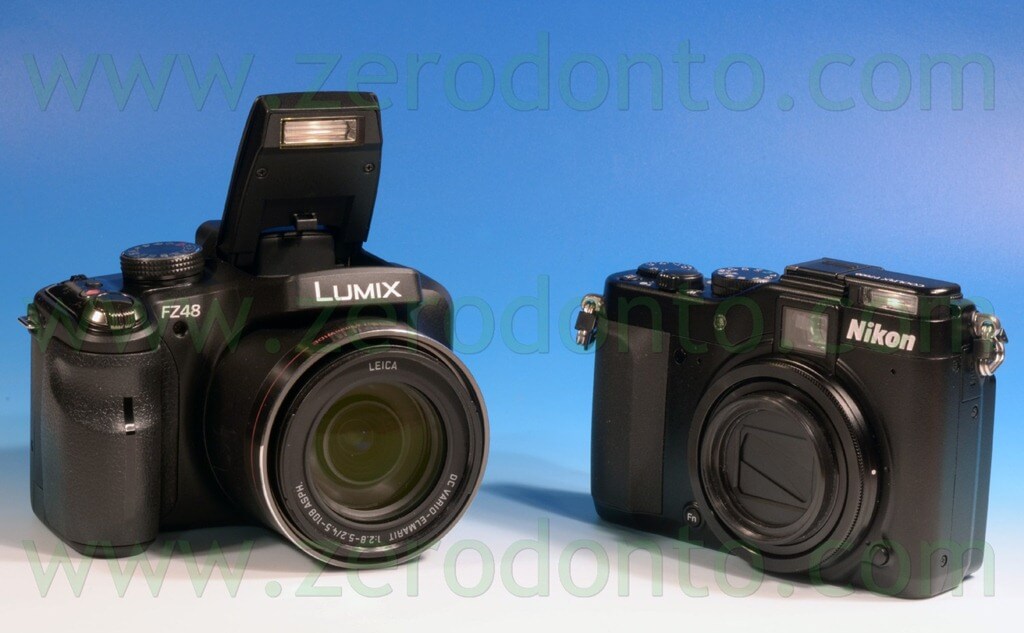
but also have many advantages over the compact. Mainly in the lens size,
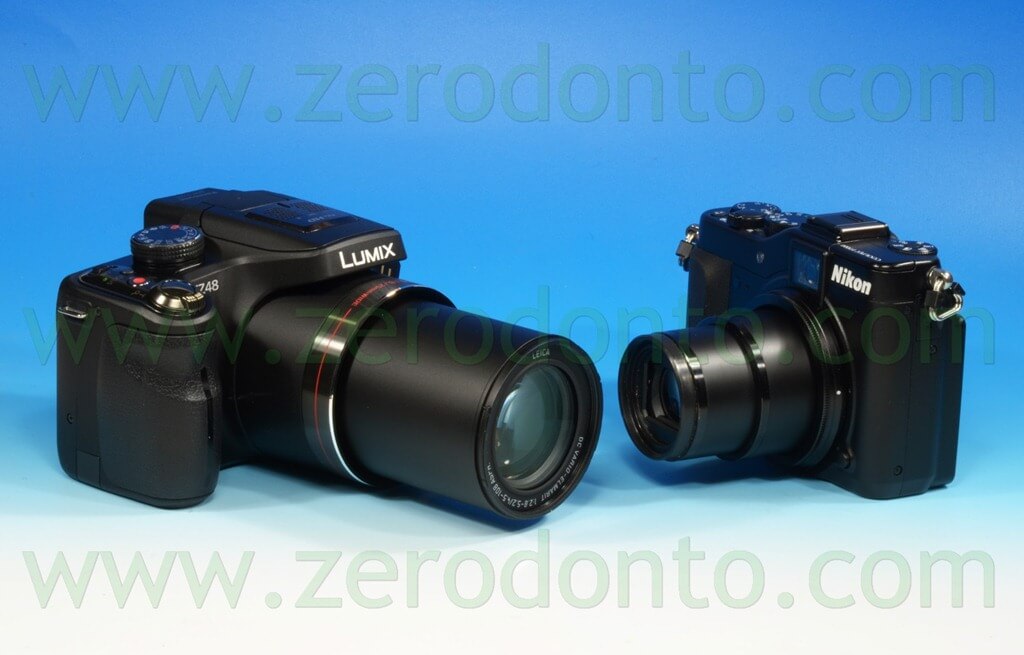
which influences its sharpness. Often the focal lens has a very powerful zoom, this allows us to take pictures further away from the subject and also in almost all the “bridge” cameras the flash is positioned in the center of the camera.

Being able to use higher focal lengths we will never be so close to the subject as with most compacts. The flash is almost always located in the center of the camera, using higher focal length in macro (100mm to 300mm) allows the flash light, as we move away, to fully illuminate the entire frame, only in some profile pictures there may be a bit of shadow in the bottom of the arch but if we make good use of mirrors, in almost all the profile photos, the problem is resolved. Furthermore, all bridge cameras have an ease of use thanks to the conformation of the camera body that is almost always ergonomically shaped,
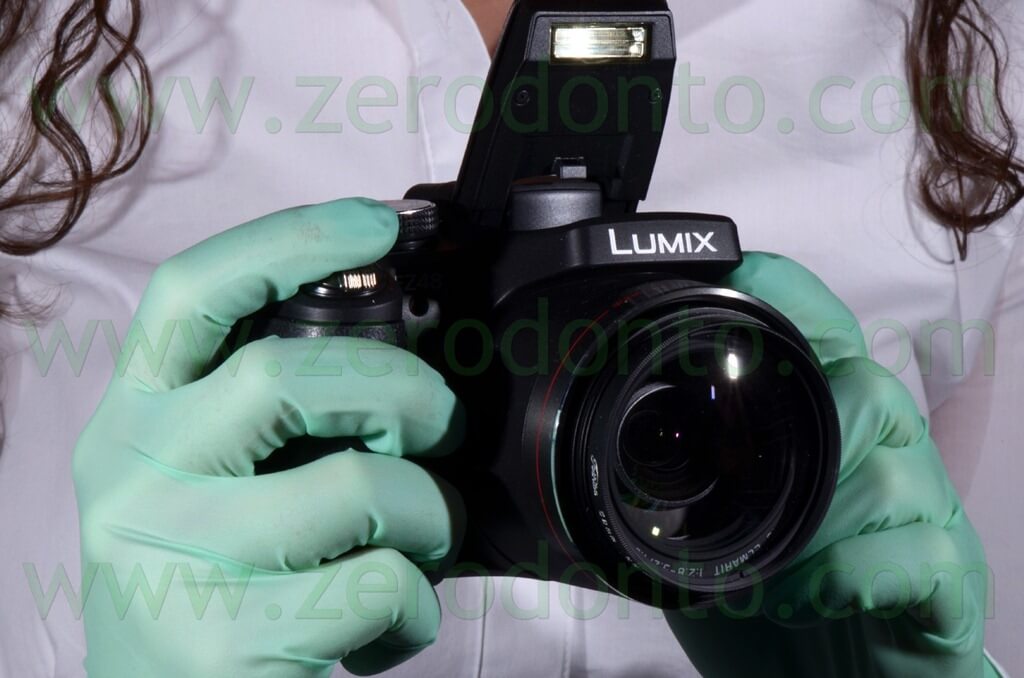
in addition to the often light weight, almost all the “bridge” cameras can be used with only one hand. Settings and menu are identical to the compact as described above.
Aperture-priority,
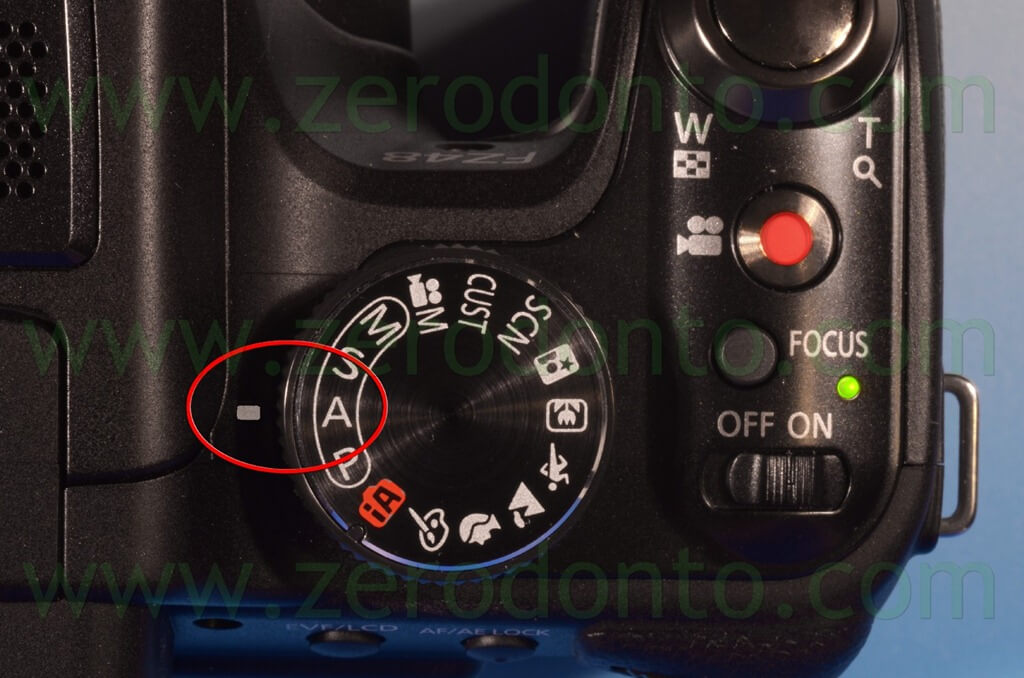
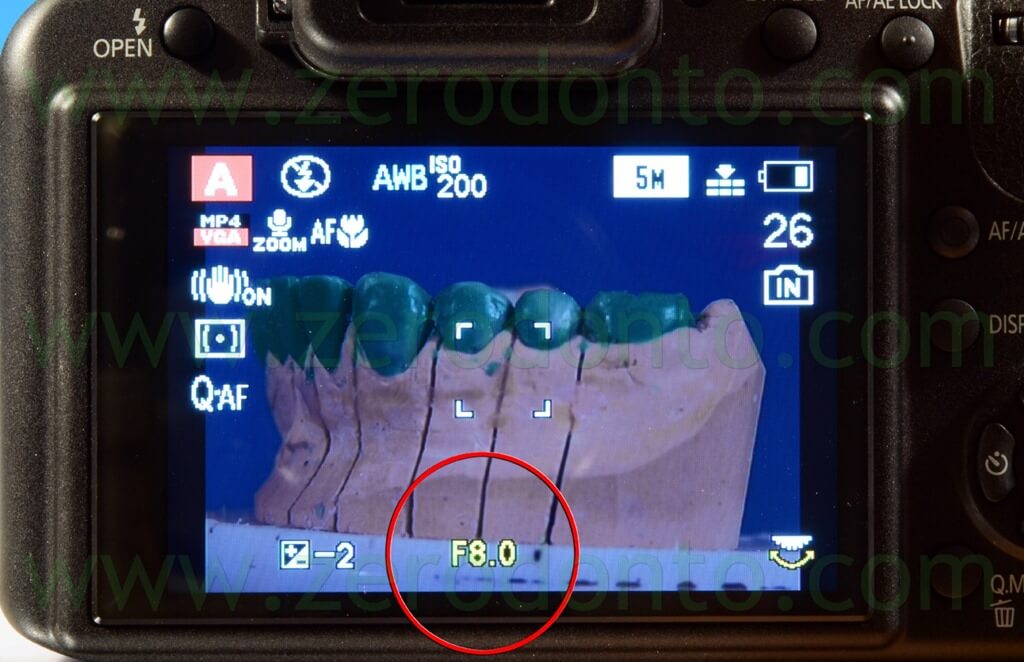
Always set the aperture fully closed,
then set flash white balance, set the forced flash
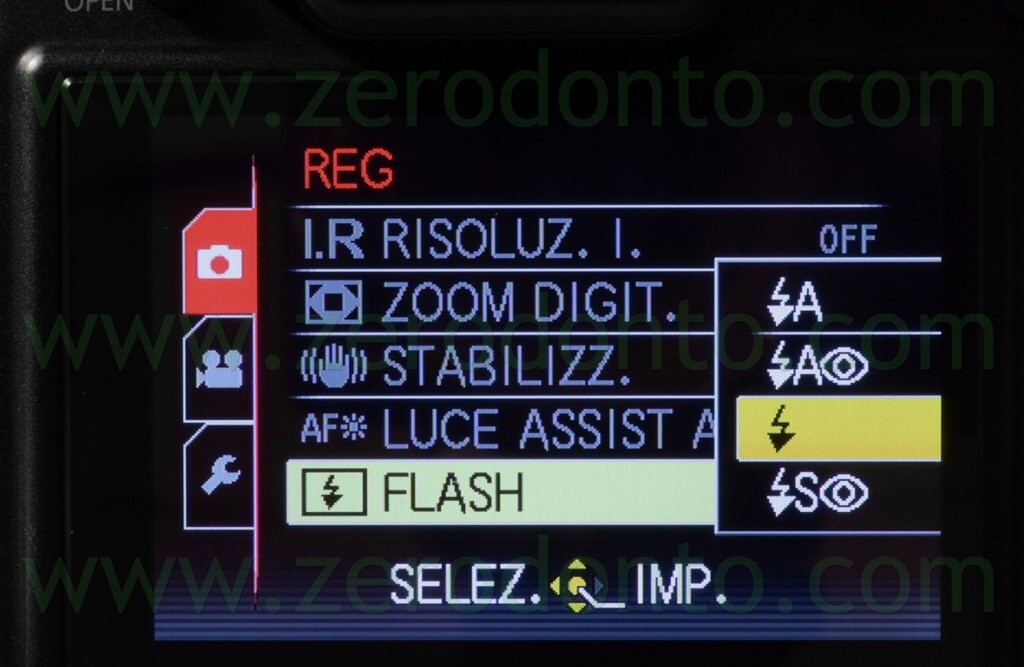
which will always fires in any light condition, but many set it to automatic.
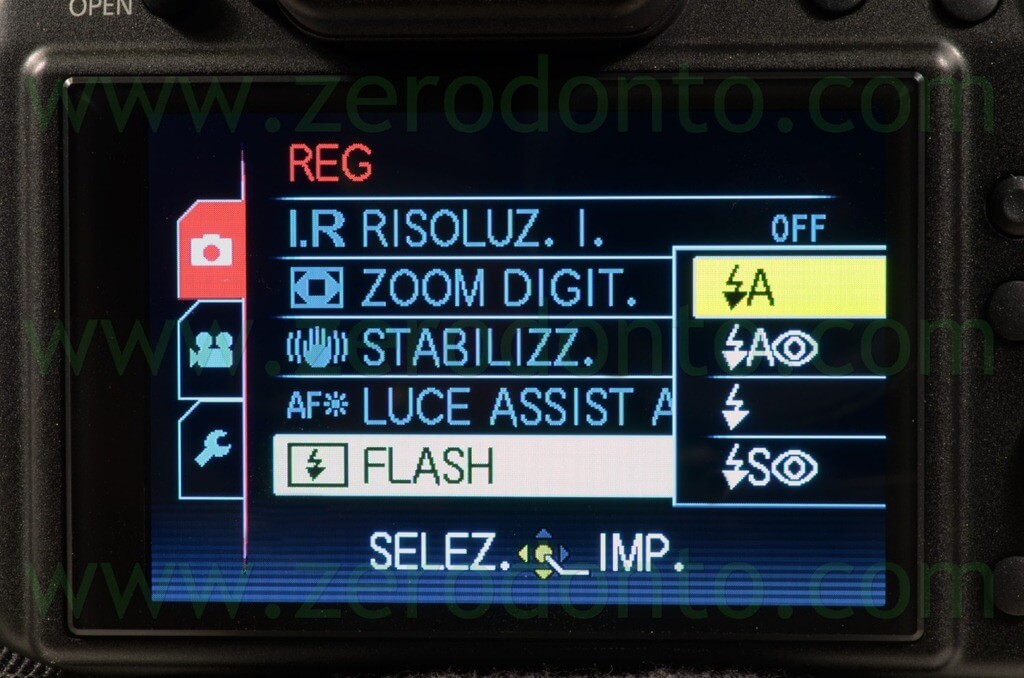
When set this way, the flash fires only when the light is low, with the risk that many pictures will snap without flash and will be blurry.
Many “bridge” cameras allow us to set various types of displays on the screen, if possible the camera should be set on the screen with horizontal and vertical lines, this always facilitates taking straight pictures of the face and mouth.
Among the functions (if available) that may be useful, there is also the possibility to make video recordings, we can do this by setting the camera on the video symbol on the mode dial
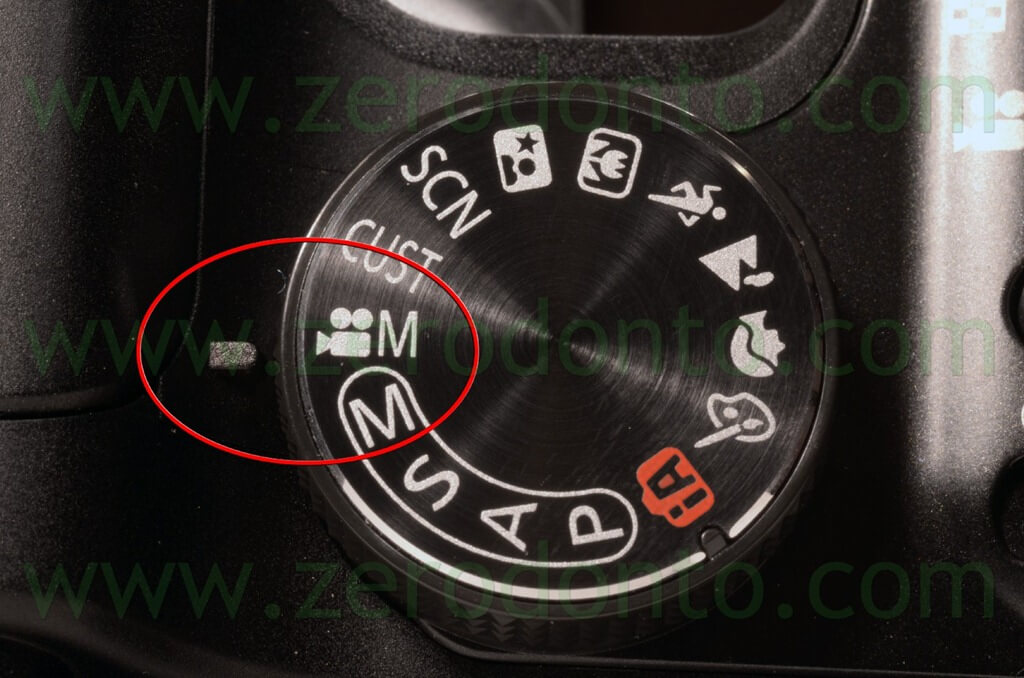
or directly by pressing the shortcut button
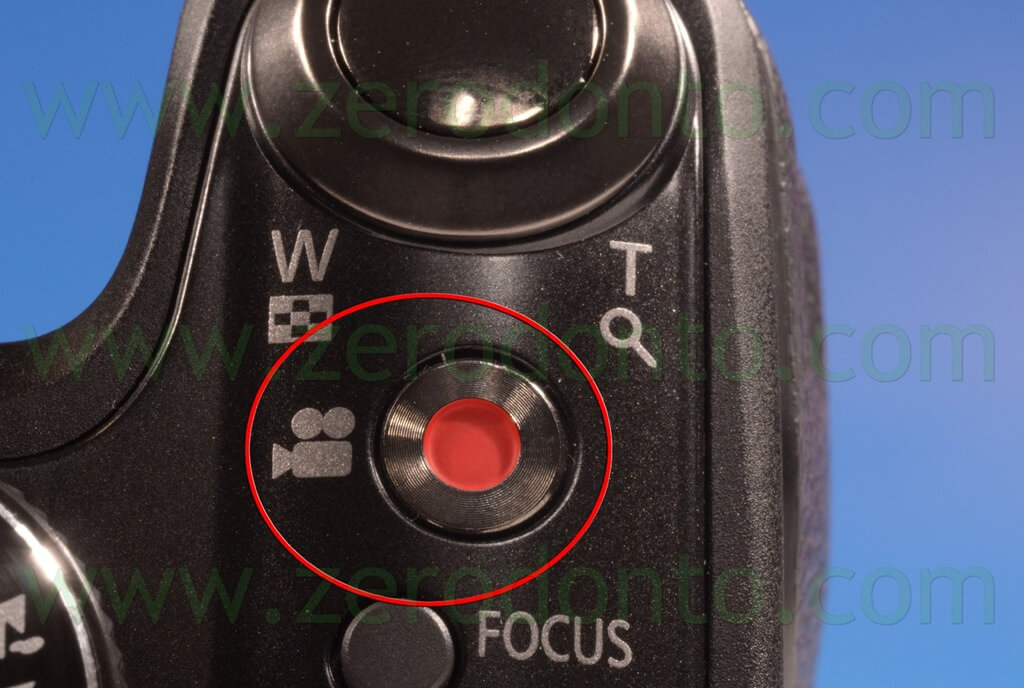
so you can record movies without having to set the dial to the video symbol, but it does this directly from any program that the mode dial is set on.
I suggest you initially record a smile or a particular audio sample of a patient, or any detail that one considers important, which cannot be demonstrated with the static image of the photo, in just a few seconds and we are covered in the event of a dispute with the patient .
DSLRs
DSLRs are preferred among the possible cameras that a dentist office and the dental laboratory must have for health records,
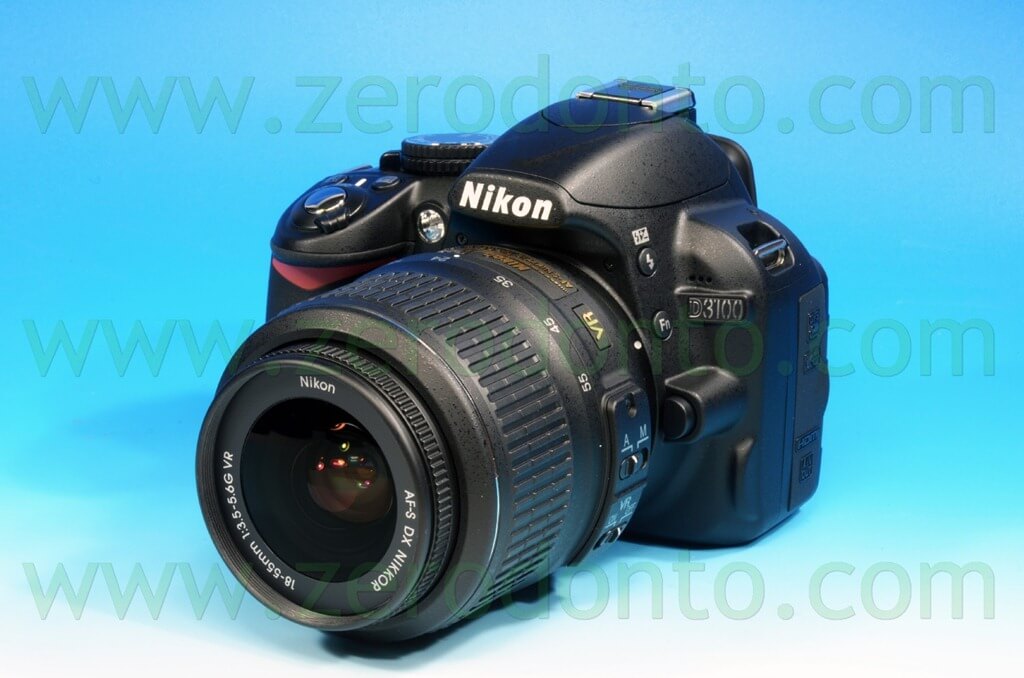
if the choice falls on an DSLR, surely we can get good results.
On a DSLR we can utilize the full range of lenses available in the catalog, but the lenses that are most useful for the doctor and the technician are macro lenses. We will discuss in detail the lenses most commonly used by the doctor and technician.
The ideal focal lengths to use in this case are: from 90mm to 135mm. Every company has a catalog of one or more macro lenses, it is best to choose the focal length closest to 100mm, focal lengths to disregard are 50-60mm or 180-200mm or greater. The focal length recommended is 100mm, and all manufacturers of cameras and universal lenses have a 100mm macro lens in their catalog. For personal choice I will demonstrate using the lens I use for my work, but as I said, there are many brands that produce good lenses.
The macro lens with the camera body and its sensor can determine a different photo from brand to brand, but also from camera to camera of the same brand you decide to choose, my choice and my advice is the result of years of experience in clinical photography, dedicated especially to doctors and dental technicians. Tests upon tests, to make choices based color quality which should reproduce tooth color very closely, not choosing certain cameras I could not achieve the results I want from a digital SLR camera, quality, weight, ease of use and set up, finally, the results of lens sharpness.
To be able to decide which camera, lens and lighting (flash) are the best for the doctors and technicians, one must, like me, have knowledge not only photographic and optical properties, but also of the tooth color, experience accumulated over the years in contact with doctors and technicians of national and international fame.
My photographic experience in this field has been carried out for about 33 years, I will try to communicate and give information to those who want to take either photos for personal documentation, that can defined “good pictures”, or for those who want to get the most of what digital technology currently has to offer.
The choice of DSLR must be made on two fundamental principles.
1. The ability to have a good sensor
2. the weight that should remain fairly low to be able to manage everything from the camera body, flash and macro lens (macro ones weigh more than other lenses), everything must be able to be used by the entire staff, including women.
Some DSLRs are called “professional” due to their characteristics and may also have some extra advantages but, in my opinion, to date there are few advantages for their use in the medical, technician office, but these DSLRs of excessive weight and costs will not be taken into account in these pages.
The maximum weight of a DSLR camera body must not exceed 700-750gr. at most.
The choice of DSLRs is greater today compared to a few years ago, so I would say that we can certainly choose the camera that best suit our needs.
Each brand includes various DSLRs in the catalog from amateur to professional. For documentation without great pretensions we may also use the amateur DSLR, but if we have greater needs I suggest you choose among cameras that border on the professional, and often the costs are similar to the amateur equipment. The advice that I will give will enable you to choose between the various DSLRs without big investments but with excellent results.
Many latest generation DSLRs also have the ability to record video, do not underestimate this possibility, so if the market offers two similar cameras but one of the two can also shoot video and the price difference is minimal, the choice should fall on latter.
The cameras that I will talk about, that I consider optimal, are Nikon, Canon, Pentax, etc. ..
Like I said before the choice of a different brand from the ones that I refer to in these pages is not a wrong choice, so to be fair I will express one basic concept, ” you can get excellent results with any DSLR.”
Of course, the choice of the right reflex allows us to achieve outstanding results, but when used only for computer archiving the difference between a amateur and a professional DSLR is not noticeable. Only with printing, enlargement of the detail on the monitor or projection on screens for a conference the difference is perceptible, the bigger the screen the more you notice the difference.
Currently the cost of the cameras that I recommend are almost within anyone’s reach, we must consider that with the passing of years and the growth in the use of the DSLRs prices have decreased significantly due to the greater amount of production of each camera.
As with computers so with new generation DSLRs offer more possibilities, so the choice must always fall on the latest model reflex with the latest technology at an affordable cost.
The camera I will use has the same characteristics as all the other cameras, therefore, it will be like describing all the cameras included in this segment of the market.
We start with explaining all the buttons you have an DSLR so to understand how to use them. The functioning of DSLR its buttons are very similar for all brands, we might find the buttons and functions in different locations on the camera body, but you just need to read the instructions manual to figure out where to find the buttons that I will illustrate.
Almost all cameras have the mode dial,
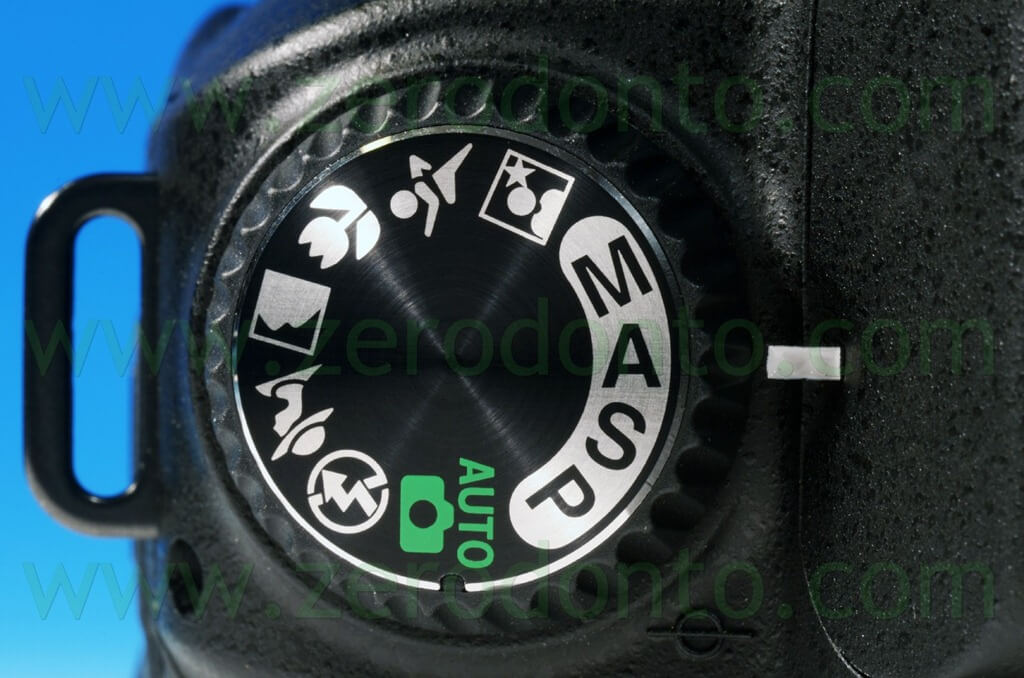
This dial allows us to choose the program we want, the most important programs for all DSLR cameras are the letters A-P-M-S.
On the dial there are often “facilitated” programs (best out of the office), but in this article we will not consider them.
To be brief (I will be more extensive in the future) I will give a brief description of the three programs “S-P-M”. I will discuss “A” in more detail, this program, in our field, interests us the most.
PROGRAM “ P ”
The letter “P” indicates the definition of “Program”.
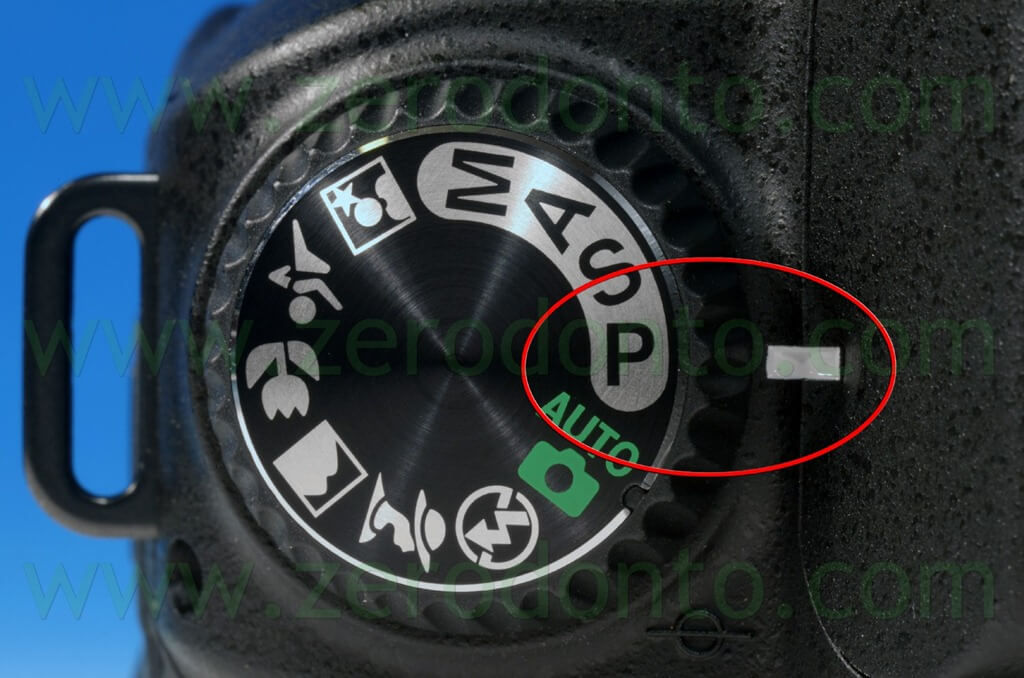
When the camera is set to this letter (program mode) it decides for itself both the shutter speed and right aperture, based on the amount light that we have when we decide to take the picture.
Both the shutter speed and aperture change continuously if there are continuous light changes (sunny day, but with continuous passage of clouds).
A sensor inside the camera is able to measure the amount of light and to establish what the right time and aperture are for the shot.
Normally this function in the medical field is not useful, the camera will never give us a chance to get a good depth of field because this program never chooses (or it is very rare that it will) the smaller aperture for maximum sharpness. On the contrary, however, when we are out of the office, this program will allow us to take great pictures (also by setting the lens in autofocus) and it will be very difficult to make a mistake.
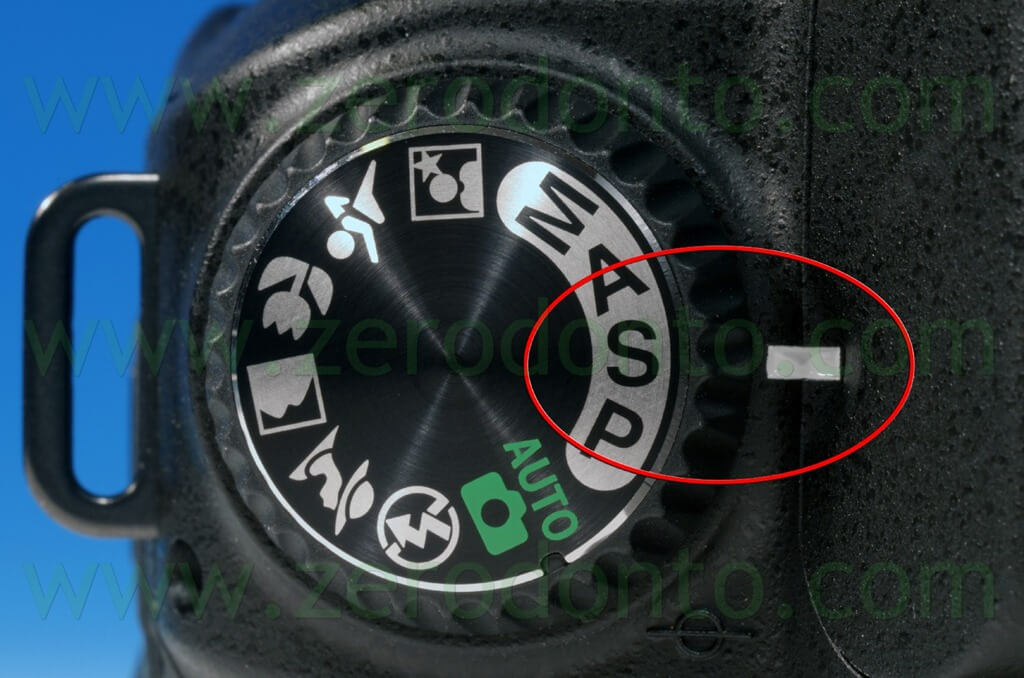
PROGRAM “S”
The letter “S” denotes the program shutter priority mode.
The operator selects the shutter speed and the camera will automatically set the corresponding aperture, but this program is not useful for documentation in the office.
It is useful for sporting events, such as photos of motorcycle racing, racing cars, athletes in any sport with fast movement, etc.
Basically, this program is ideal to avoid blur from camera shake with moving objects. We choose the shutter speed (usually quite fast) with speed greater than 1/500 of a second (the number 1 indicates the seconds and the 500 is the fraction of a second) or faster 1/700, 1/1000, 1/2000, etc. of a second and longer speeds, we can hardly get blurred photos.
For every shutter speed we decide to use, the camera knows how to automatically decide what the ideal aperture is. We, of course, decide the speed according to the speed of the subject that we want to photograph. Example of an athlete running by foot we will choose a fast speed, like 1/500, for racing cars racing at high speed we will choose a speed 1/2000 of a second or higher, this may also vary depending on your position, if the car, motorcycle or athlete, etc. is the front of or to the side of our shot.
PROGRAM “M”
“M” is not a program,
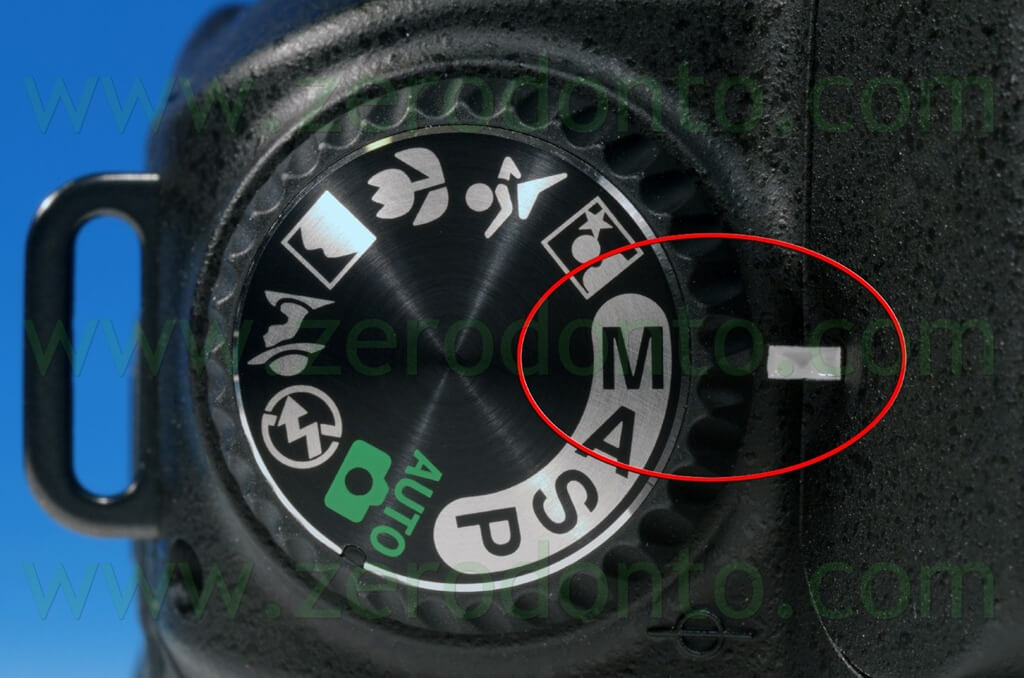
but it is the “MANUAL” mode where the camera allows the operator to choose both the shutter speed and aperture, using the two knurled dials placed on the camera body, one regulates the shutter speed, the other opens and closes the aperture .
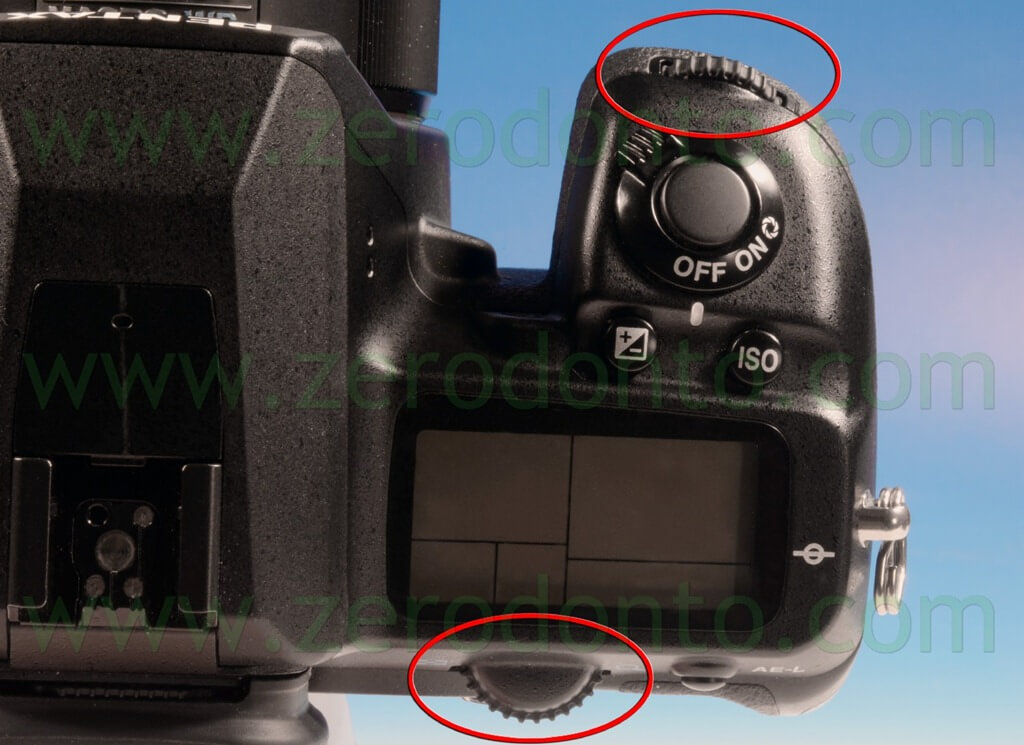
The decision rests with the operator even if the photos do not turn out, and there is no help from the camera.
This program is used by expert photographers, or for those who want to test the camera and change at will shutter speed and aperture.
With all the technologies applied to all amateur and semi-professional cameras, manual positioning is used very rarely, every digital camera has various programs to facilitate its full use in every situation, and every manufacturer decide which programs to access directly from the mode dial.

PROGRAM “A”
“A” indicates the aperture priority mode,
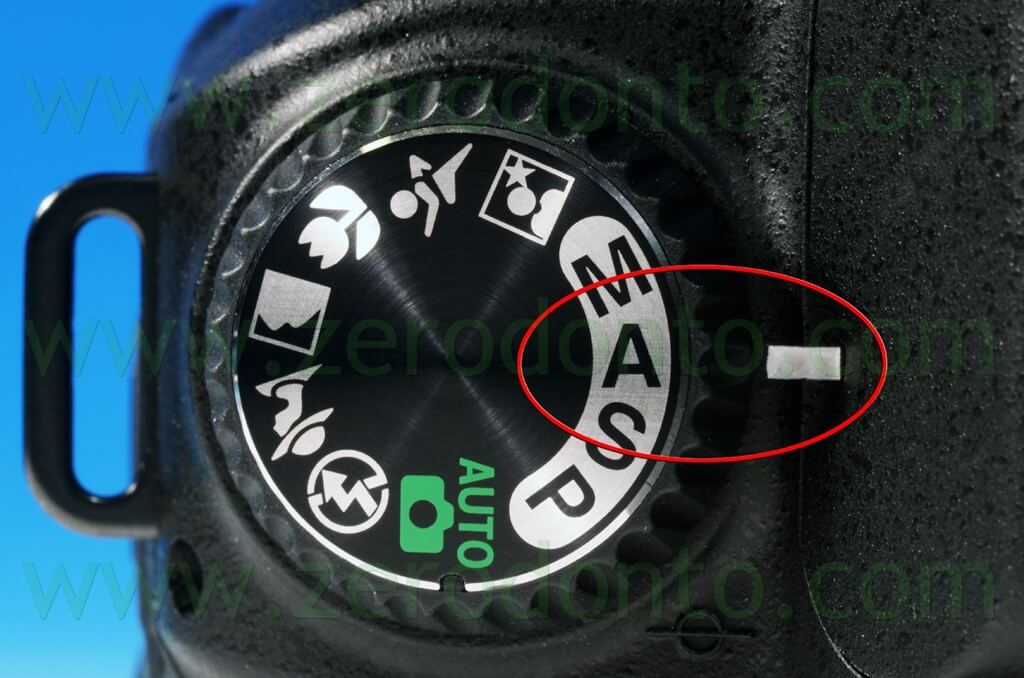
the operator selects an aperture of any kind: f2.8 or f5.6 or f8 etc. and the camera, according to the aperture chosen by us, decides the perfect shutter speed to get good exposure.
However, if we decide to use an aperture like f22 very closed, the machine will definitely choose a longer shutter speed.
This concept, however, does not apply to our needs, because all our photos we use in the smallest apertures possible, for maximum depth of field, macro lenses use small apertures from f32 and some up to F57 like the 105mm Micro Nikkor.
With the smaller aperture e.g. f32 with a hole so small little light passes through,
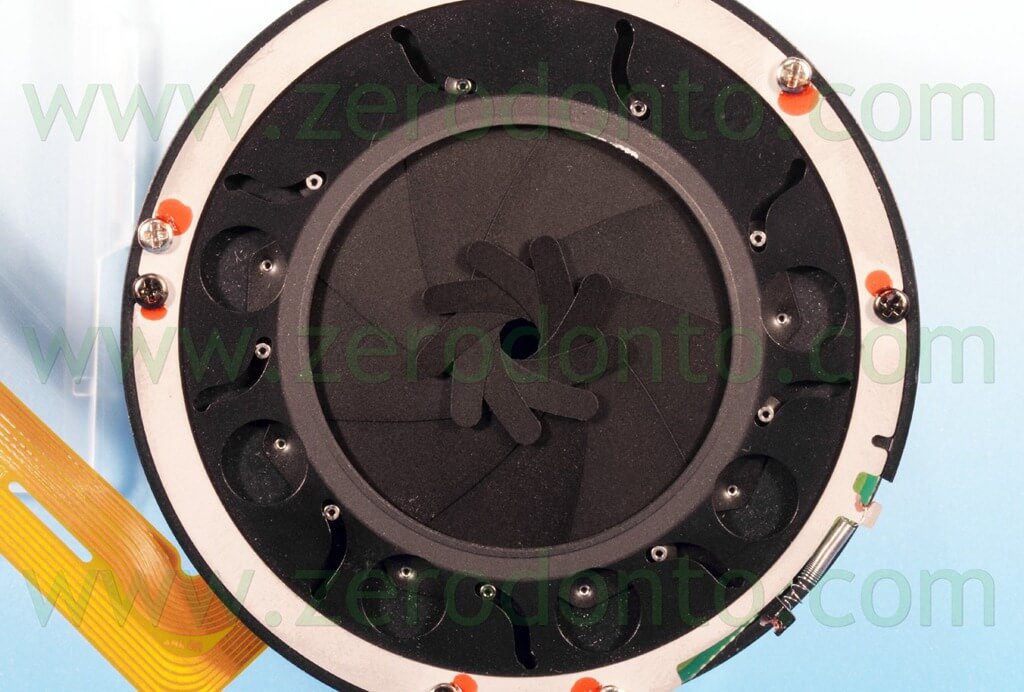
the camera chooses a longer shutter speed in order to properly expose automatically, let us hypothesize two seconds or even longer than two seconds, depends on the light that we have at the moment of the shot, these shutter speeds chosen by the camera, are too long to be used free hand.
In the office we only use incandescent lights, if used without the flash the camera would always choose a longer shutter speed for the oral cavity photos.
To prevent camera shake blur we have to use a light source that allows us to take advantage of the smallest possible aperture (f32 or more). For maximum sharpness shooting must be fast in order to impress the sensor and the photo must be sharp (later I will discuss both the macro lens and depth of field more specifically).
To overcome these problems we must always use the ring flash or twin light flash (see the “flash” section as to which source of lighting is best to use).
Almost all the new generation cameras have an incorporated flash in the upper part of the camera.
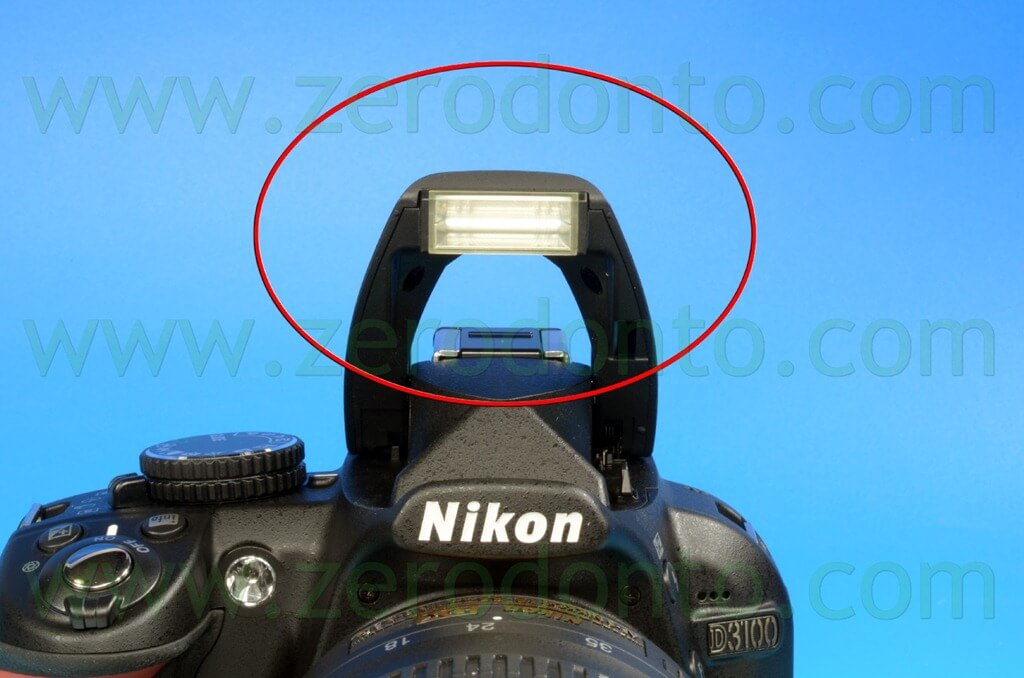
This flash is integrated with the camera, every time we use it, it automatically reads the necessary light it must give off in order to expose properly, this automation is defined as ” TTL flash trigger.”
If we use an external flash, and we always will, we have to choose the types of flash that the camera recognizes and can use in ” TTL trigger”.
Whenever we use or the camera flash or a flash that the camera recognizes in TTL, the flash sync speed (synchronization) is directly chosen by the camera as soon as we raise the flash,
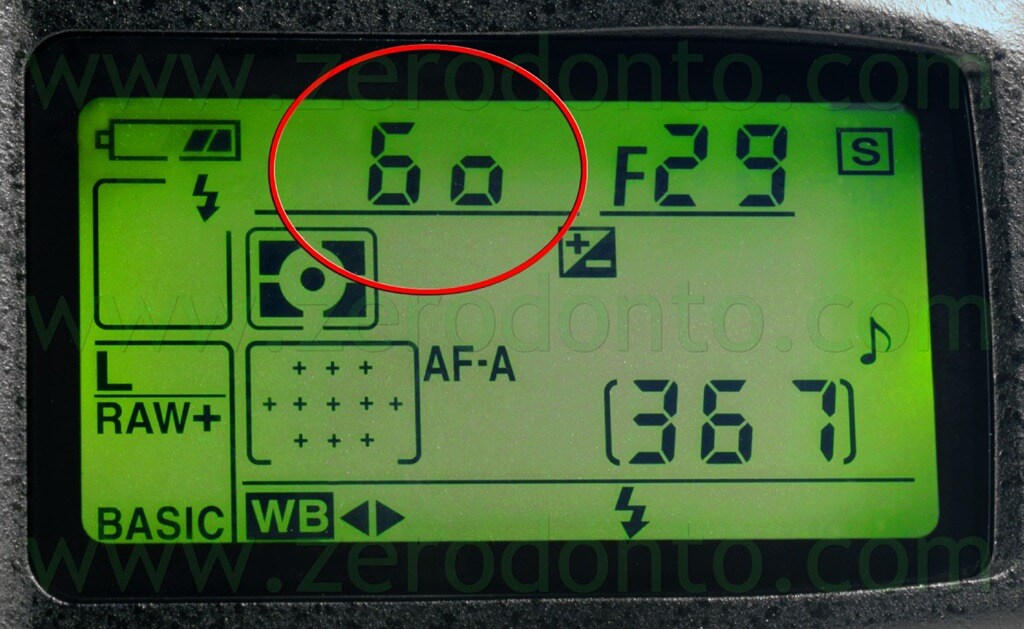
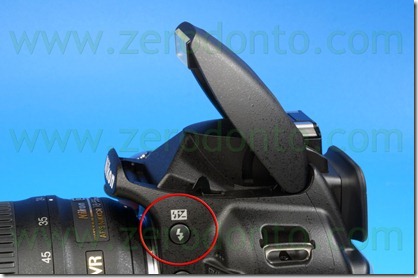
or when we turn on the additional flash (Metz, Nikon, etc.).
Therefore, when using the camera flash or a specific external flash, we will never have the problem of camera shake blur, the flash always provides us with the necessary light and the camera is always able to quantify the right amount of light for each photo that we take.
Of all the camera’s programs the most important for health documentation is “A”.
After choosing the program that is right for medical documentation, we must look at the buttons that are placed on the outside of the camera and that we have to know how to use it at any time.
Looking at the back of the camera at we see the possible functions. Remembering that the buttons vary from one camera to another and from one manufacturer to another, but we put one next to the other we will notice that the buttons are placed in a different order but that the functions are similar. I will first describe the back view and then the front.
BACK
The DSLRs I am going to talk about are among the most commonly used DSLRs, both in the medical and technical, and on most of these cameras, amateur, semi- amateur and professional, the buttons and menus will be almost similar on all models from the same manufacturer, this makes it easier for those who change camera or for those who own different cameras from the same manufacturer, after learning all the functions and buttons of an DSLR, it becomes quick to recognize and use a new camera.
Let us look at the buttons on the left of the screen.
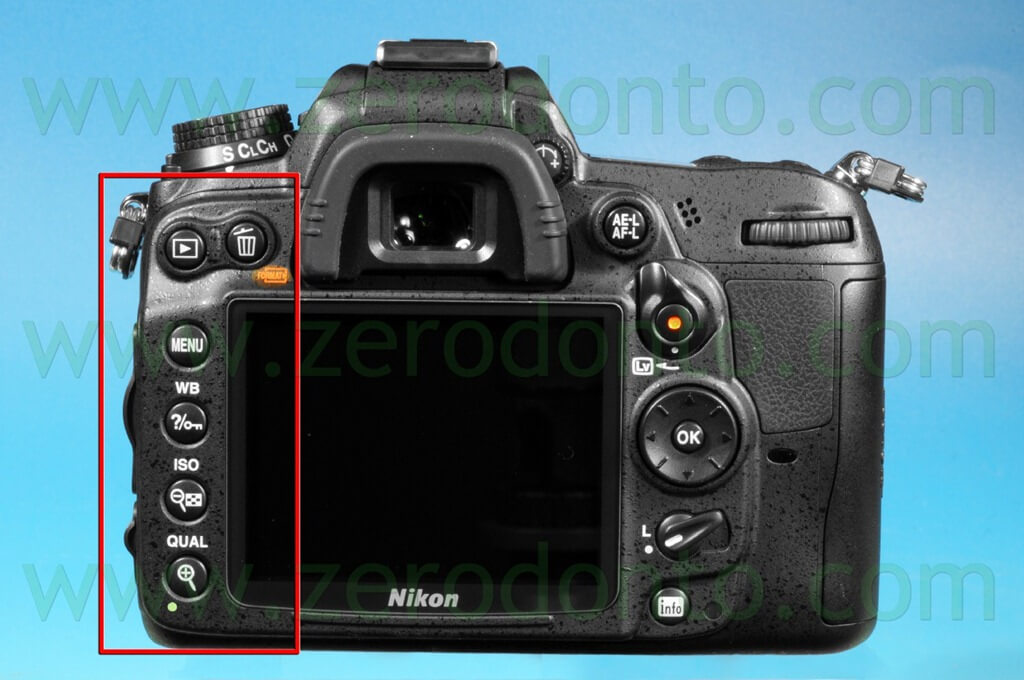
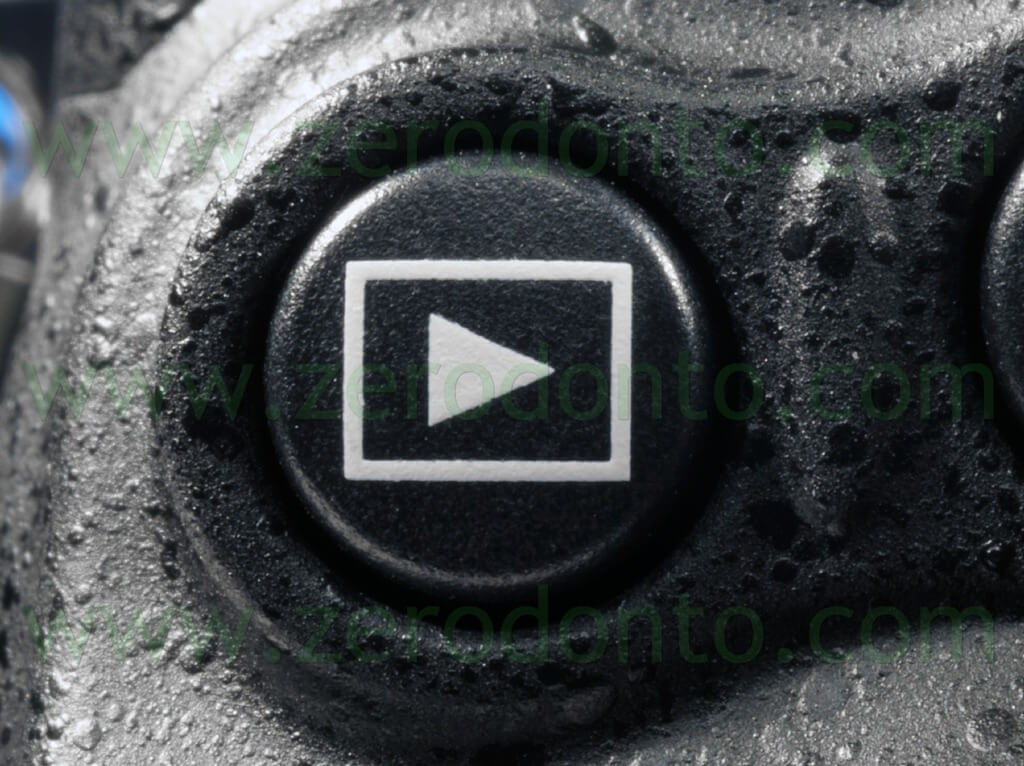
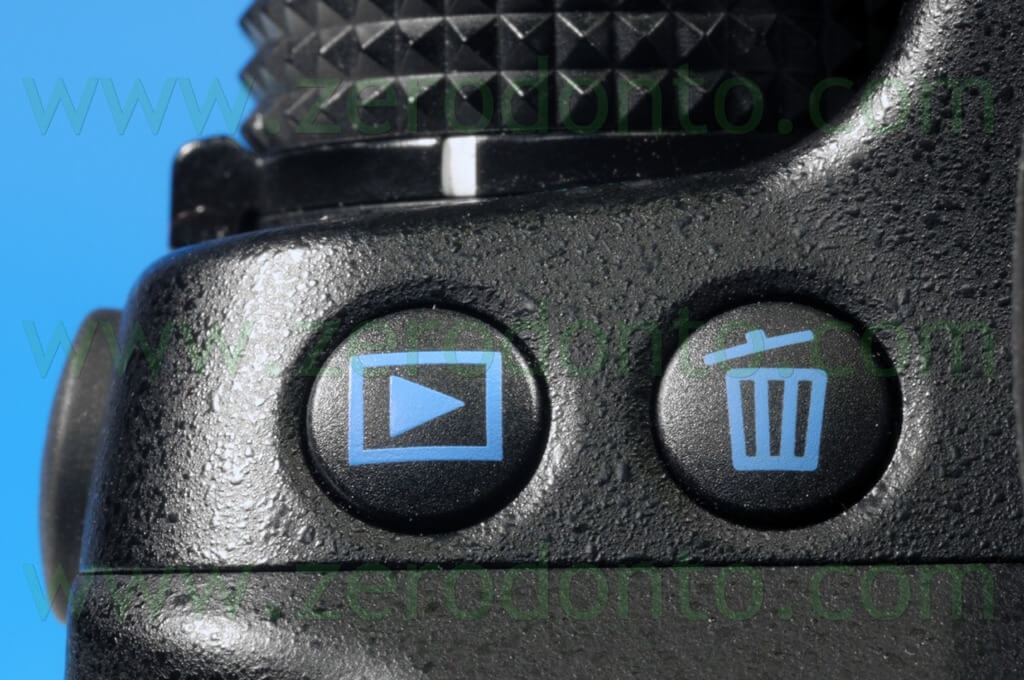
The “Play” button, this button is used to review photos either after taking them or at a later time.
On the side there is the “Erase” button,

after pressing the play button we see the picture taken and if it is not to our liking we simply press the erase button, the screen displays a message that asks for confirmation to erase the photo, just press the erase button again or the “OK” button and the photo will be removed.
The fist button on the left of the screen is the “Menu” button,

by pressing this button we bring up all the internal menu functions on the screen from which we will choose the most important functions we will need to set up the camera (later we will see which and how to set them).
Under the menu button there is a button with a key symbol and a question mark.
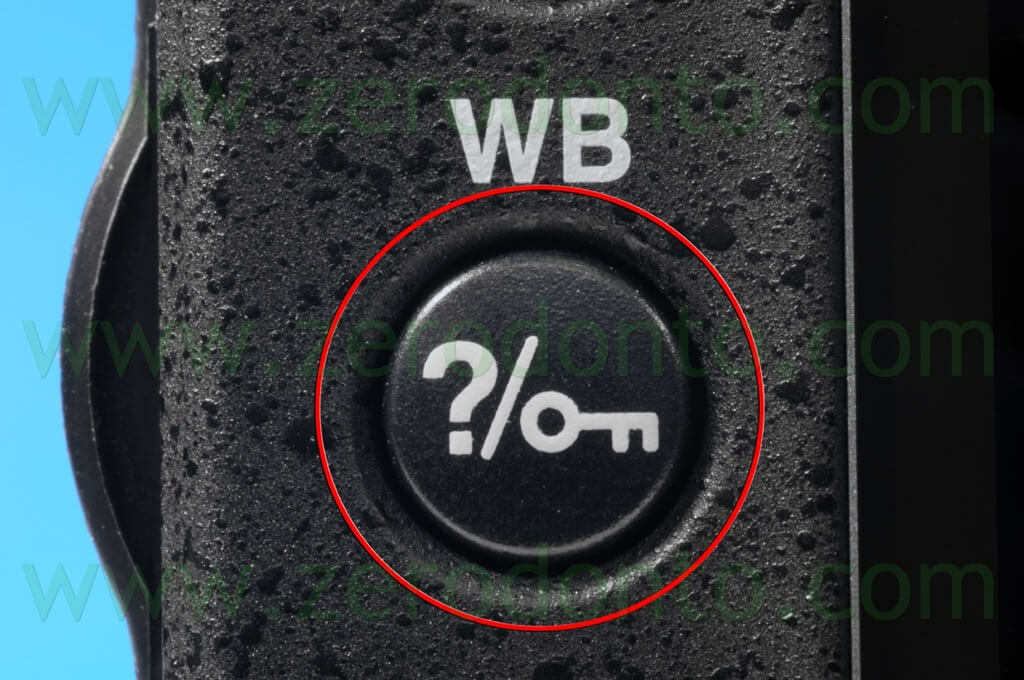
This button has two functions, for example: the first function in question mark button can only be activated if we press “menu” and choose an item from the menu, for example: “White Balance”
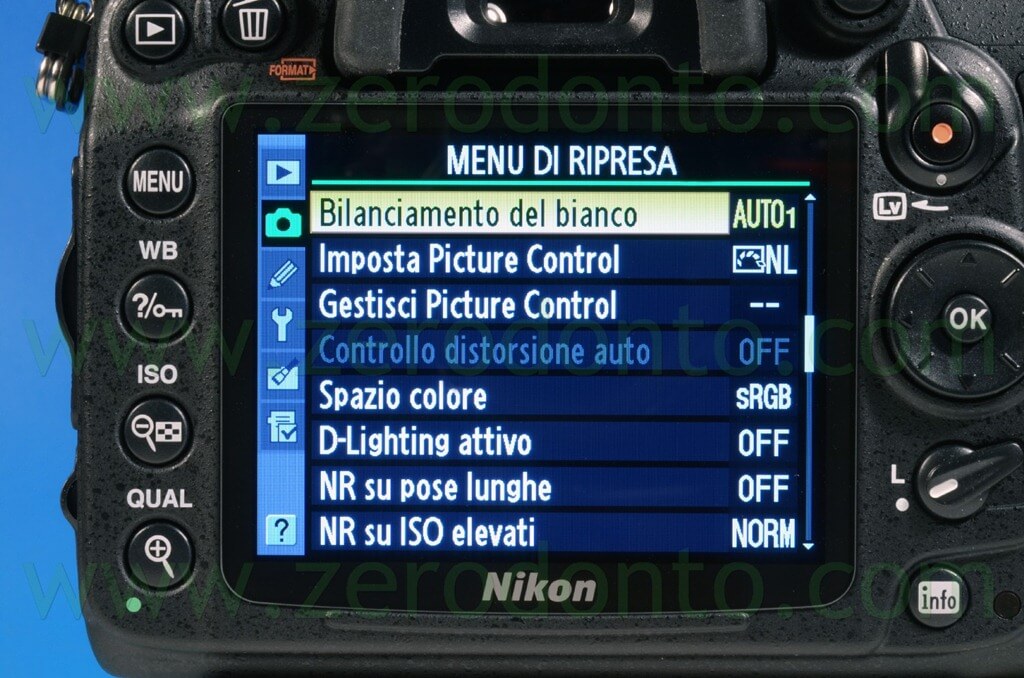
and we decided to select “incandescent light” from the white balance menu,
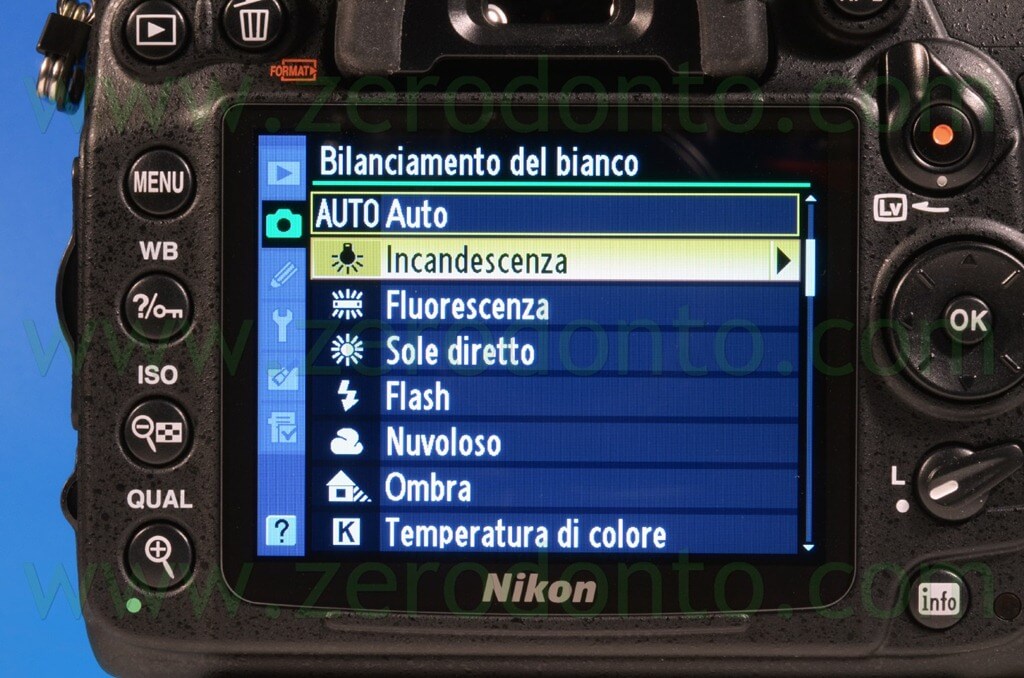
but we do not know what it means or do not remember the term.
Press and hold the button with the question mark to read the definition of “incandescent light” (the camera will give a brief description of the meaning).
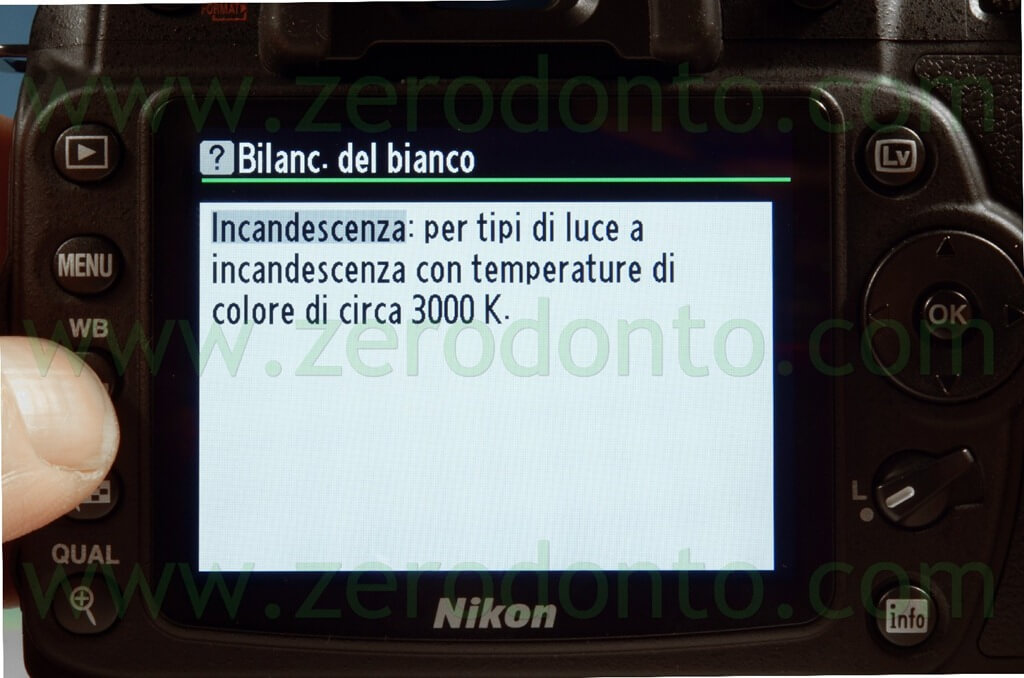
The description that appears to us is short, the reason is that anyone who buys a camera should always read the instruction manual supplied, so it is assumed that the term incandescent has already been widely read about, the camera provides you with a short text as a reminder. In other words, we have a mini-manual built into the camera.
The second function, the “key”, is used to protect the photos you do not want to risk accidentally deleted from the camera. Assuming we work in an office with more than one person using the same equipment.
Someone uses the camera to take a picture and realizes that the camera indicates that the memory card is full, at that moment the person operating the camera cannot download the pictures to the computer, they press play to view the pictures and to decide which ones to delete, they might see two or three similar images, and delete one or two of these, but not knowing why there are two or three shots of the same detail they might delete a photo that cannot be repeated, a photo that for the person who took it, made ??sense to take two or three times.
The only chance we have to not allow anyone to delete the photos that we believe to be unique and to protect the photo after shooting is to view the photo you just took and then pressing the button with the key symbol, a symbol will appear on the top left-hand side of the picture and from this point on no one can erase the protected picture.
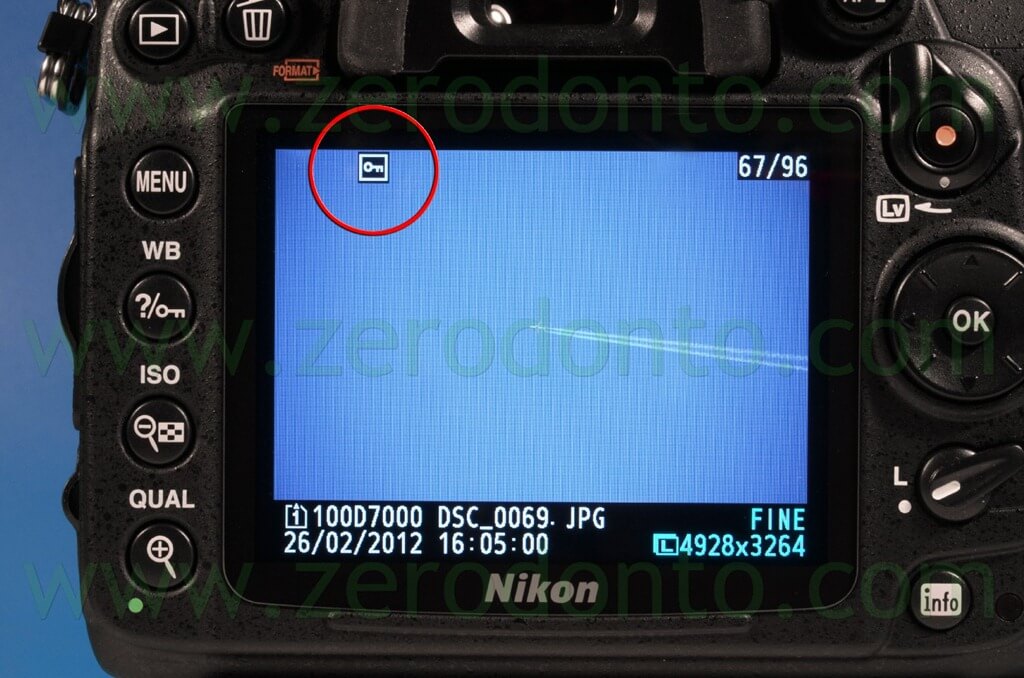
To remove the protection from the photo, just press the button with the key symbol again.
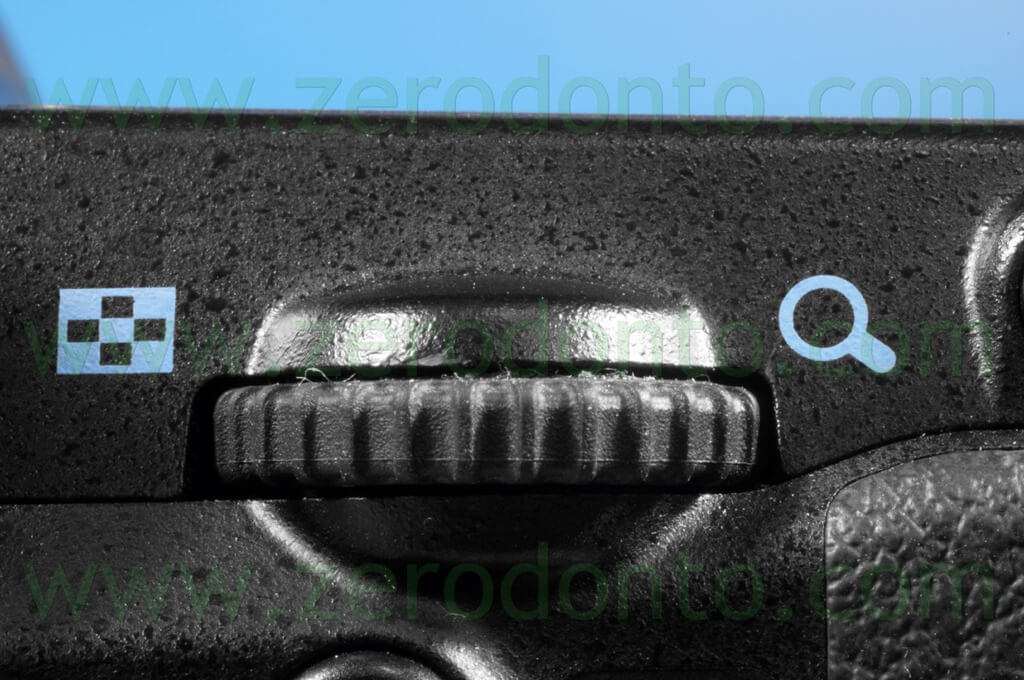
Under the key button there is another button with two functions, the letters ISO and a magnifying glass with a minus sign.
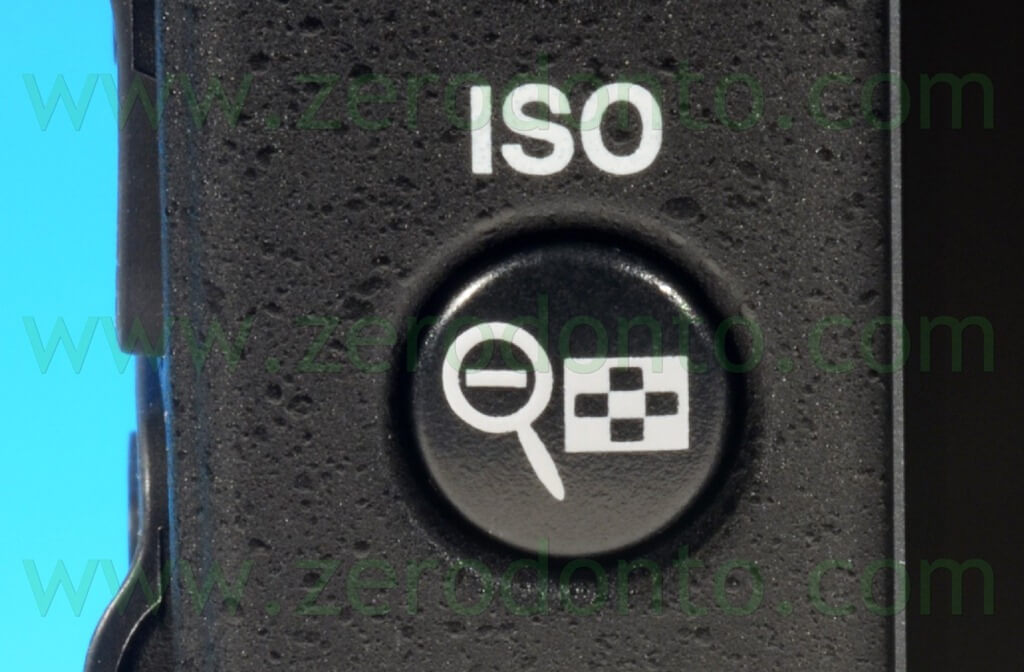
By holding down this button while turning the knurled dial on the upper right of the camera
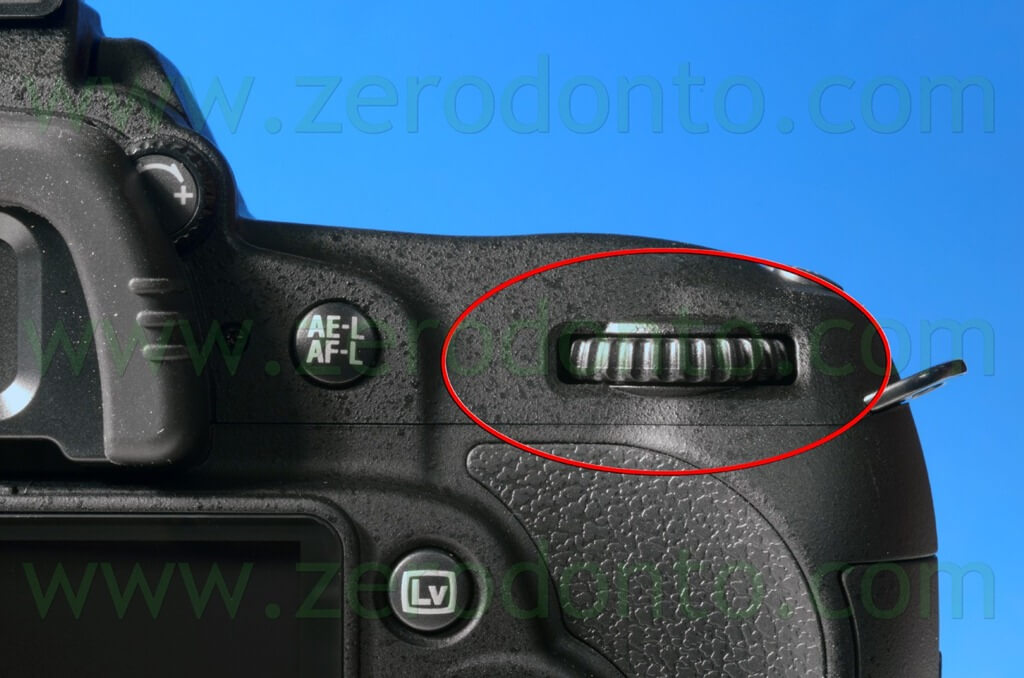
we can change the sensitivity of the camera to light at any time we like and also from picture to picture. Normally, in the office we almost always use a sensitivity of ISO 200.
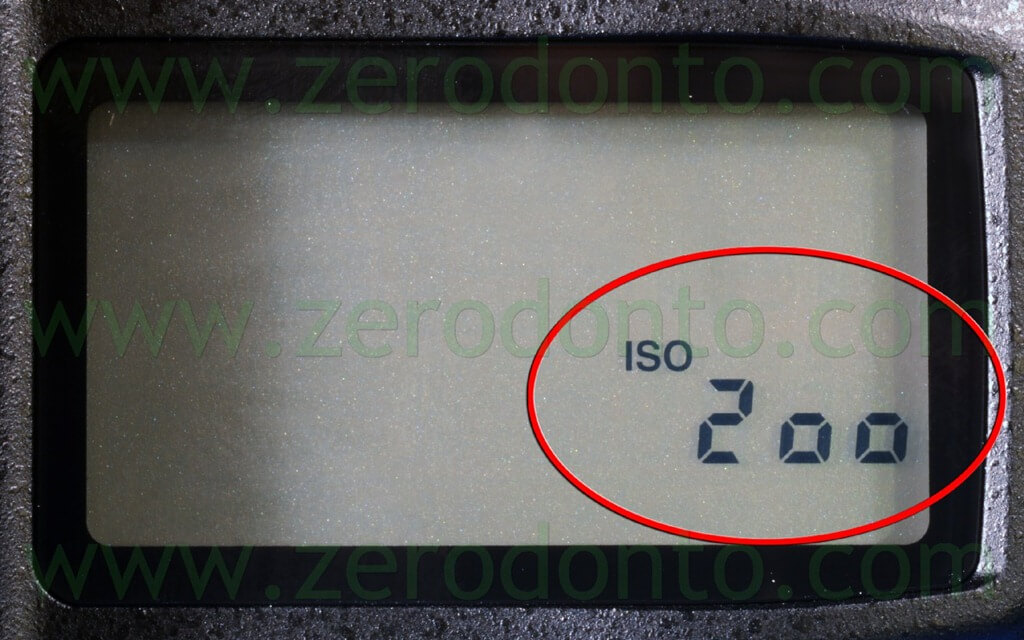
The second function of this button “the magnifying glass minus sign” is used in play mode and allows us to zoom out.
If pressed repeatedly it allows us to view multiple photos together,
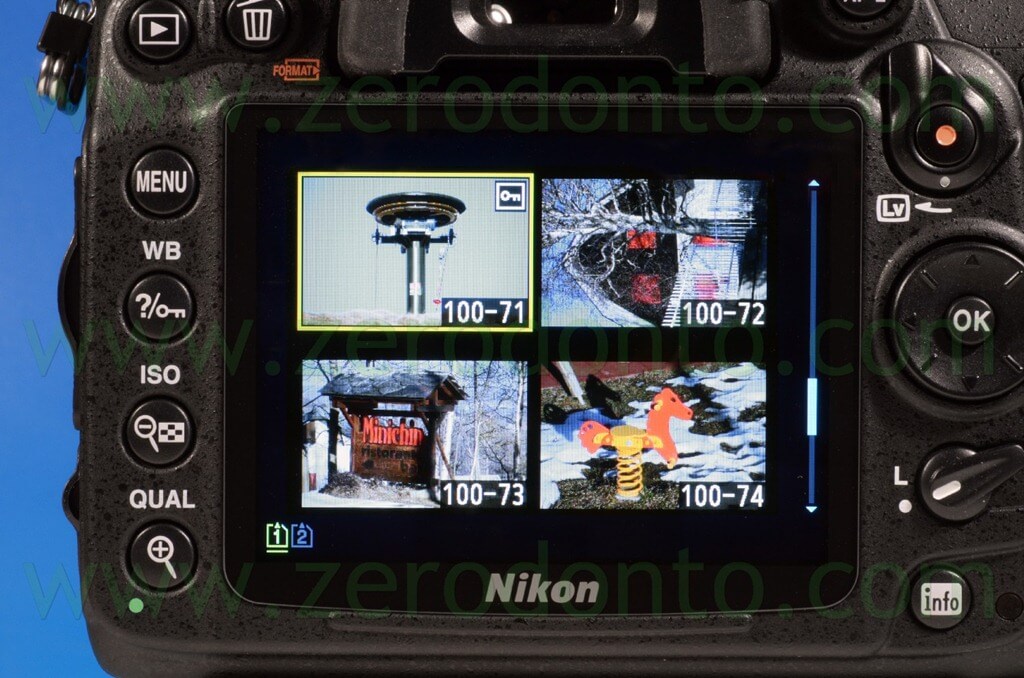
four, or nine, or seventy-two, further zooming out takes us back to the calendar, we can move to an earlier date to view the photos taken a few days before.
The last button on the bottom left also has a double function, the letters “QUAL” and the magnifying glass with the + sign.
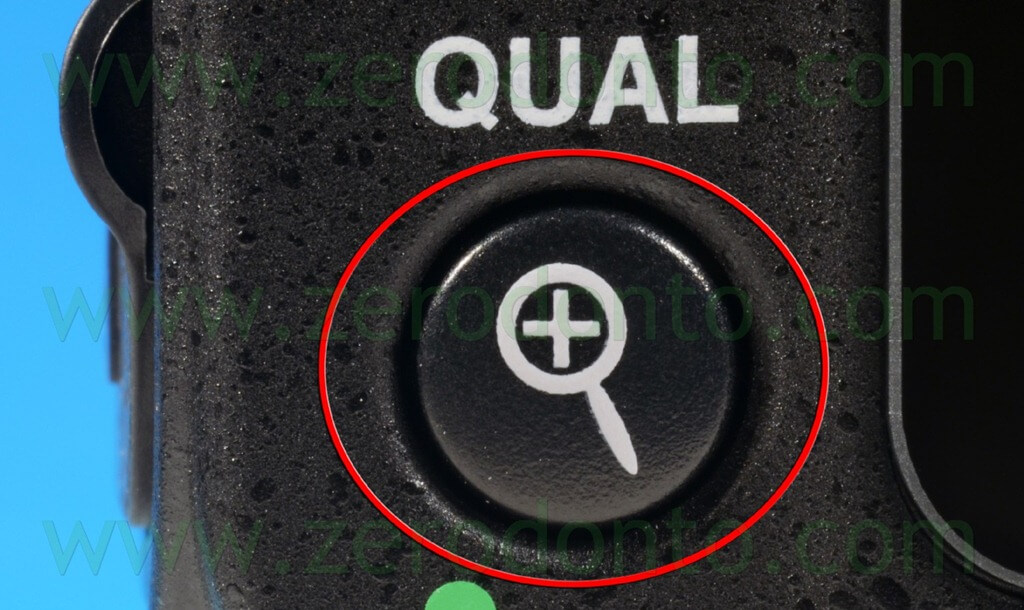
The first function is to change the quality of a photo, or even from one photo to another, we decide. Just hold down the button, simultaneously turn the knurled dial at the top right of the screen, and turning one way or another we increase or diminish the quality, looking at the display we will see the files with the quality options, (format) example: Raw, indicates the full size, or we can use compressed formats like jpeg fine, normal, basic.
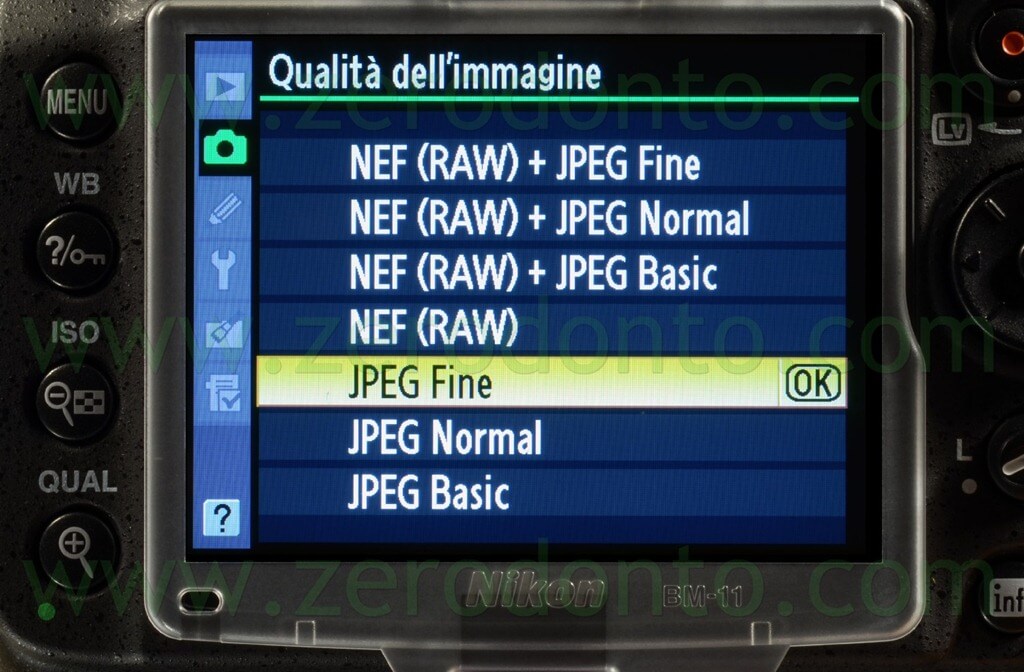
Normally for those who do not need photos for conferences or to print posters, I suggest to set to jpeg fine.
To the right of the screen at the top is the autofocus lock and exposure lock button,
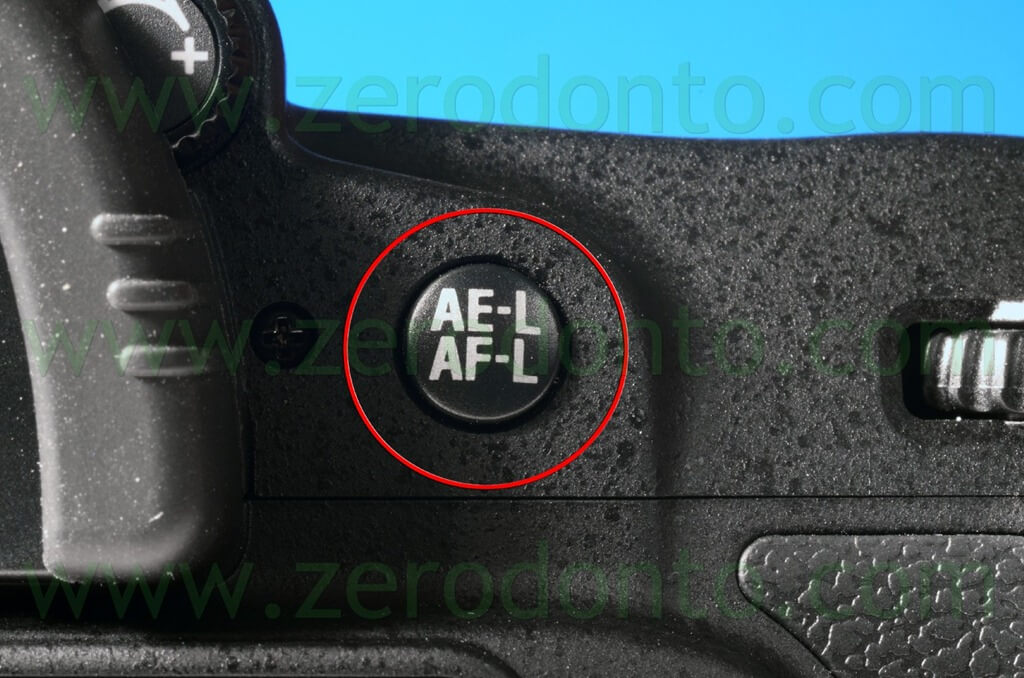
these two buttons are never used in the office, so in this first article will not deal with these functions.
To the right of the screen is the Live -View button (not all cameras have this feature).
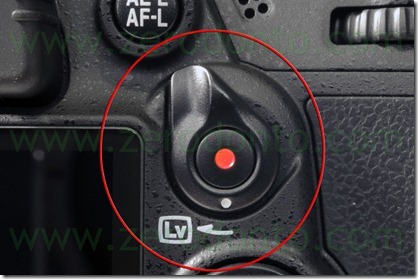
This button allows us to frame the subject from the screen instead of the viewfinder like in every DSLR. As I already mentioned before, almost all new generation DSLRs can also record video, and for those who want to use the camera for recording video it is much more comfortable to use the screen than the viewfinder, especially if we use the camera with the help of the tripod.
Personally, I’m used to focusing using the viewfinder, I find it a little difficult to focus on the screen, not having to camera supported by the face I have a feeling of greater movement, especially in the filming of a single tooth, or even a quadrant.
To the right of the screen is the round “OK” button and the small arrows,
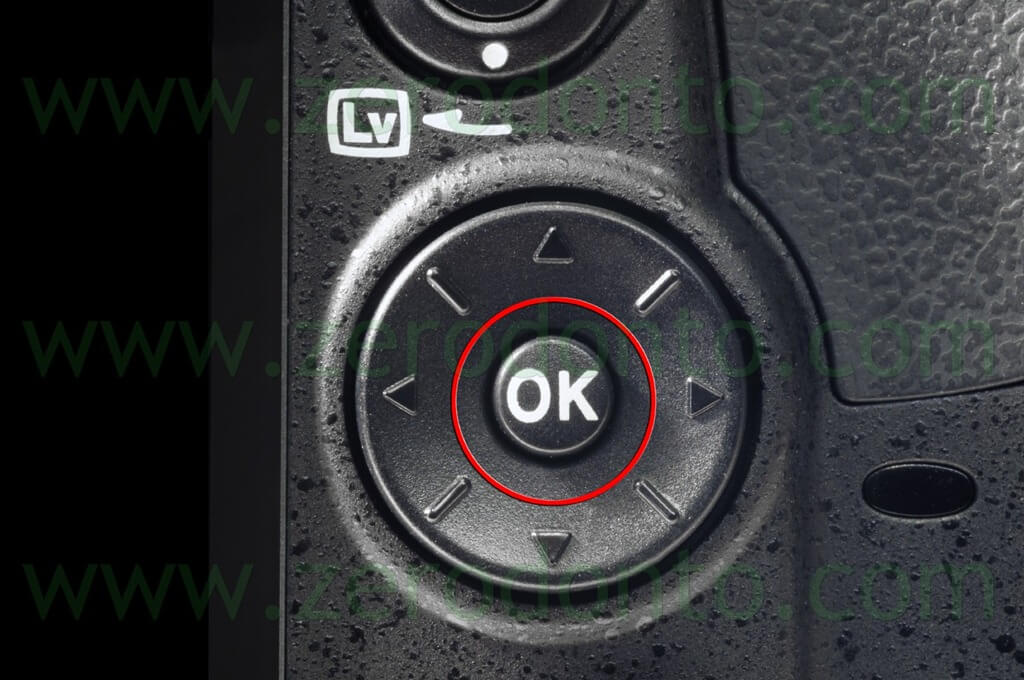
these allow us to move up, down, right, left, in both in the menu functions and when viewing photos.
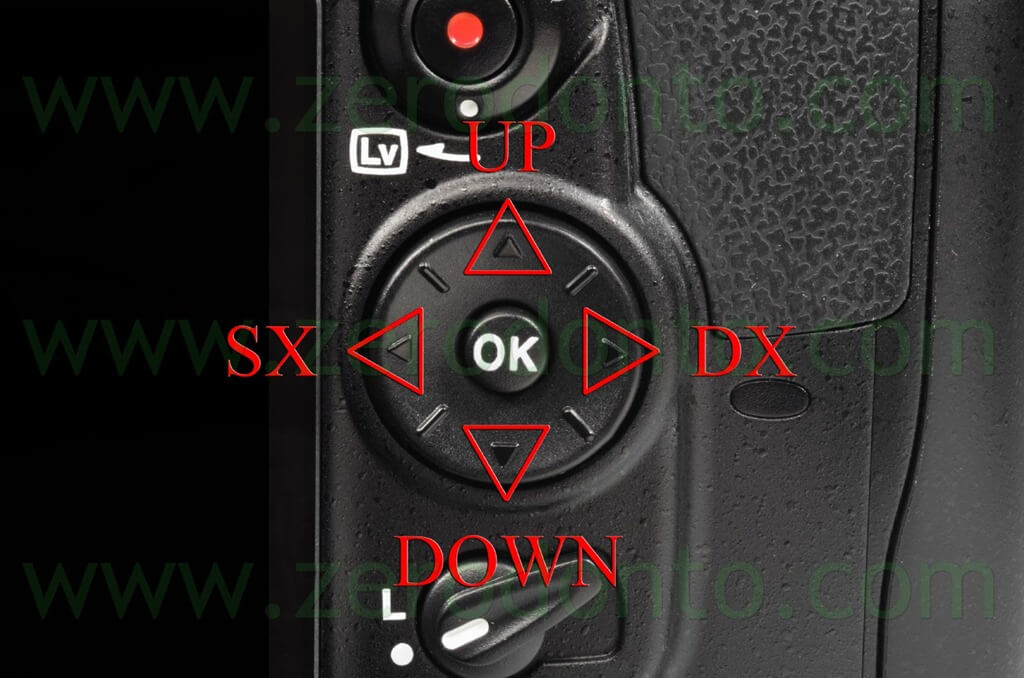
On most new generation cameras we find the info button,
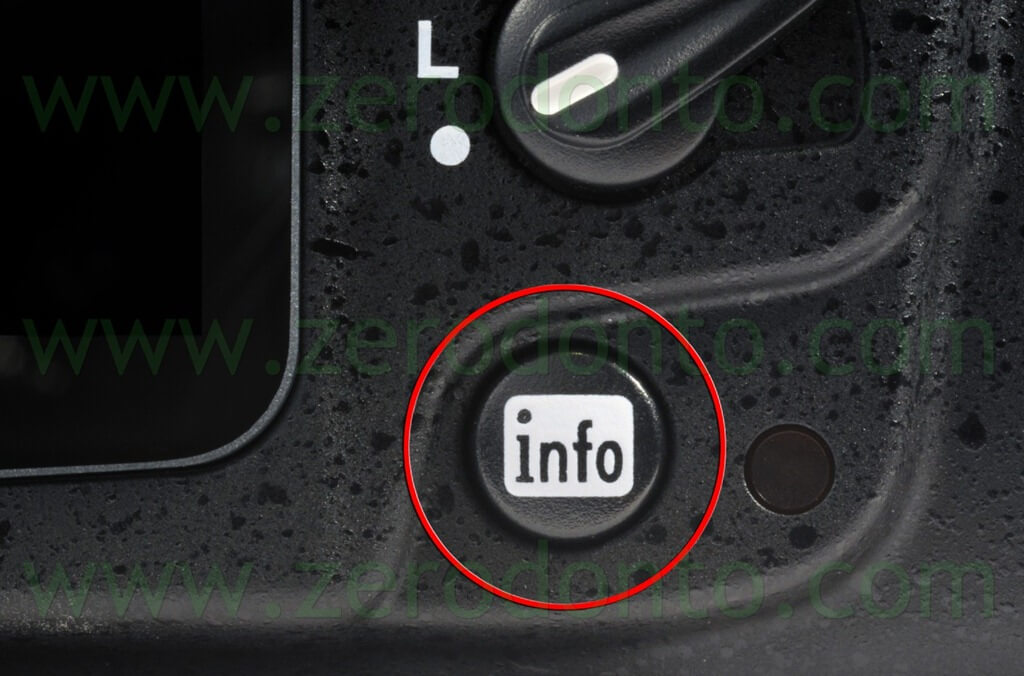
if we press this button all the settings set by us appear on the screen, if we press it again it illuminates the screen and by moving with the arrow button we can move to the setting that we want to change without having to go through the main menu.

The last button we find on the back of all DSLRs is the diopter dial.
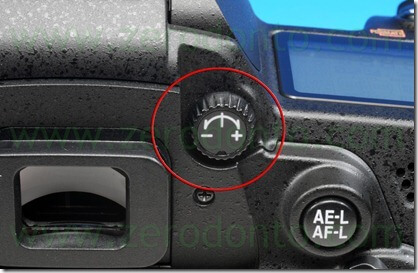
This dial allows us to see clearly when we focus, it is often underestimated by the buyer, however in clinical photography it must always be adjusted before using the camera.
If we use the camera on auto focus we do not necessarily need to use the diopter dial, even if we think we see in sharp focus the camera will adjust automatically to perfect focus when shooting, but in clinical photography, all the pictures are taken with the manual focus, so we decide if we have the right focus on the subject.
In order correctly adjust the diopter dial bring the lens to minimum focus distance, get close to any object on our desk, the best thing would be a black and white newspaper, and then moving the diopter dial right or left, we will find a point on the dial where we see the object in better focus, that is the position in which the dial must remain.
The dial can go from a -2 to +2 diopter, for people who have problems with a higher or lower diopter may have to use dioptric adjustment lenses which are often found as an accessory in the DSLR catalogs, or you need to contact an optician to get a lens that is right for our diopter, the problem may arise in an office where there are more people, with different eyesight problems, who use the same camera.
To overcome this problem, each operator should have their own eyepiece as an accessory and whenever using the camera it should be fit on the viewfinder to avoid having to make adjustments every time one uses the camera.
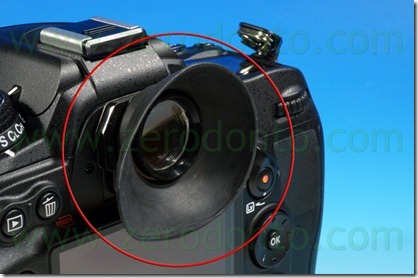
RIGHT AND LEFT SIDE OF THE CAMERA
Each manufacturer adds a slot for the memory card and some cameras have a double memory card slot
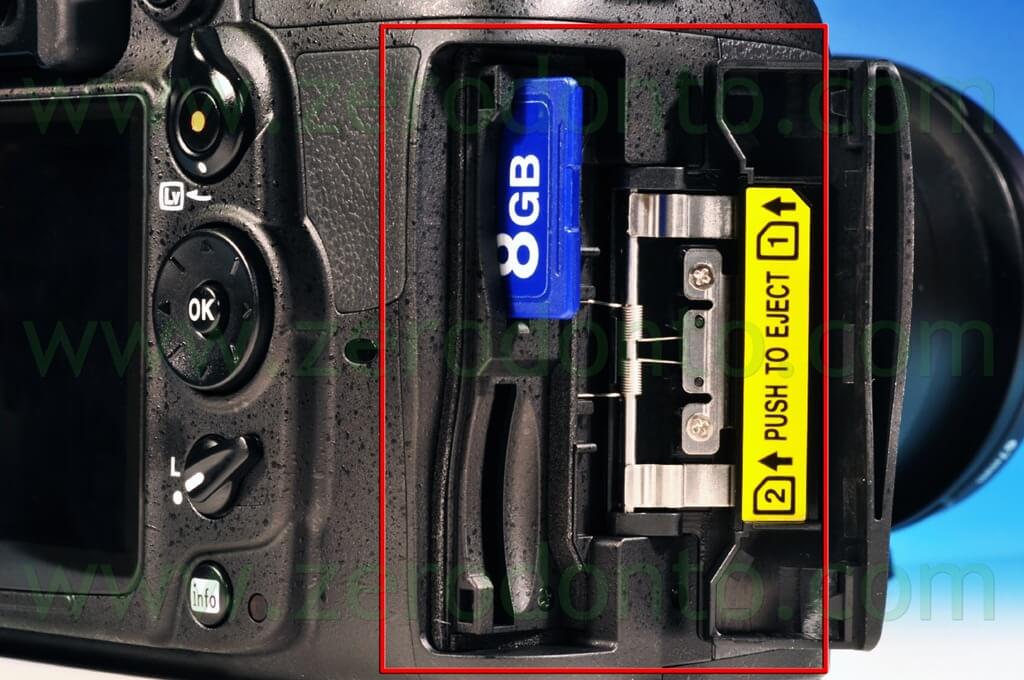
The advantage of the double slot is to be able to immediately back-up photos taken, having two cards with the same picture we can give one card to our technician or give one card immediately to the assistant to download the photos instantly on your computer, but our camera still has another memory card so we can continue shooting(you can read more in memory card section).
There is also the possibility, via Wi-Fi card, to download photos directly to our computer as they are taken. The other possibility of a double slot is to use one of the memory cards for video and the other only for images.
On the opposite left-hand side we find one or more ports for the various cable connections, charger cable, USB, HDMI, etc.
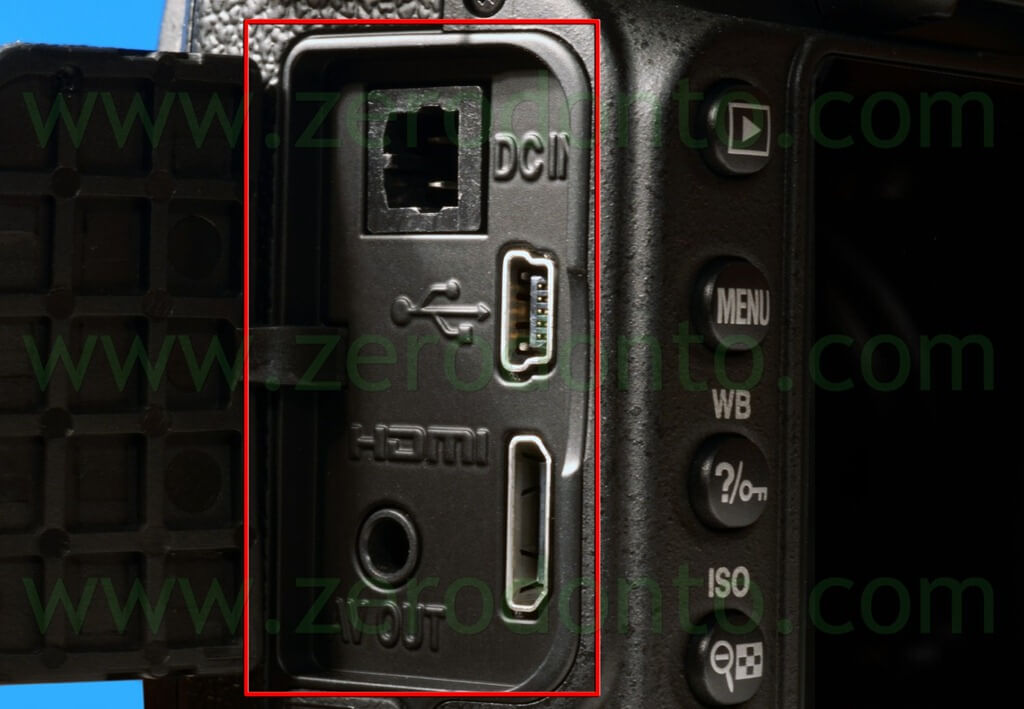
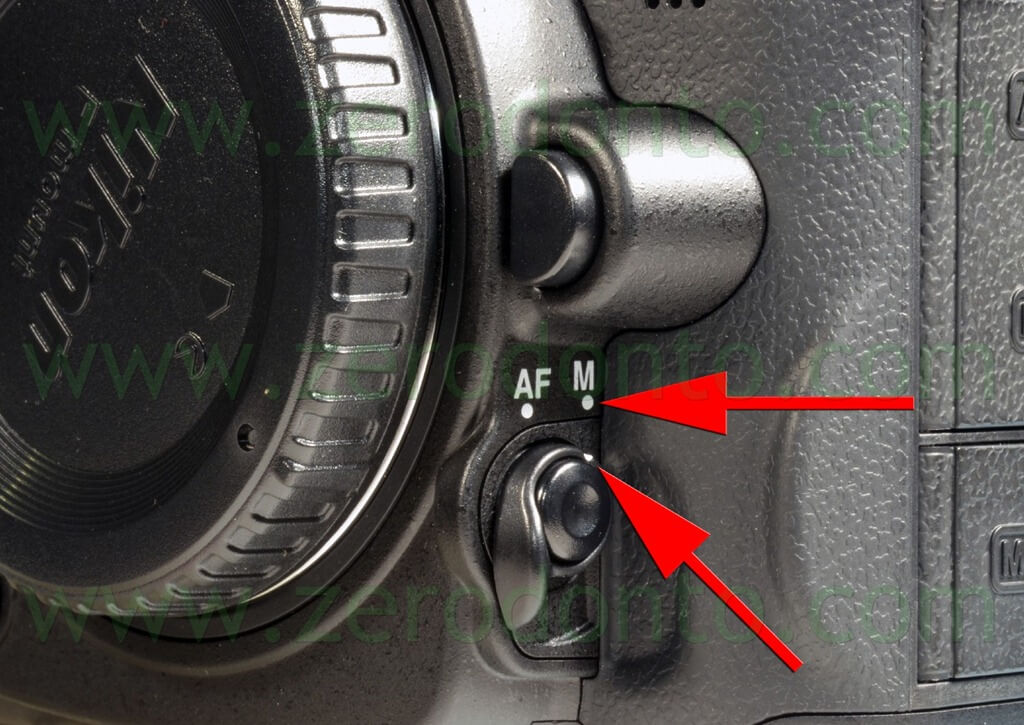
On the left side of the camera are the autofocus and manual buttons, normally it should be left in “manual focus” indicated by the letter “M”.
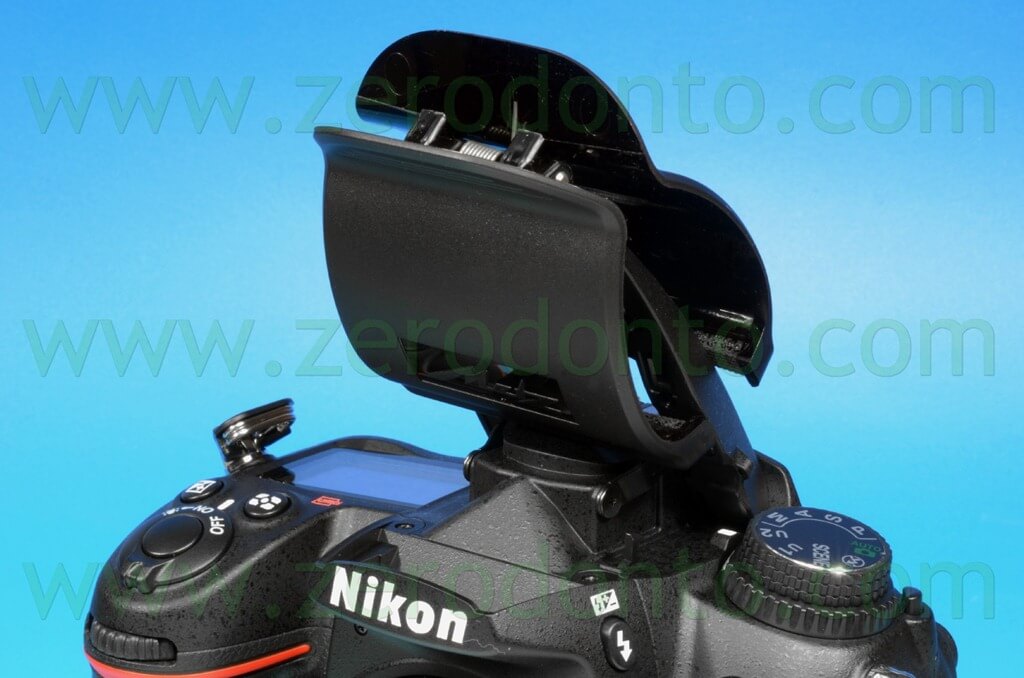
On top of the camera is the button with the flash symbol, by pressing the button we can raise the camera’s integrated flash.
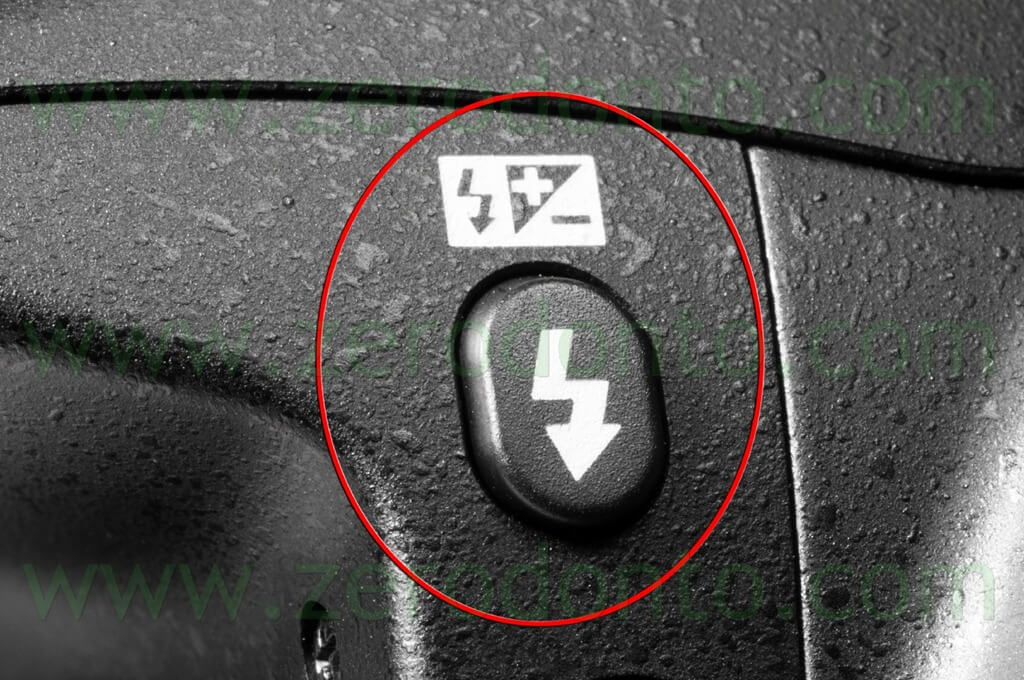
In clinical photography we should always at least use the integrated flash.
For those who use the Nikon SB-R200 flash, or the Metz 15-ms-1 flash, the integrated flash must still be activated acts as because it acts as a “commander”. A “commander” is added to the flash support, with an accessory, on the Nikon
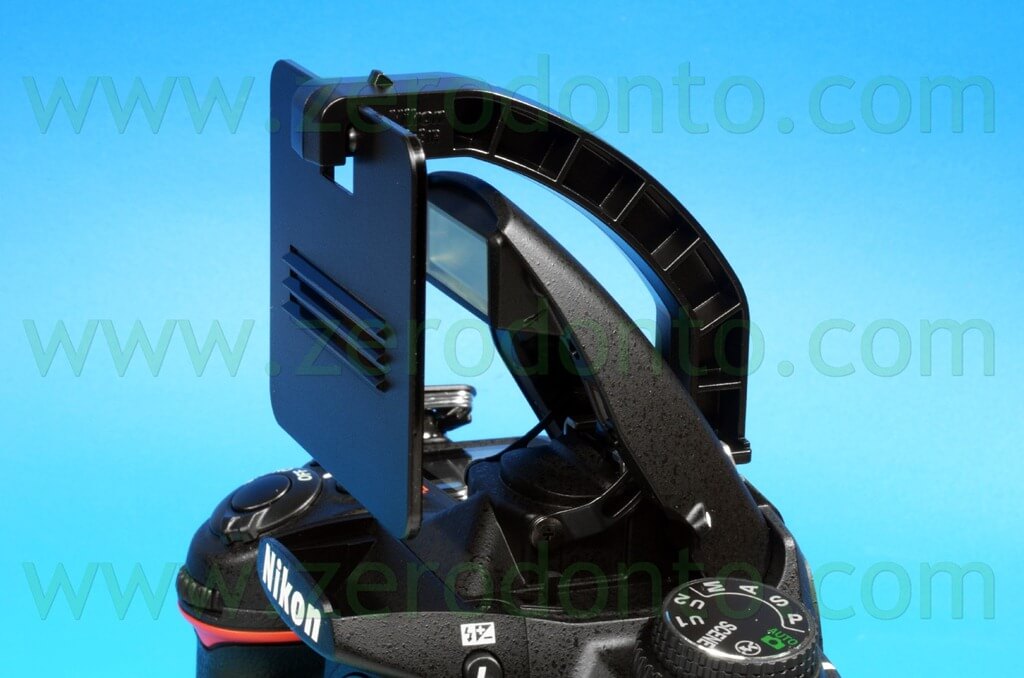
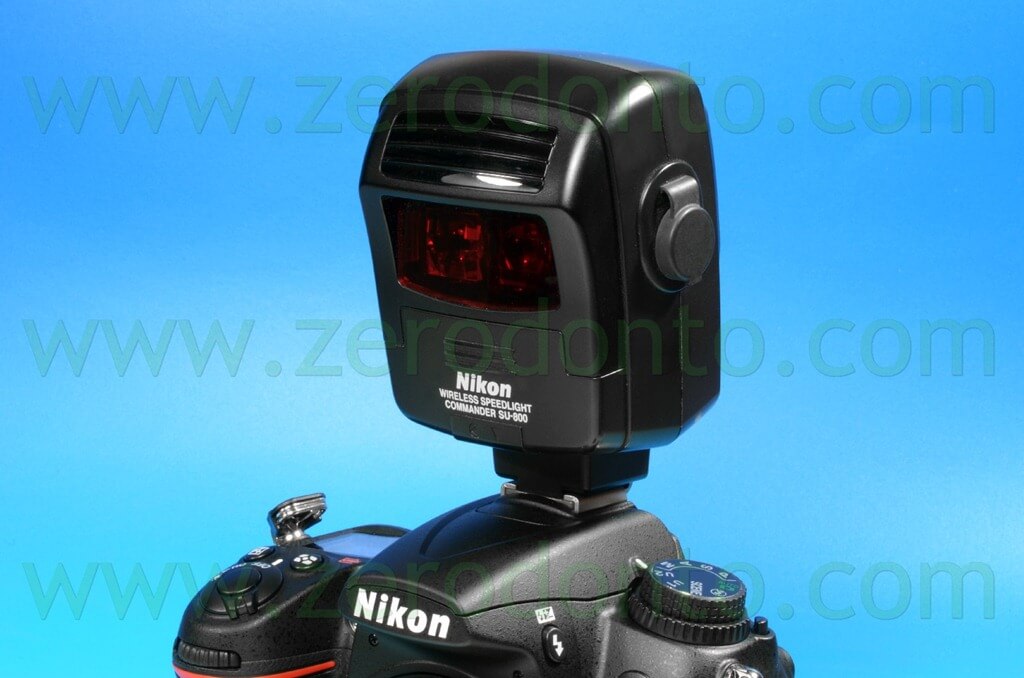
or the infrared filter on the Metz flash.
TOP
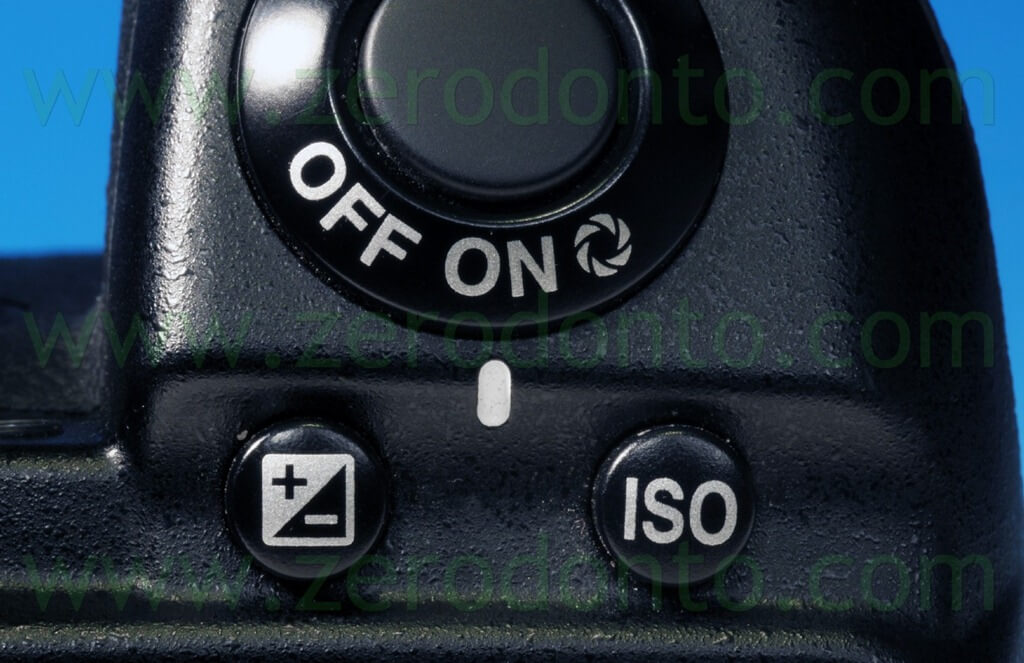
On the top of the camera is the “on, off” power switch, and almost always near the shutter button there is the button with the plus and minus symbols.
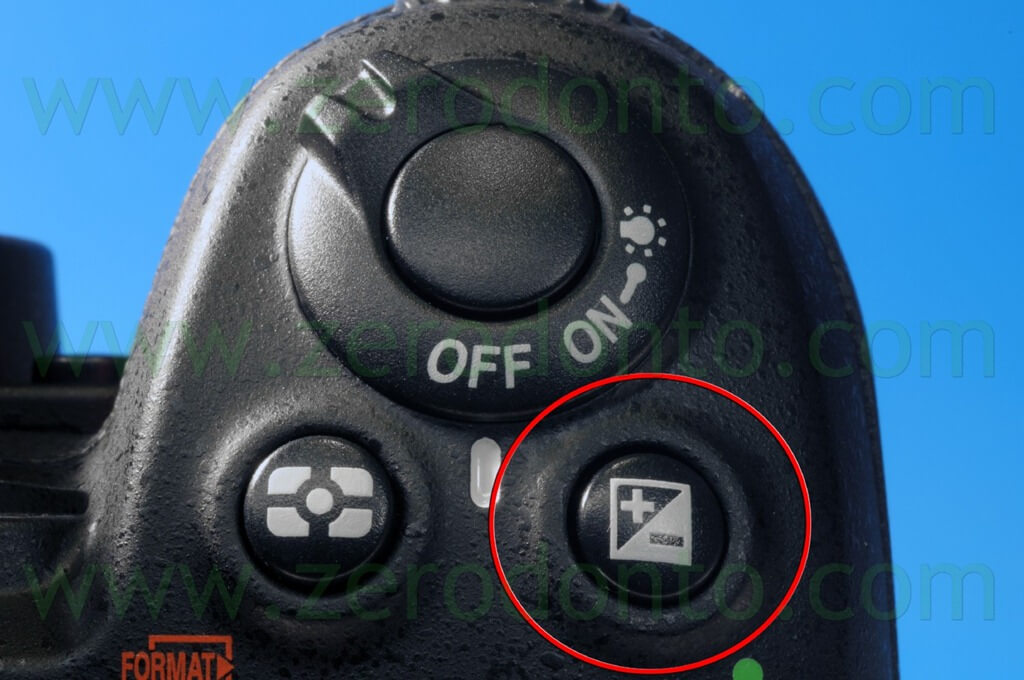
This is the over and underexposure button, normally used to take brighter or darker pictures.
Example: If you take a picture and it seems a bit dark (in the photography we use the term “underexposed”) we can retake the photo and if we want it a little lighter we just hold down the + / – button at the same time rotate the knurled dial on the back until we see an overexposure percentage with a plus sign.
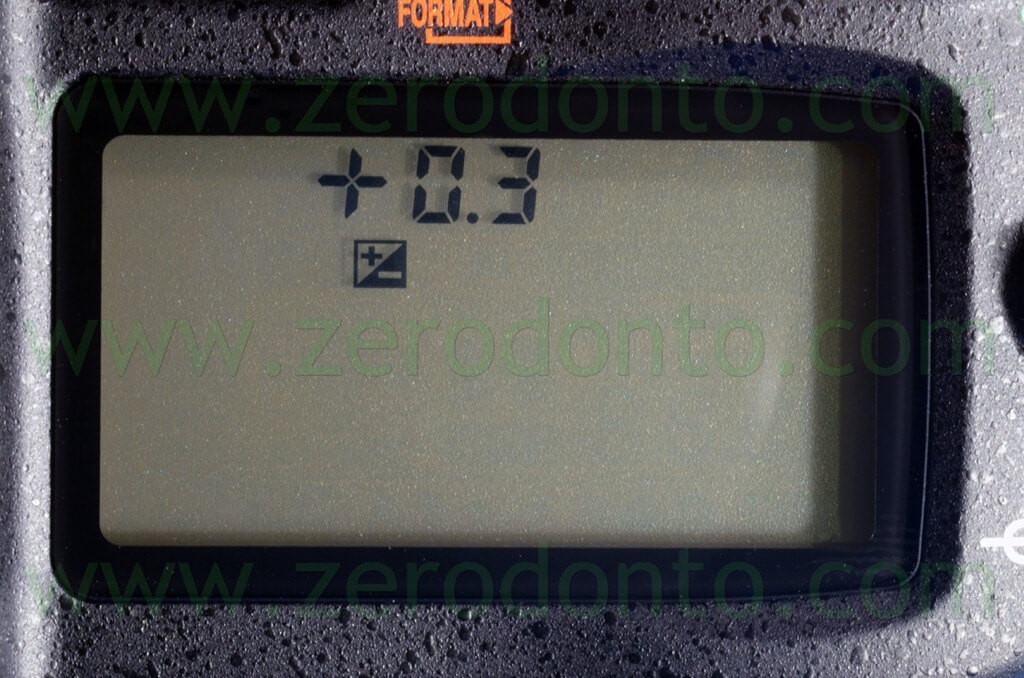
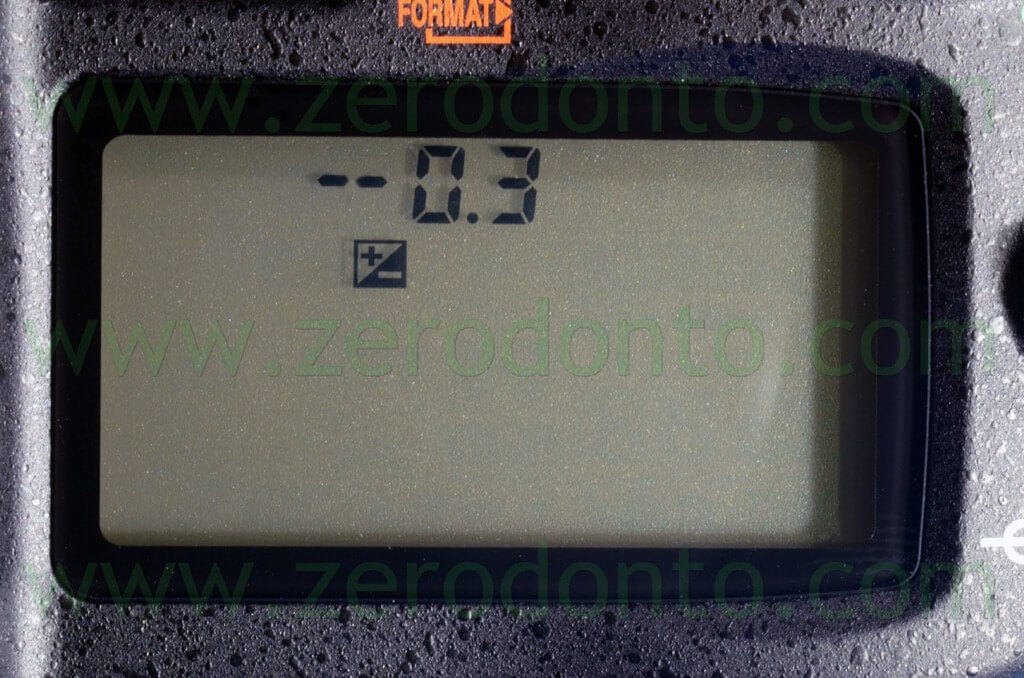
At this point we will shoot the picture and it will probably be lighter, but if we are still not please just increase the percentage of overexposure, and the third picture will be lighter. We do the same if the picture seems too light and we want to darken it(in photographic terms this is called “overexposure”) we repeat the same steps but the percentages will have a “minus” sign.
FRONT
The most important button on the front of the camera is almost always on the right on every camera, the button to remove the lens,
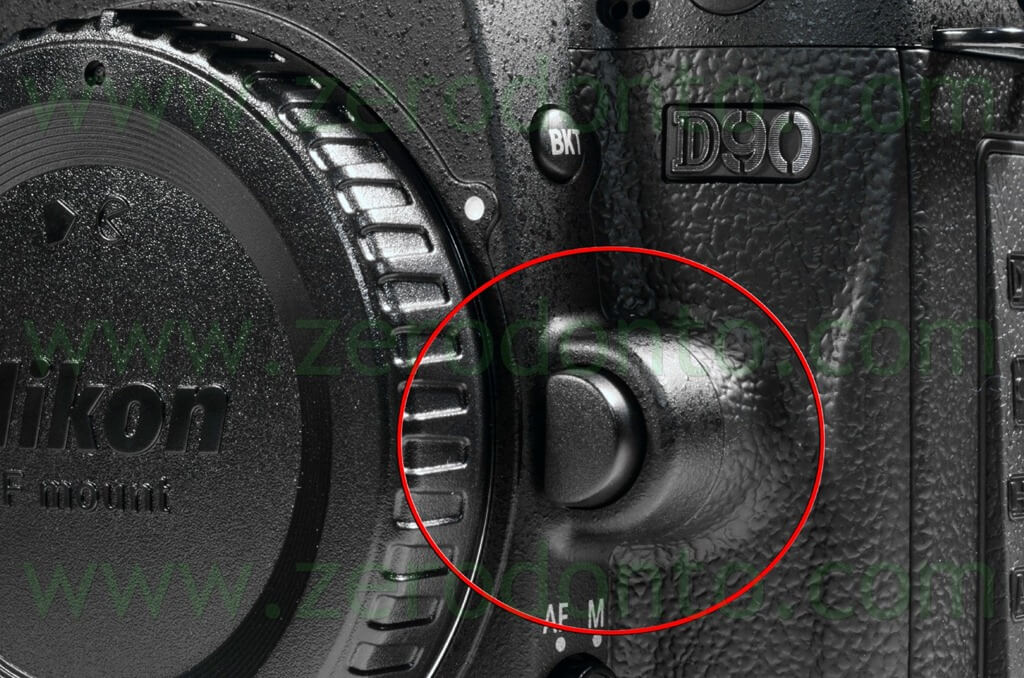
which is now a bayonet mount on all DSLRs, you hold it down and remove the lens by turning it clockwise, by turning it the other way the lens attaches. Each lens and body show the exact point where the lens alines with the camera body.
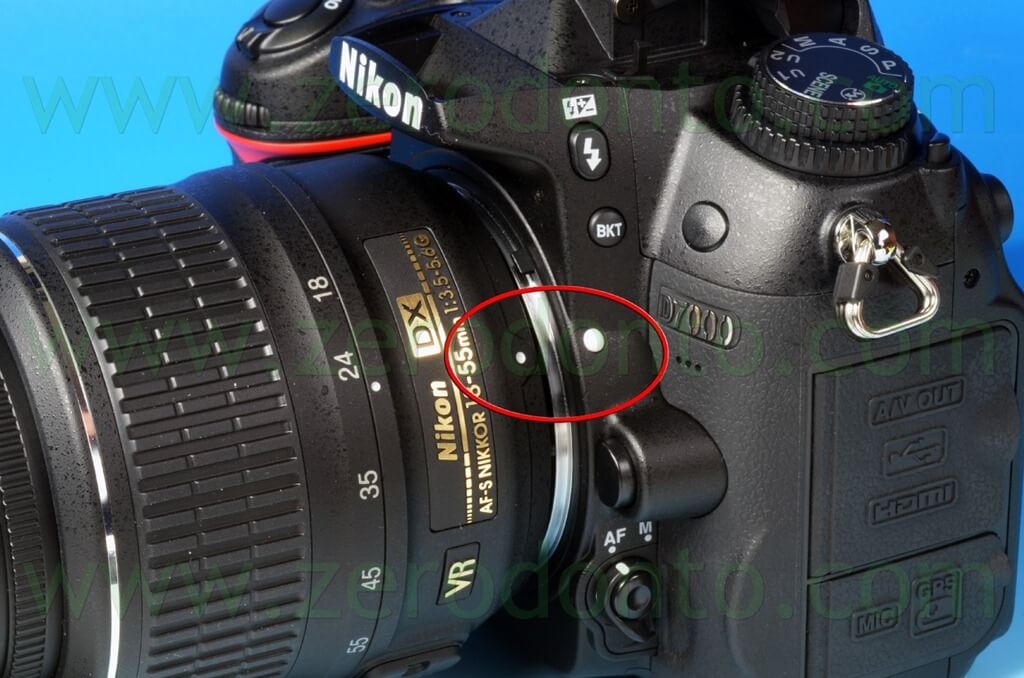
If the lens is inserted correctly you should hear a “click”, the click indicates that the lens is properly inserted.
I suggest using a little force when doing this to make sure that the lens is inserted (both the bayonet and the rear of the lens are made of steel) thus, forcing it a little will not cause damage and it is advisable to do this on a table so that,if the lens is not attached, it will not fall on the floor and we will not have to buy a new one.
If we look at a different camera from the Nikon DSLR like the Pentax K-5, we notice that on the camera body we find the same buttons, in different places, that perform the same main functions that all DSLRs have.
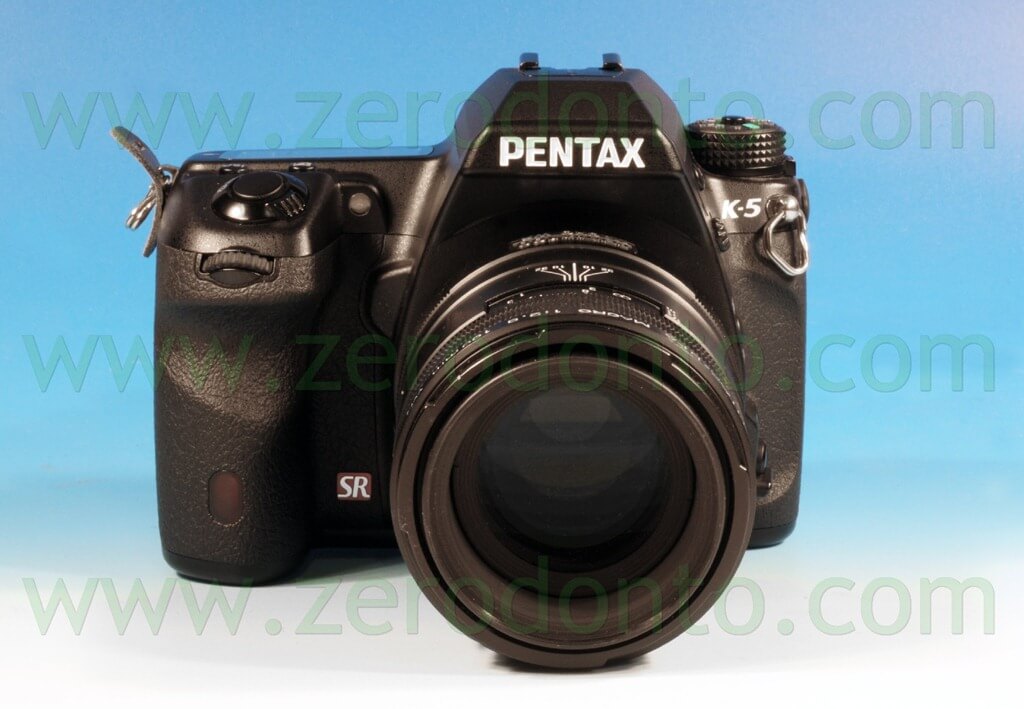
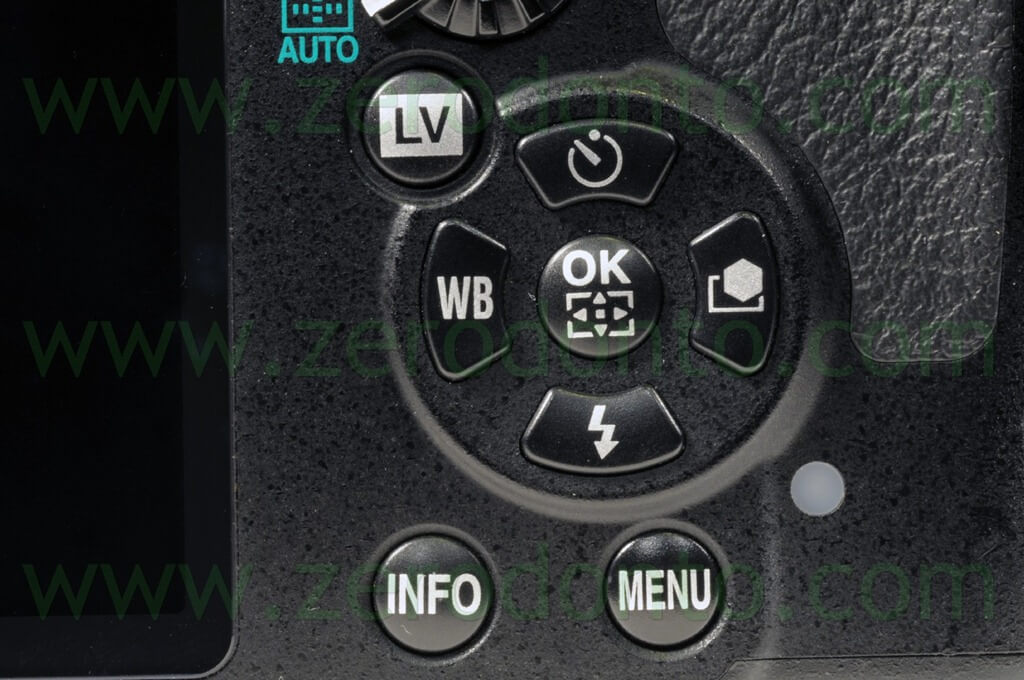
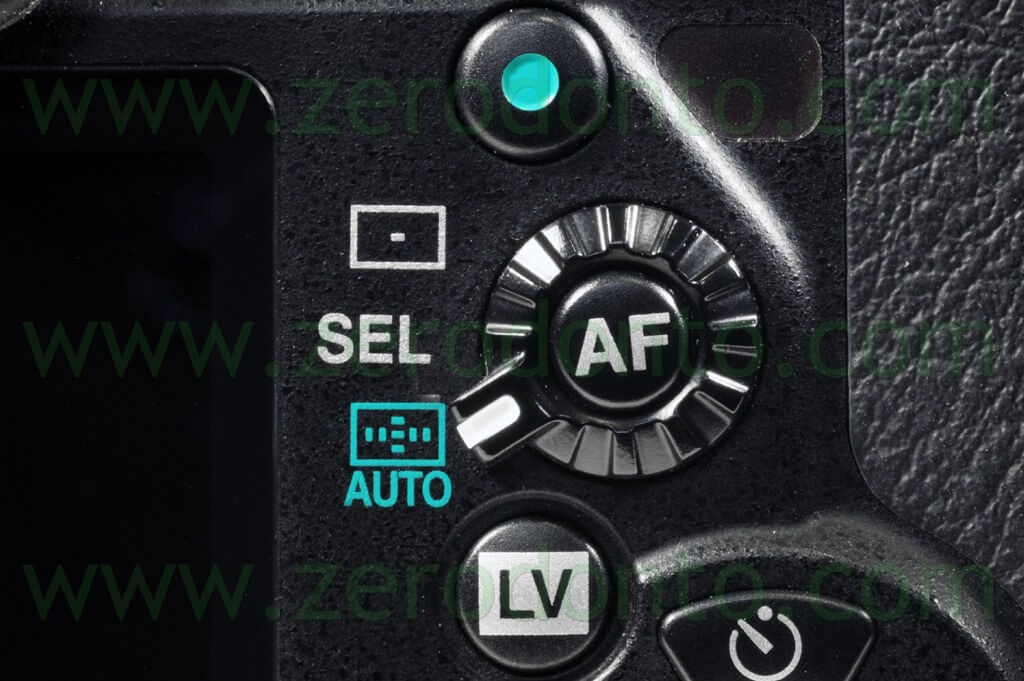
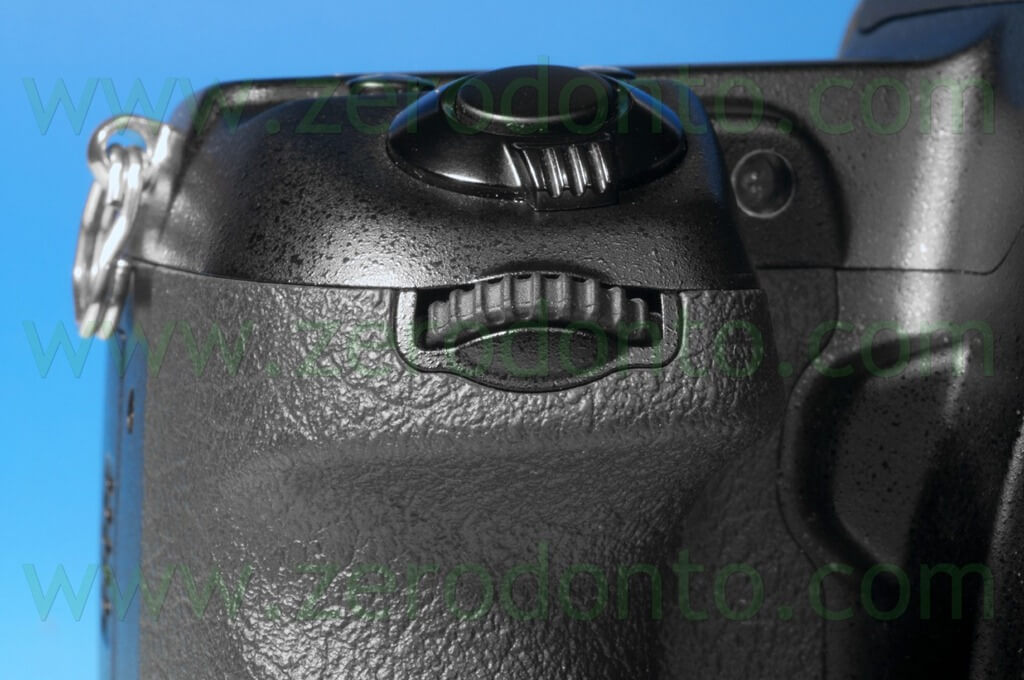
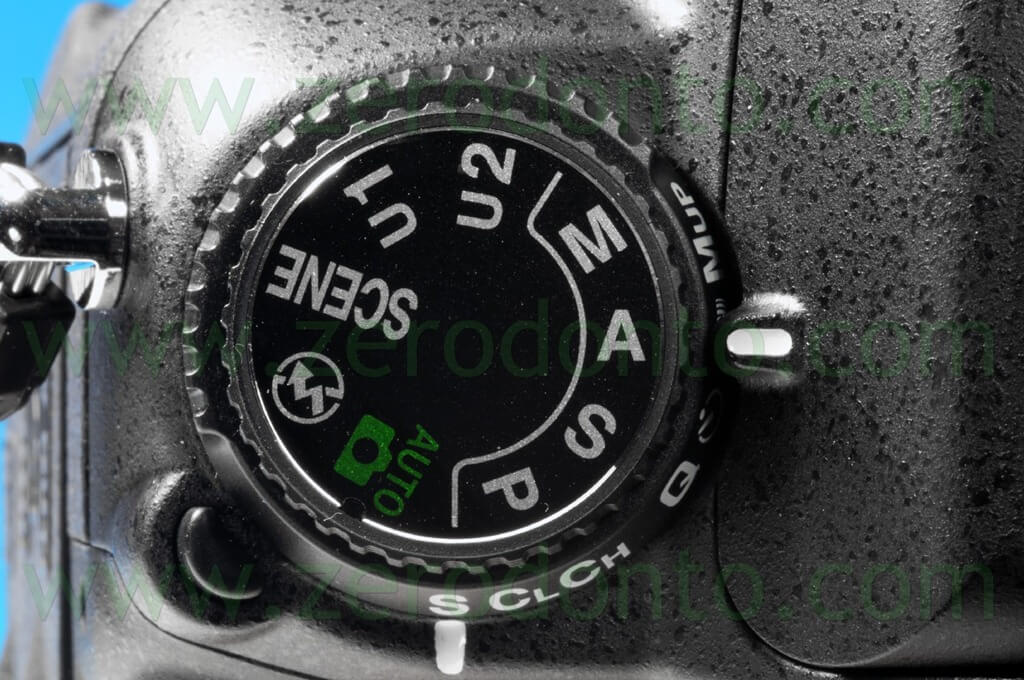
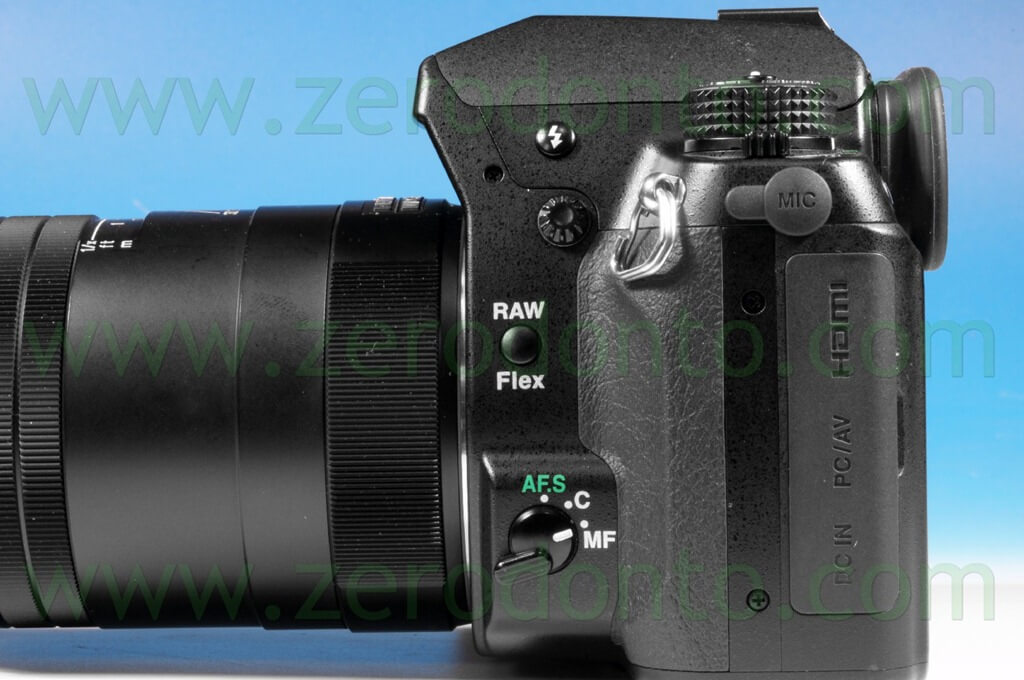
Therefore we can assume that all cameras have approximately the same basic functions, they can vary in the menus from model to model, but the basic settings used in clinical documentation are similar.
MACRO LENS
In clinical photography we only use macro lenses.
The peculiarity of these lenses is the optical scheme, designed to obtain the maximum quality in pictures at close range, unlike the amateur lenses where the minimum focus is almost always from half a meter on up.
I suggest to always use macro lenses made by the manufacturer of the camera that we decide to buy, like Nikon, Canon, Pentax, etc. There are also lenses made by producers of optics, such as Sigma, Tamron, Tokina, etc. but I will not speak of these in this article.
My thirty years of experience have allowed me to test and evaluate which are the best lenses for clinical photos where one must try to capture the right colors of the teeth and gums.
Unfortunately, I have to say that the number of macro lenses that have satisfied me is very small, of course, this is just my personal opinion.
The lens together with the type of sensor decides the quality, we often see this when changing from a old generation DSLR to a new generation DSLR using the same lens.
My advice is to use a lens with a 100mm focal length, with this type of focus can also take pictures of individual teeth without having to go into the patient’s mouth.
Inside the lenses we find a mechanism that is defined by the term “Diaphragm”, it consists of sheets that let more or less light in.
The depth of field depends up the opening or closing of the diaphragm. Example, if we take a frontal picture of a mouth of all our patient’s teeth with the aperture wide open will notice only the front teeth are in focus, that means that little sharpness is equivalent to little depth of field, if we take a second picture with the aperture fully closed, without changing the focus and the focus point, we will see almost the entire mouth in focus, you will notice a sharper immage, that is, greater depth of field. The diaphragms in the macro lenses are usually: f2,8-3 .5-4.5-5.6-8-11-16-22-32.
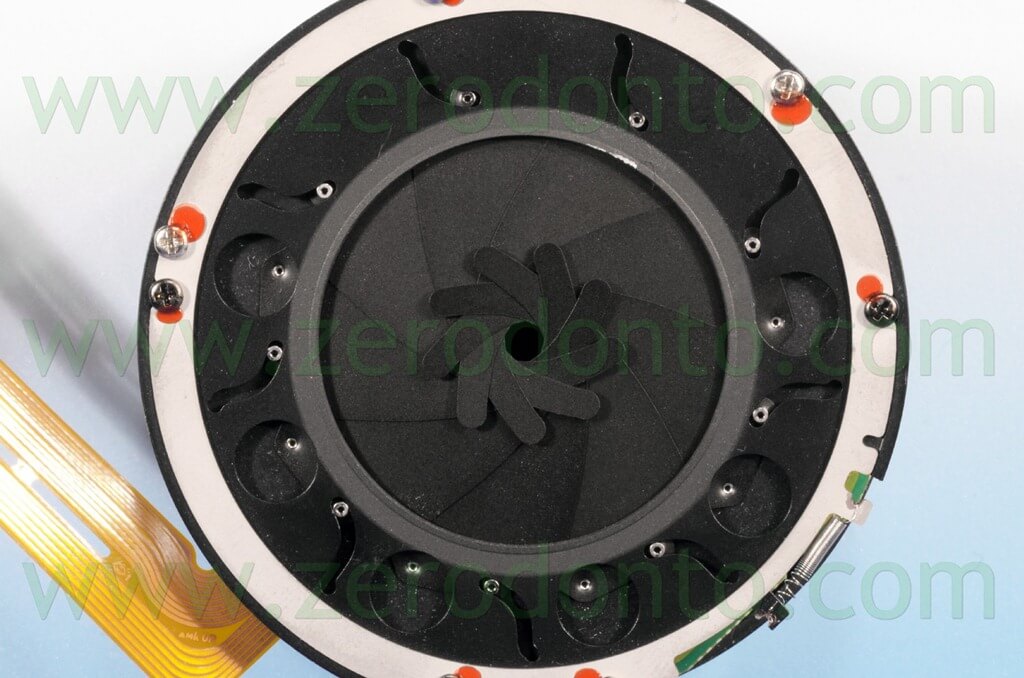
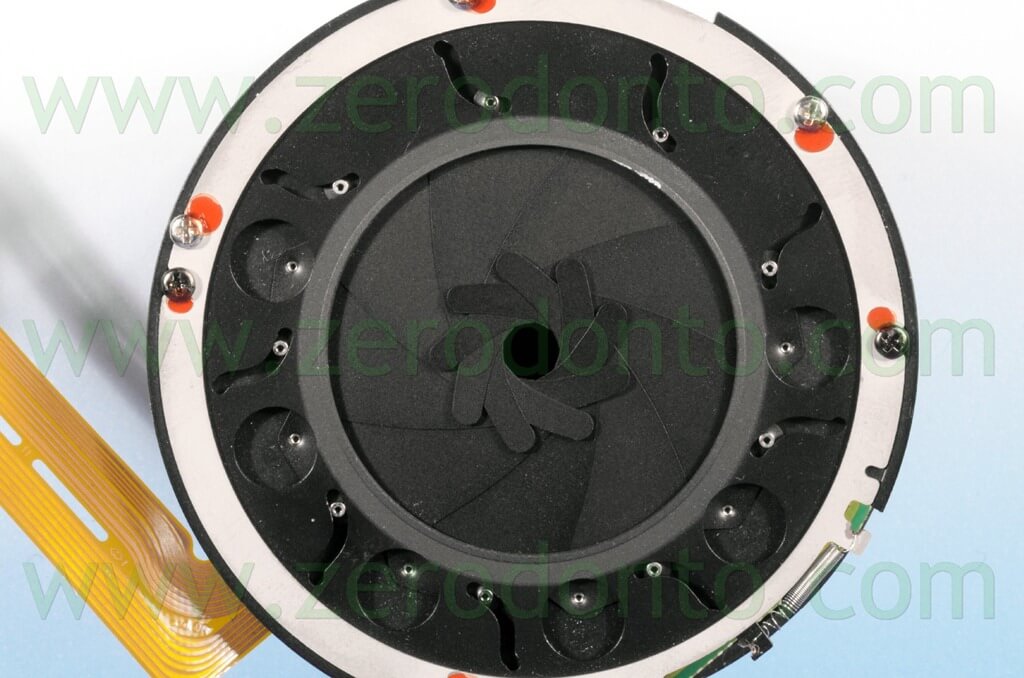
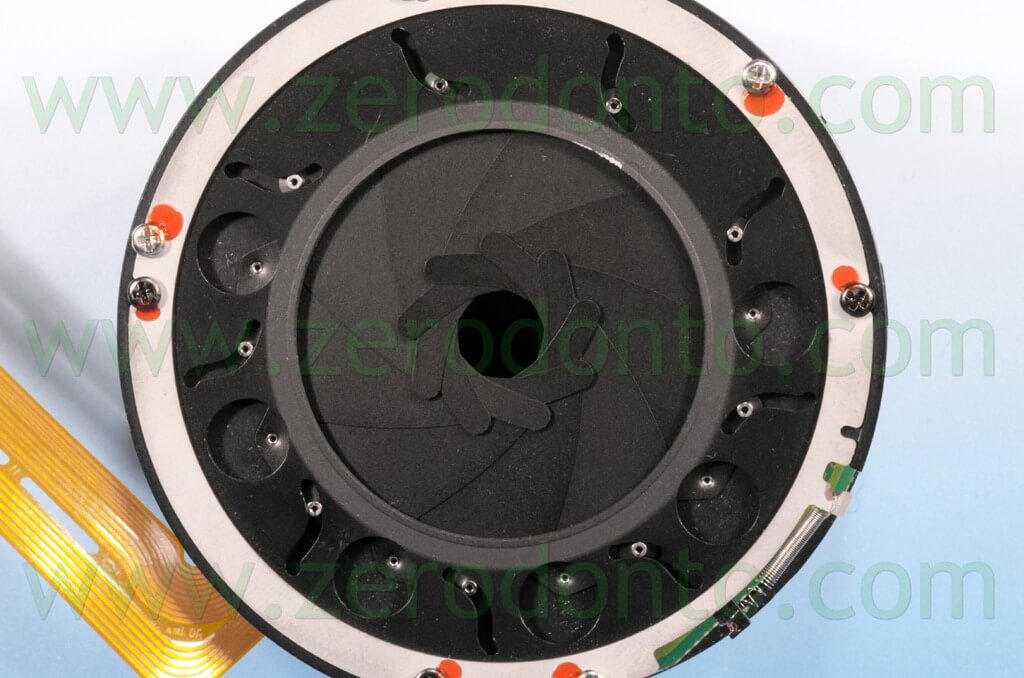
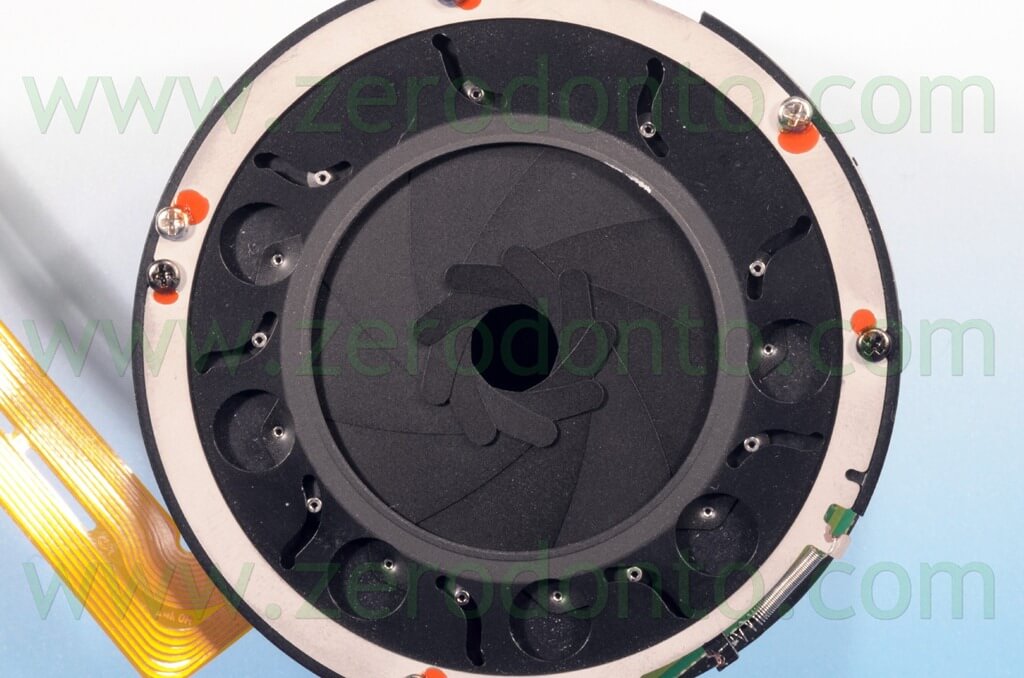
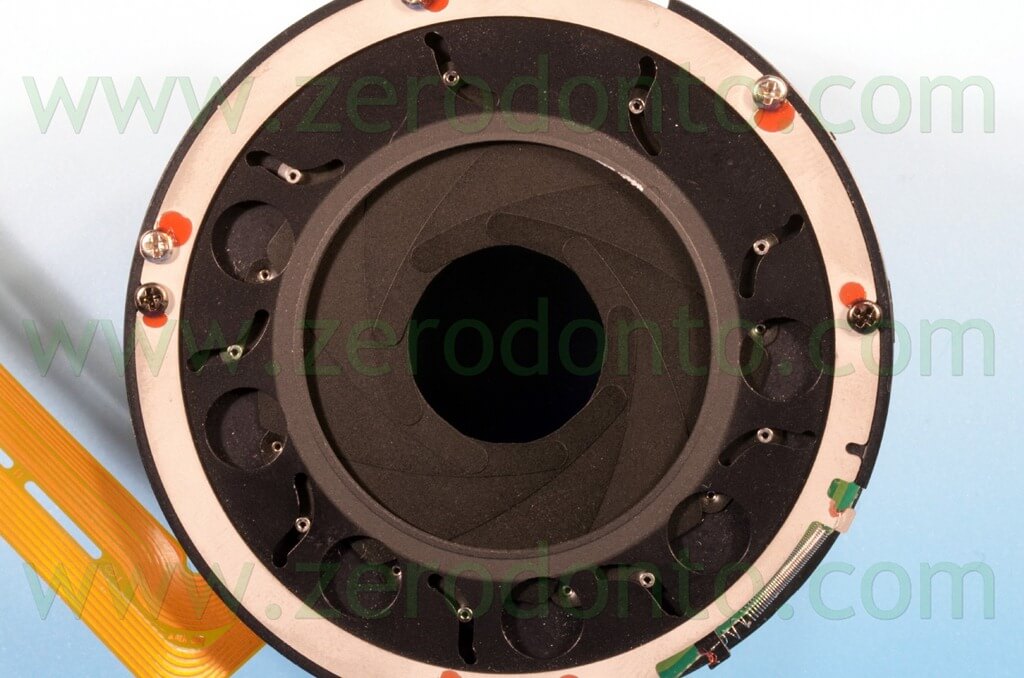
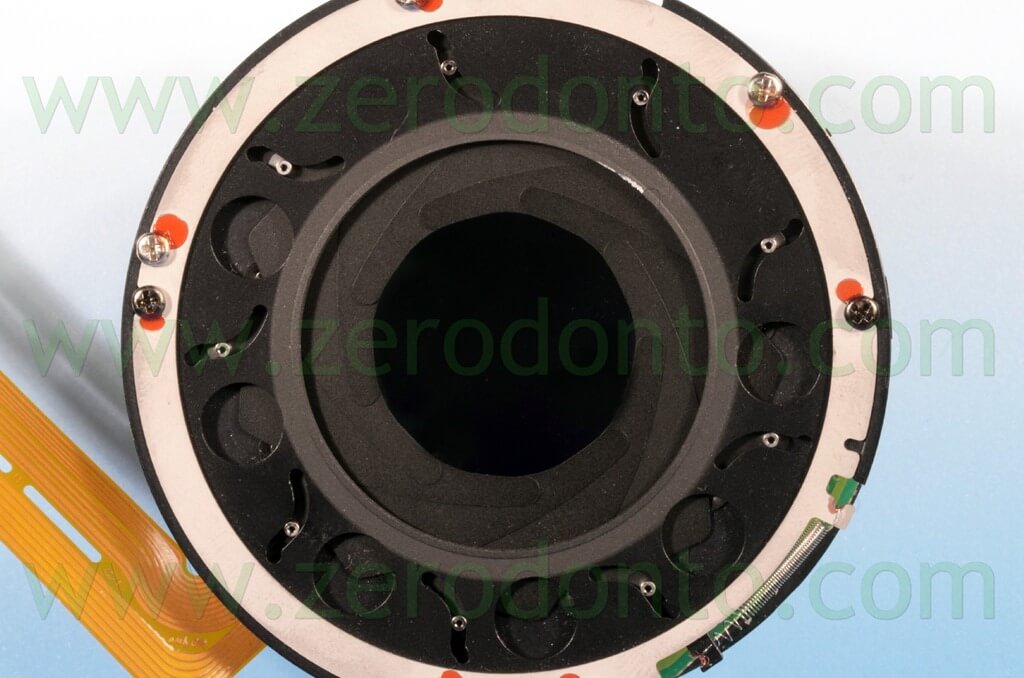

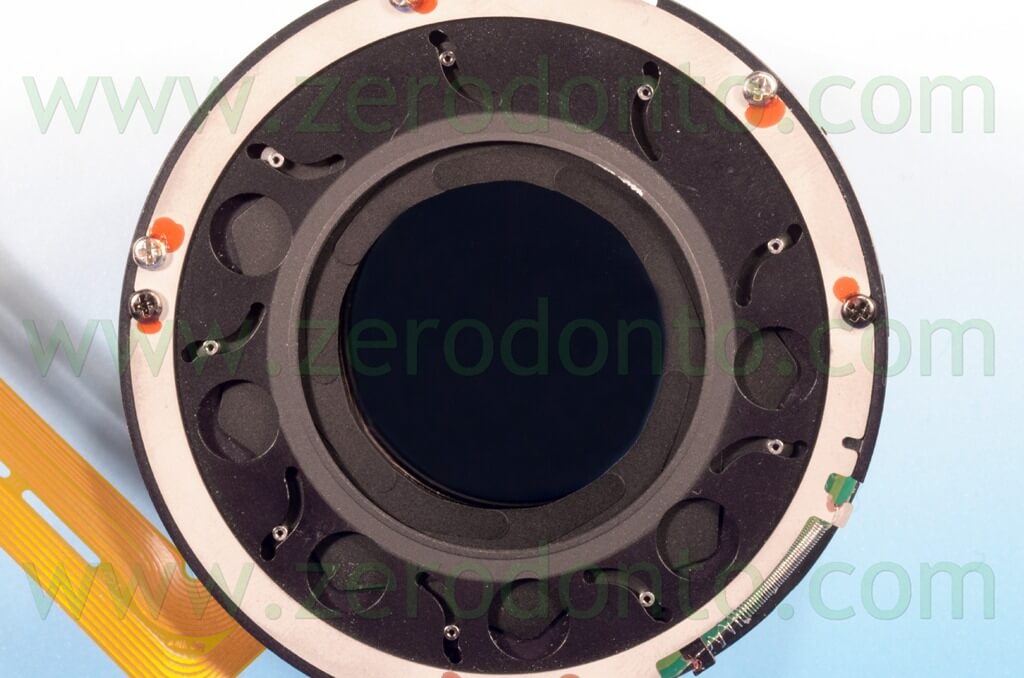
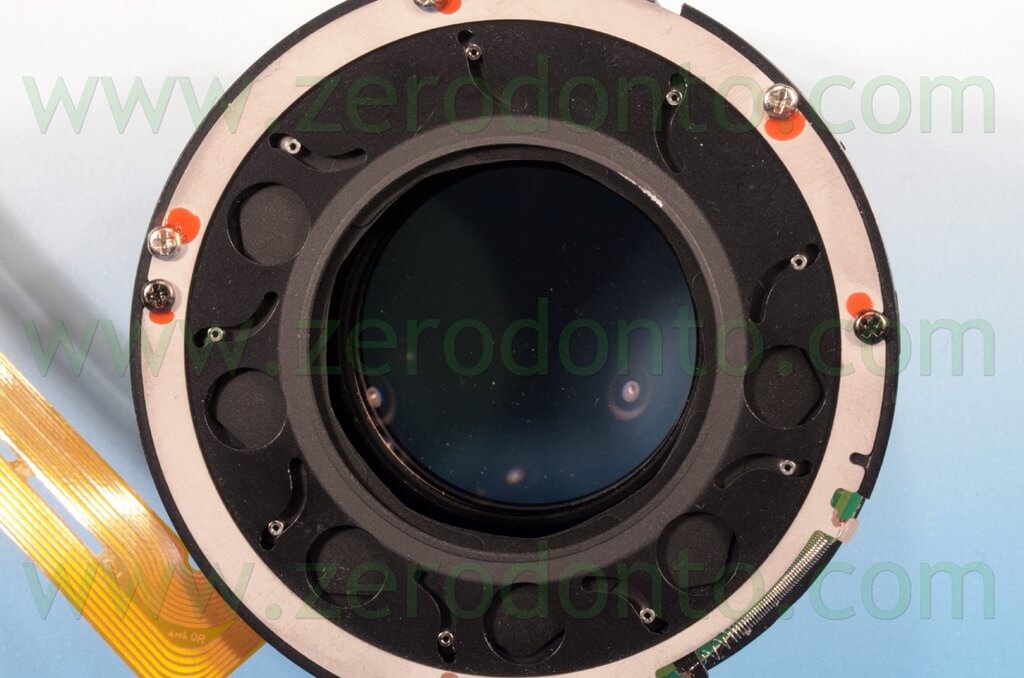
In order to express this concept well I took nine photos with diaphragms as described above and in the order of how I wrote them, without changing the magnification, that is, the distance and without changing the focus point. (the first photo in the sequence is taken with a wide open diaphragm F2.8, to the last, taken with a diaphragm closed at f32).
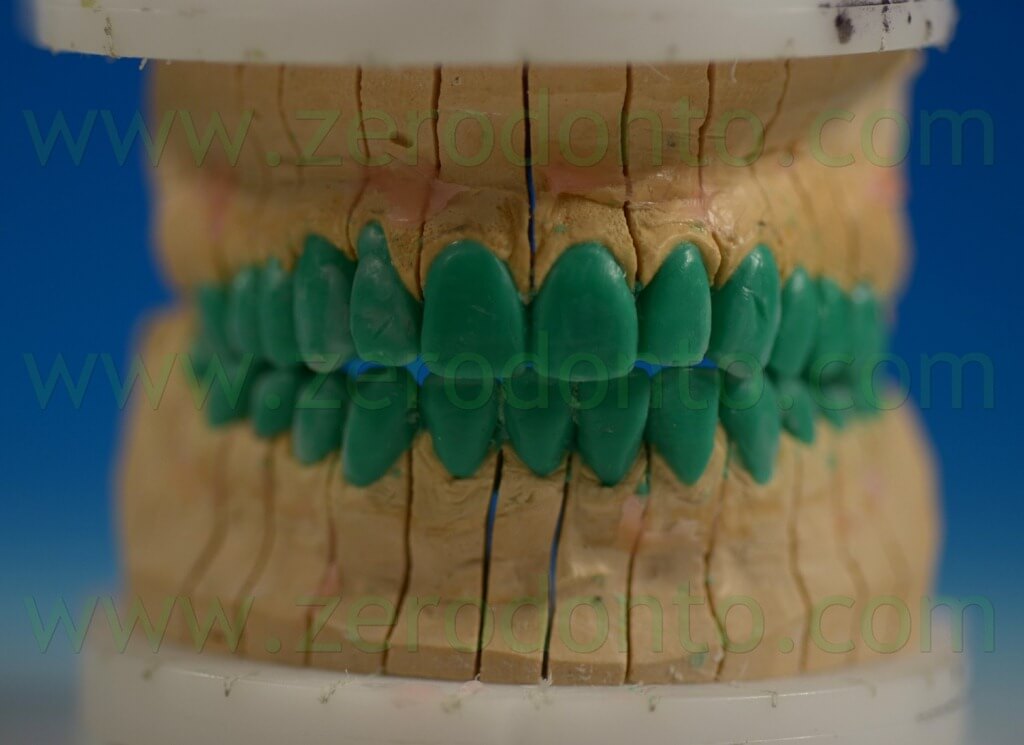
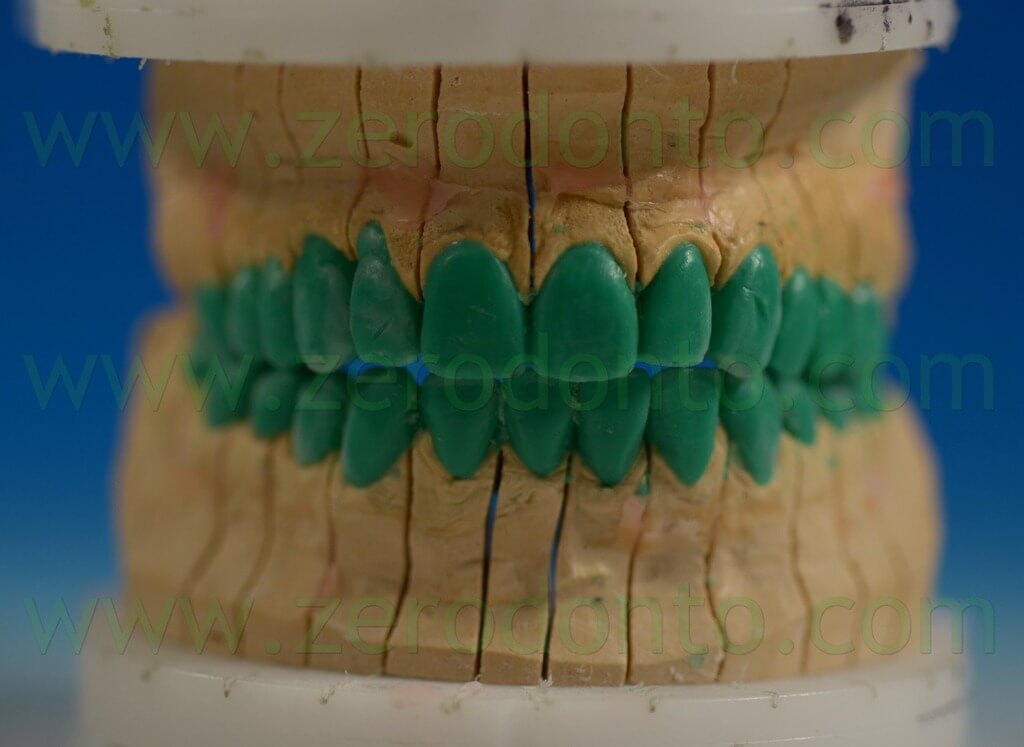
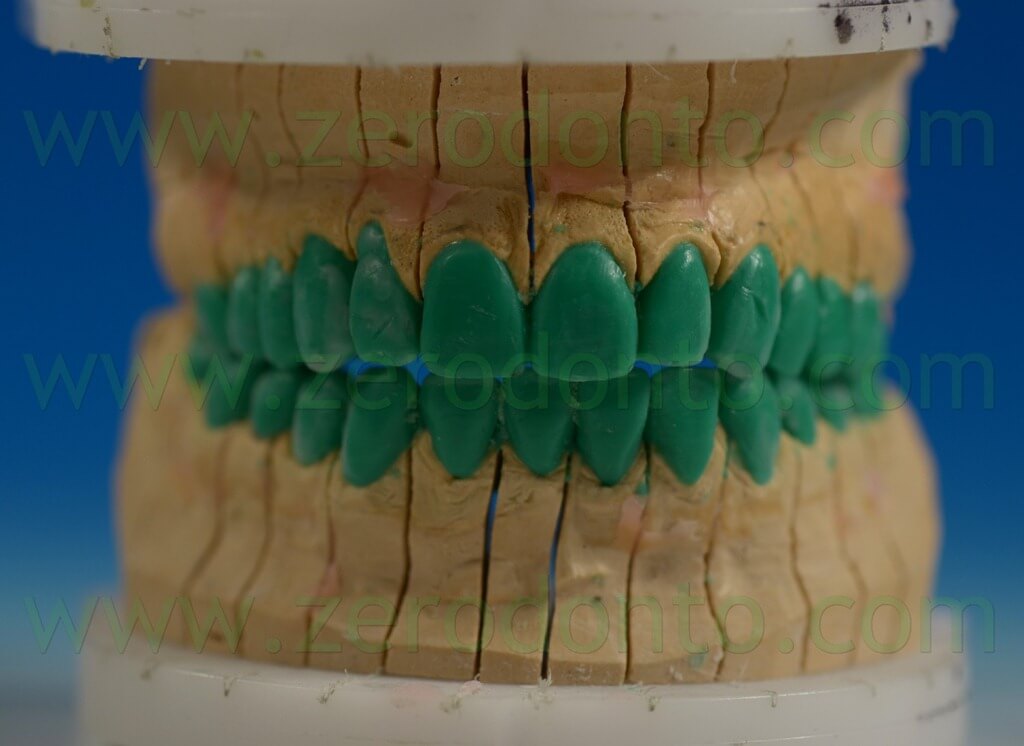
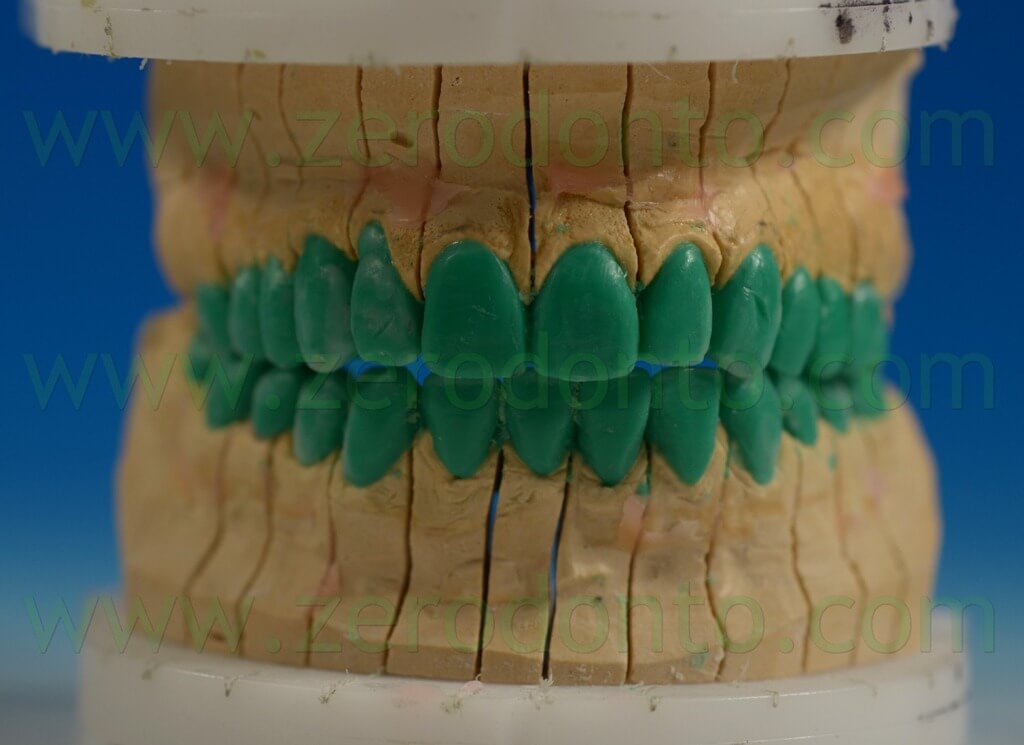
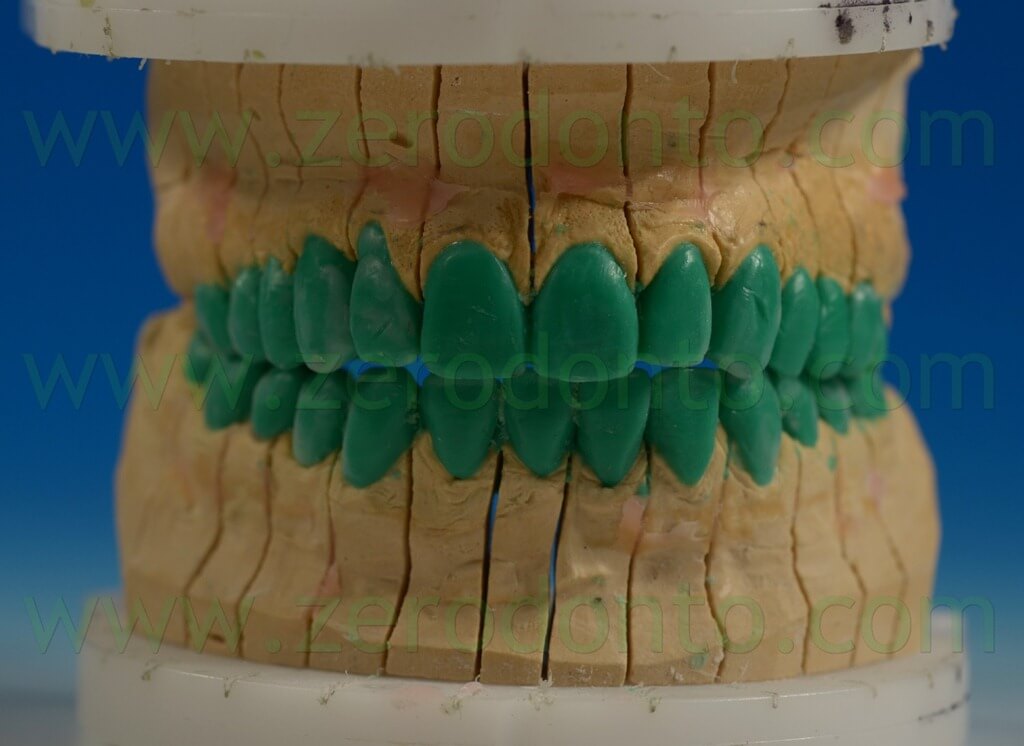


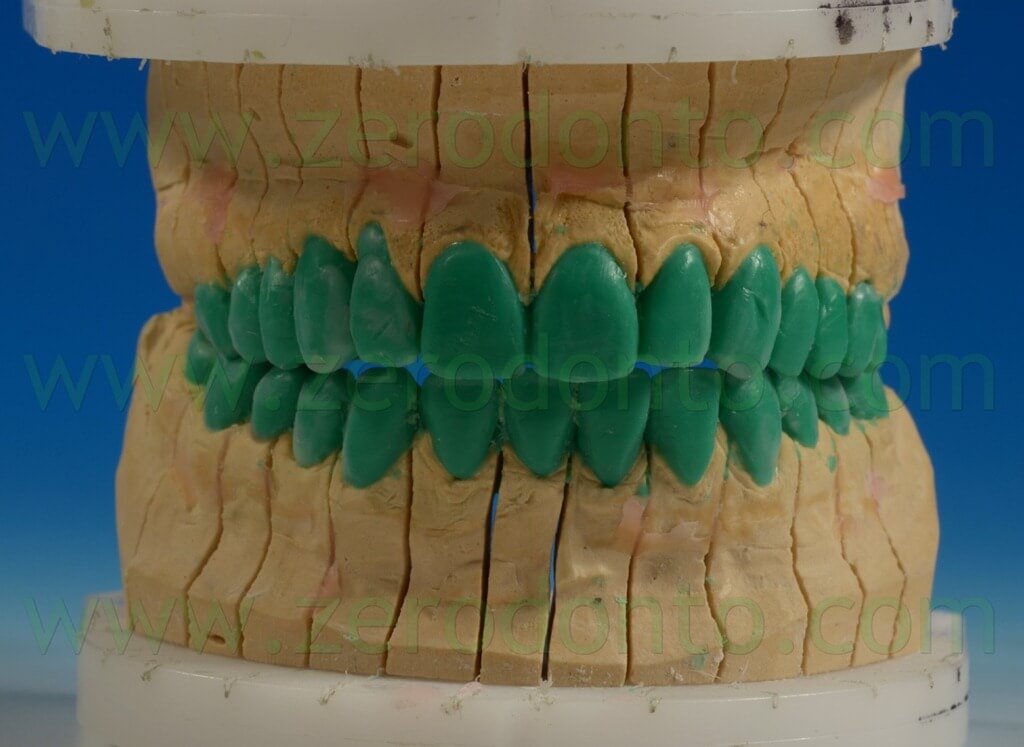

Now I will talk in a more detailed and specific way about the “depth of field”. We will notice that from picture to picture whenever we close the aperture the sharpness (depth of field) increases , the point of focus has always remained the same (premolar).
The depth of field increases for two reasons, if we move away from the subject to be photographed or if we photograph with the diaphragm fully closed.
Example: suppose we take a picture of a person three meters away with the aperture f5.6, and after taking a look at the photo, we notice that it is in focus starting at about a meter and a half before the subject until about six meters after the subject .
If we take a second picture but we move away other two meters from the subject,that is, five meters, and we always use f5.6, you will notice after taking the photo we notice it is in focus from about eight meters before the subject up to about ten meters after the subject.
If we repeat the same photos but the first at a three meter distance with f32 fully closed, we will be in focus from about a meter in front of our feet to a few kilometers away.
If we repeat the second picture at a distance greater than five meters, again with f32, we will be in focus from our feet to infinity.
If we repeat these photos, but with a subject about one meter and a half away (a person’s face) always taking the first photo in f5.6 and focusing on the eyes, and the second picture identical but in f32, you will notice very little focus with the aperture 5.6 (a few centimeters), while in the second photo with f32 to see the entire face in focus.
This shows that the farther we get from a subject keeping the same aperture, the more depth of field we get.
If we take a picture of a face and focus on the eyes, to get everything in focus we have to close the aperture.
In photography, the term to indicate the depth of field is: “everything that is in focus in the photo” (or that is sharp), before and after the point of focus, is called “depth of field”.
The depth of field increases when moving away from the subject being photographed, and decreases when we get closer.
Or if we photograph a fixed object at the same distance, the depth of field increases or decreases if we take two photos, one with the aperture wide open (f2.8) and the other fully closed (f 32).
The numbers of meters in the depth of field that I mentioned above are only indicative, I have described them randomly, only to express the concept of depth of field.
The clinical photos are all close-ups, so we have little depth of field.
The only way we can get the maximum depth of field, in photos of the oral cavity, is to always use a smaller aperture like f32 or higher.
RING FLASH: MACRO RING FLASH OR DUAL POINT FLASH?
For many years the ideal lighting has always been the ring flash. It is defined by the term “ring” because the light, when taking a photograph, lights evenly in a circle all around the subject we photograph, thus avoiding the occurrence of shadows.
The light on the subject is uniform over the entire field, and the images are displayed on the whole frame giving the correct view of the photo.
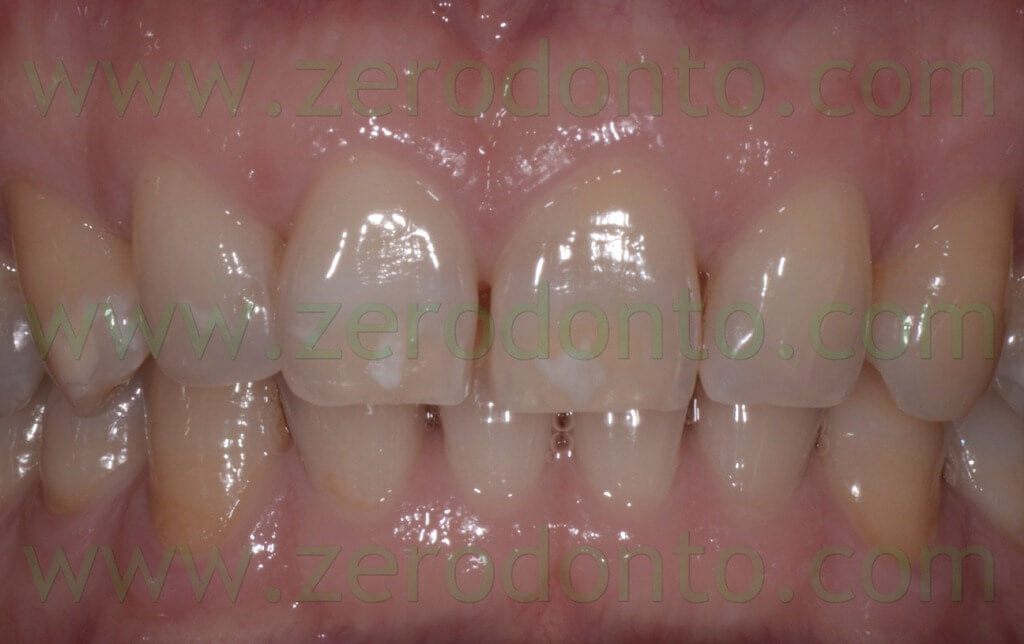
In fact, the images have good exposure and are free of shadows, but a careful examination of the images shows that they are flat, there is no three-dimensionality.
If we go back in time many years ago, for the lack of photographic knowledge of doctors and technicians and also of most of the professional photographers, the results obtained with the use of flash ring were more than satisfactory.
Based on the past results, these flashes were useful and practical, they were the easiest and most complete for medical documentation and were groundbreaking for those who wanted to document but had no idea of how to use a camera, all it took was to buy a system like: “Medical Nikon” “Medical Yashica”, “Medical Elicar”, etc.
These systems were camera, lens and flash all-in-one, all it took was adjusting the focus and the results were always safe and constant. They all used the ring flash, the results were safe, but the images flat.
Even with other companies assembling a body like, Pentax, Olympus, Elicar, Minolta, etc. adding a macro lens and a ring flash of any brand, we built a system similar to the “Medical” and the ring flash was almost always used on all these systems.
Over the years, the demands of doctors and technicians have grown, in reviewing their shots the results were not identical to the work performed, in the images they were looking for: shape, transparencies, chroma value hue, microfractures, three-dimensionality that the ring flash was not able to put in prominence.
Then, went from using the ring flash to the dual point like: Nikon SB-21, Nikon SB-29, etc. Cokin …
I personally have been a supporter of the dual point flash, up to the present day where some companies have become involved in producing them specifically for the medical industry in general, as well as being excellent tools for the most demanding doctors who use them for documentation, but who want to get good results. I hope by now that the original ring flash is no longer used,
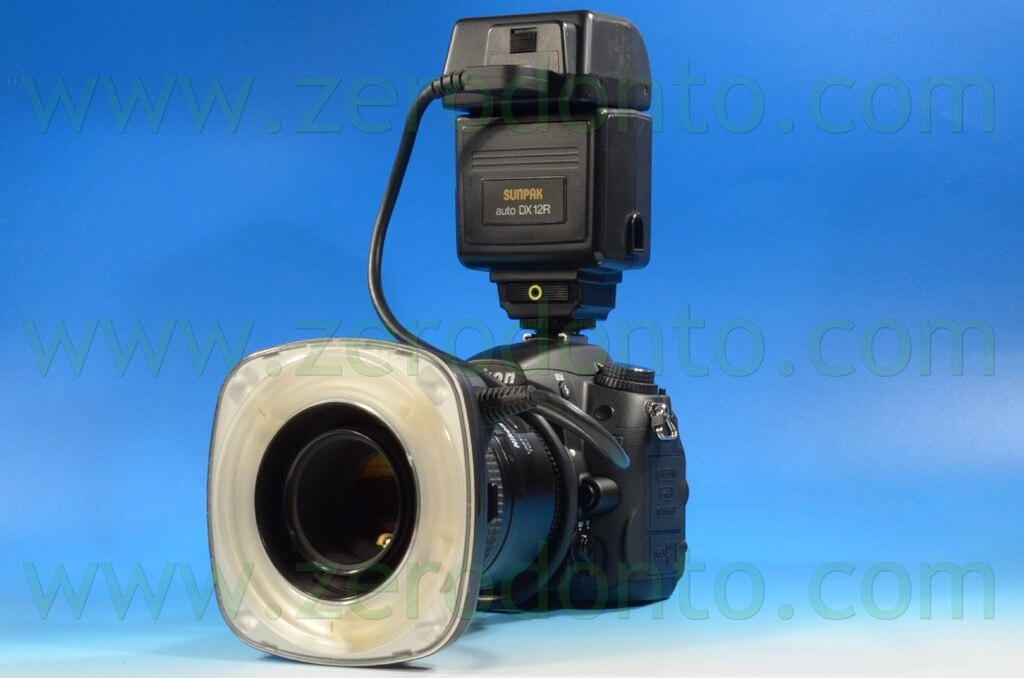
the results obtained are uniformly illuminated, but because they do not have small areas of shadow the images are flat and devoid of all the tooth features.
If we take the same picture with the macro ring flash like the Metz 15 flash
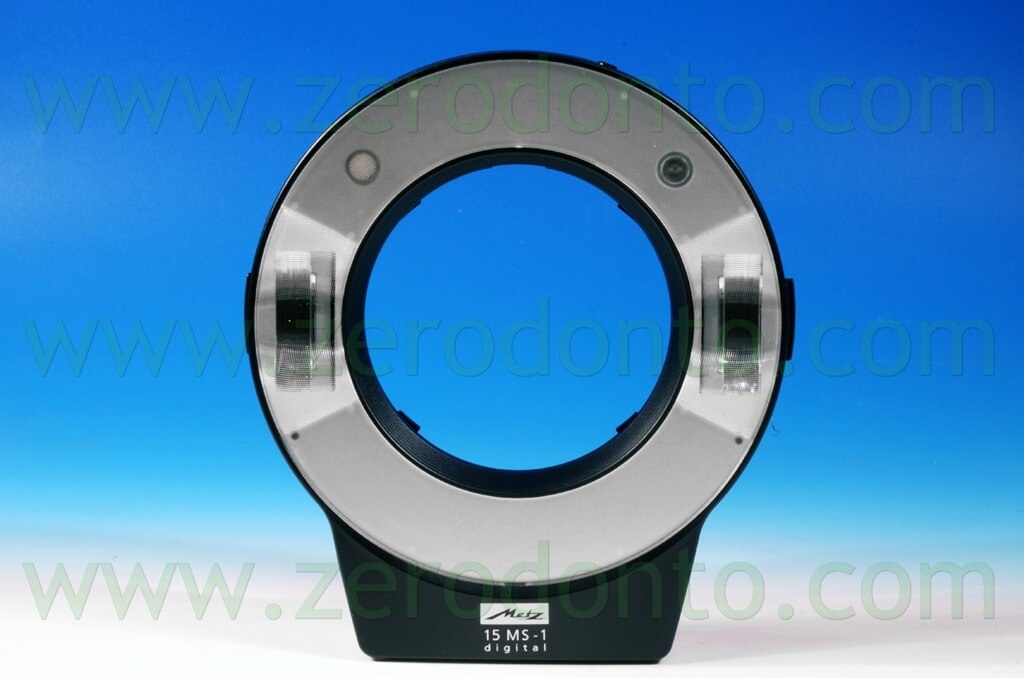
the flash can be moved 10 or 20 degrees toward the center of the lens
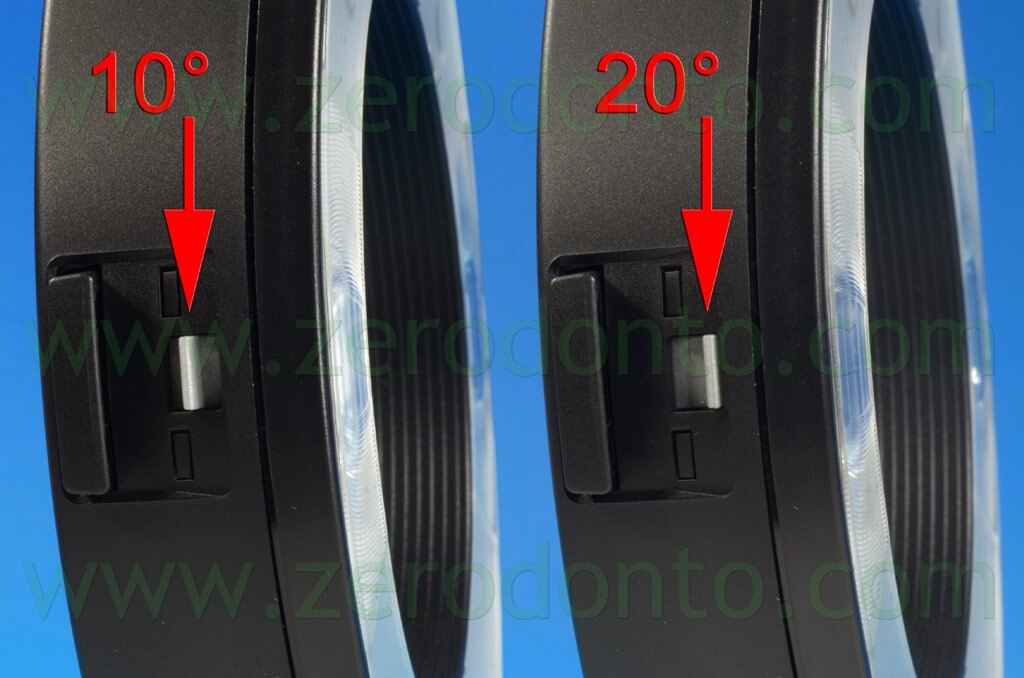
the results are already improved,
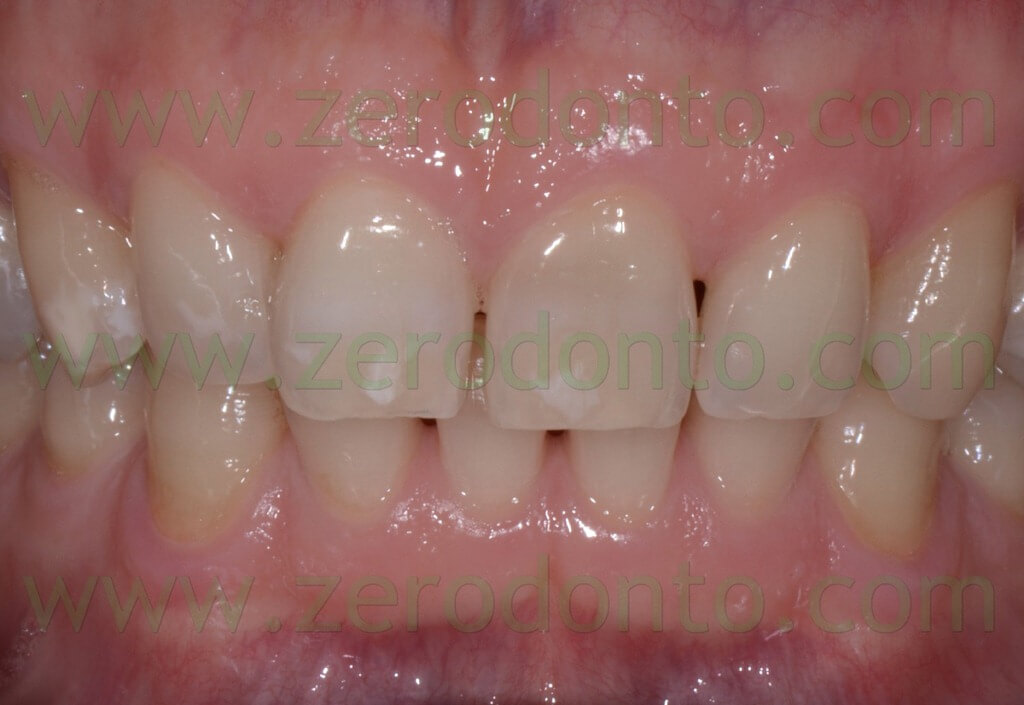
the light does not come directly on the subject, but laterally, creating light shadows that make the subject more three-dimensional, the lateral light also passes through the tooth differently from direct light, highlighting details that direct light flattens.
If, instead, we always use A dual point flash and no longer a fixed flash, like a ring flash, but a flash which allows us to emit a light from the sides at about 45 degrees, like the Nikon SB-R200 flash
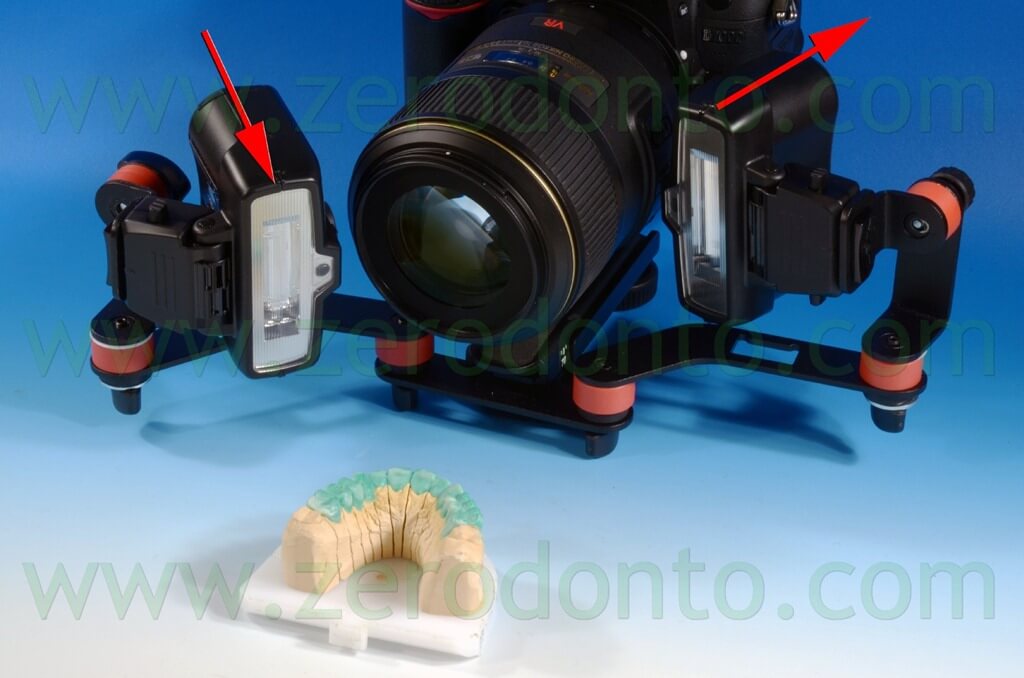
then you can see the details of the tooth, also a dual point flash creates shadows that create a three-dimensional image. Especially for dental photography, where it is important to try and capture all the details of the tooth to better reproduce them like: color, chroma value hue, microfractures, transparency, and shape.
Only the use of dual point flash allows us to obtain these results.
I will only use the Metz-15-MS-1 flash, in addition to two or more Nikon SB R-200 flashes, which I think are currently the best based on my tests on different flashes on the market.
Let’s start with the Metz flash, is the simplest as well as inexpensive. Metz is a leader in the photographic industry, especially for flash construction, for both professionals and amateurs. About three years ago they released a innovative flash which is similar to a ring flash, but with only two light sources.
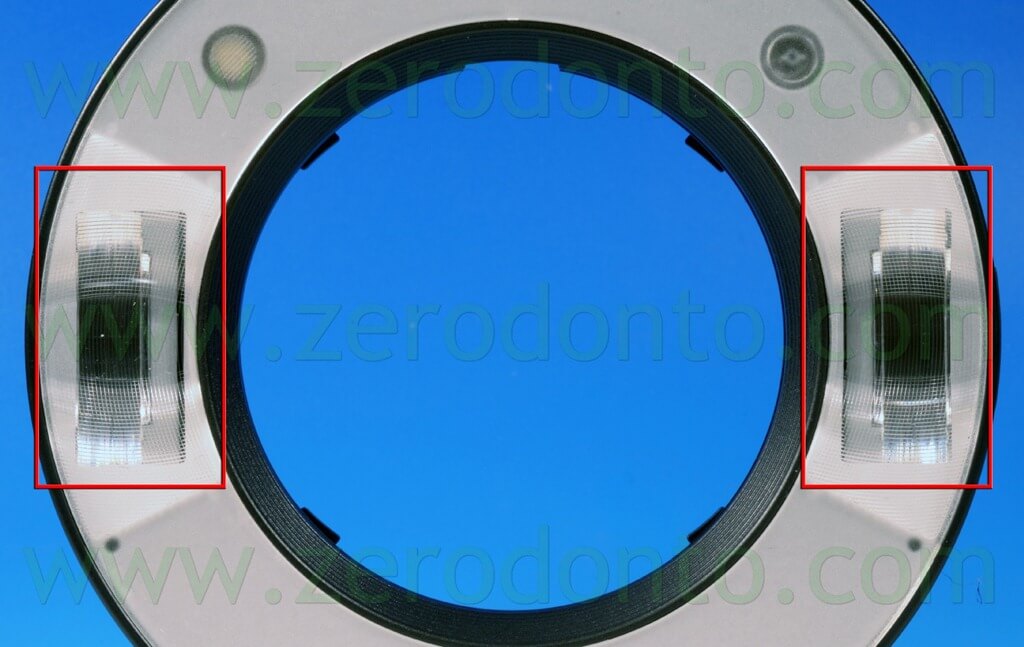
I will list the most important features and then discuss their use. It can operate in wireless, that is, away from the lens and camera, it can work in TTL flash metering for the following cameras: Pentax, Nikon, Canon, Minolta, Sony, Samsung, and can also be used as slave or second flash, it has no connection cables, it uses only two AAA batteries, and allows for quite a few shots, the flash can remain at 0 degrees like a fixed ring flash, or be turned 10 or 20 degrees.
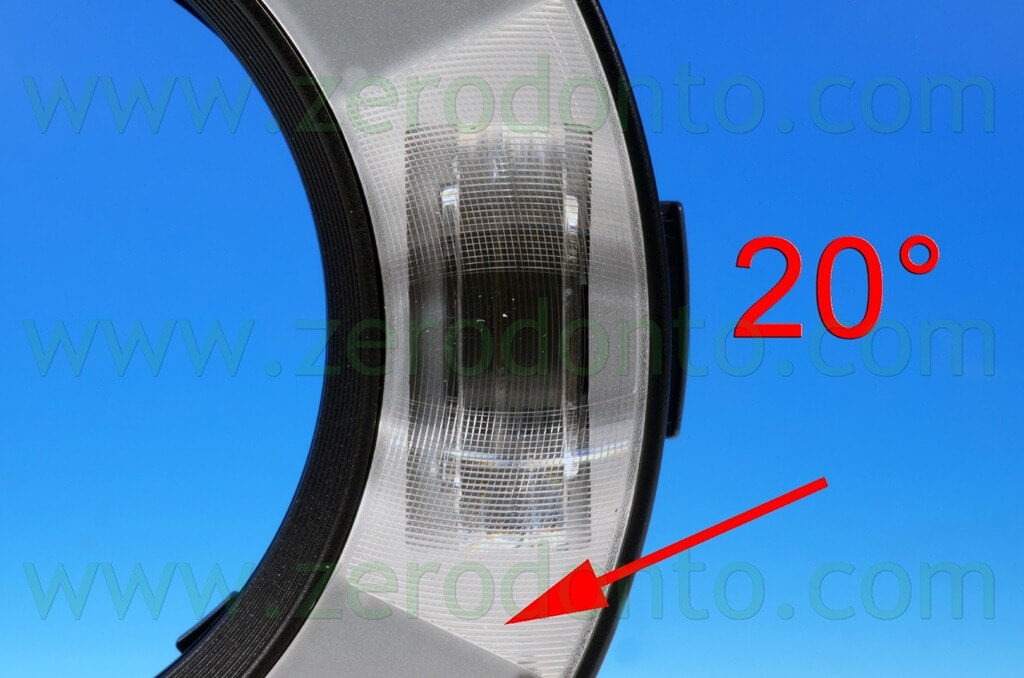
the latter position (20°) is the one that I recommend to set up and use for all intraoral photos, the light will not be direct but it will be lateral, from the side at 20 degrees.
It can be used as a “Slave”by almost all DSLRs.
It comes equipped with a plastic panel to be placed in front of the flash,
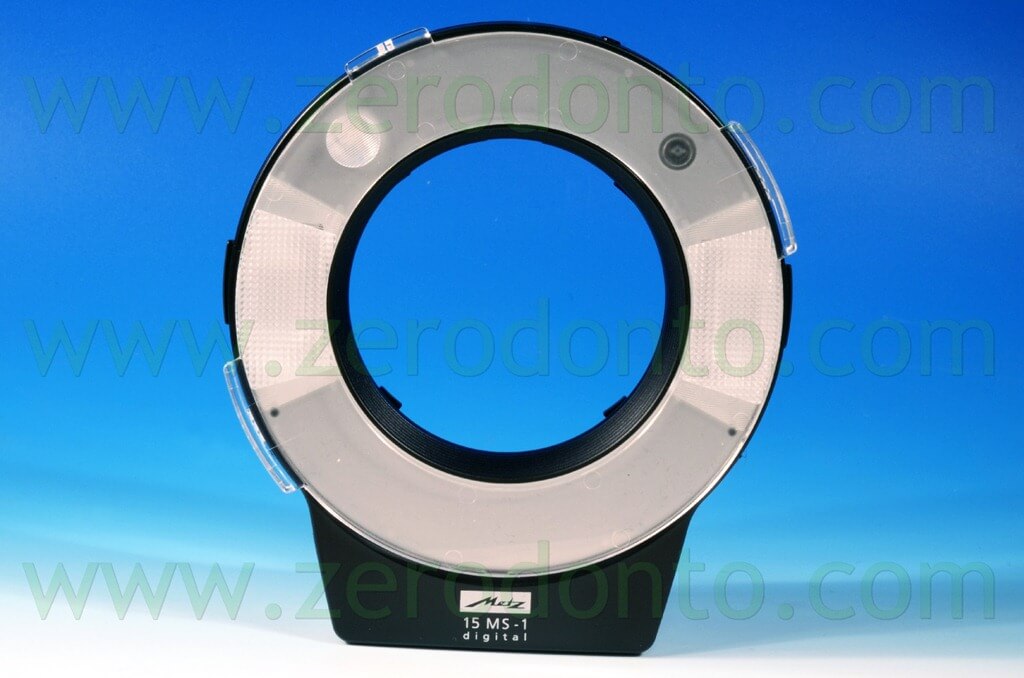
the function of the panel is to spread light more so that the photos are softer, great if used for the final photo of the patient’s face, it eliminates some wrinkles, giving the face a slight rejuvenation.
When photographing in the mouth and light for focusing is poor there is a pilot light that makes things easier for us, there is also the possibility to use it removed from the lens, place it on a tripod or it can be held by the assistant when shooting photos of the face.
Detached from the lens allows us to take pictures angling the light as we please (especially for photos of the face), the results are still better than any ring flash or fixed flash.
Turning the flash upside will notice a USB socket, this is used to update the firmware of flash, this means that the flash can be updated over time via PC, so it can be adapted in the future to new camera models.
Just set the flash on the type of camera we have for example: on the Nikon screen we see the abbreviation Nik, Can, Pen, etc..
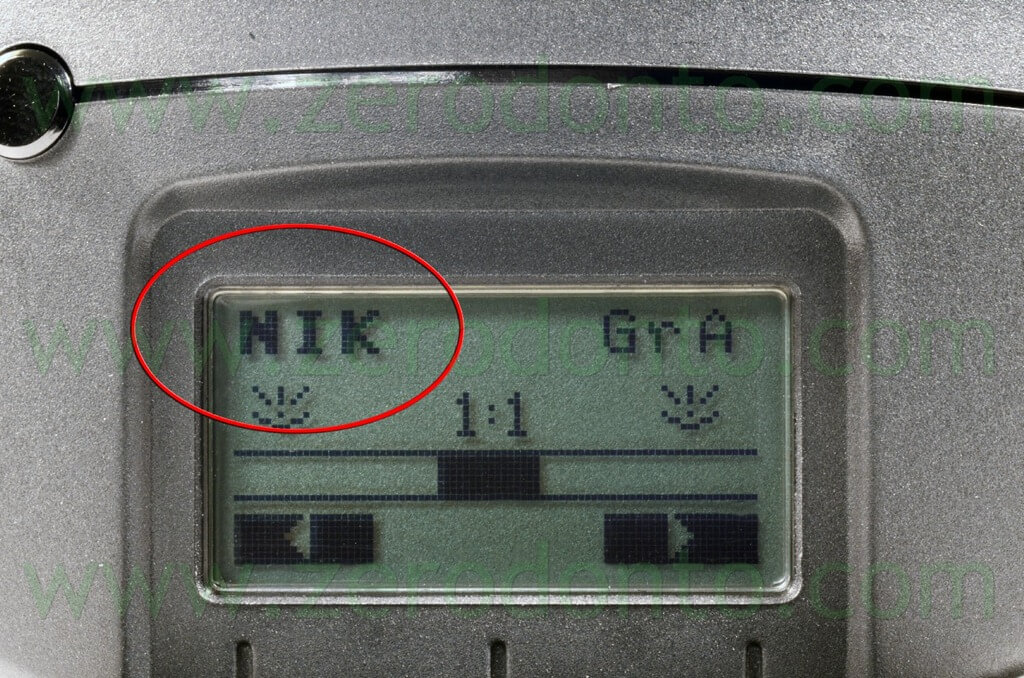
Then move the two lights 20 degrees
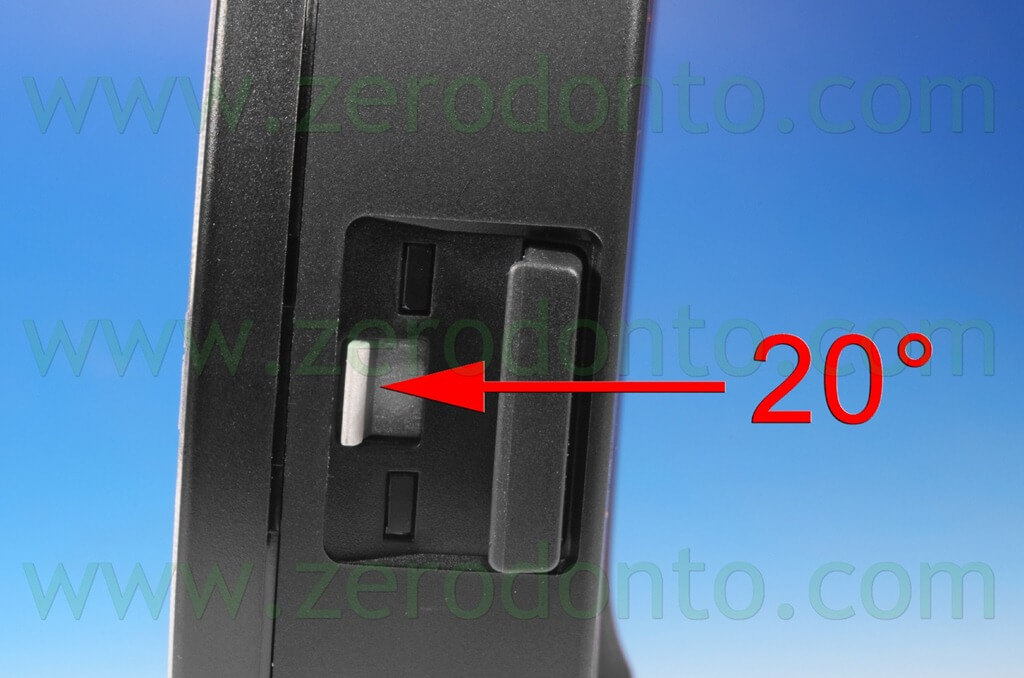
we can move more light from one side to the other, by pressing the right cursor
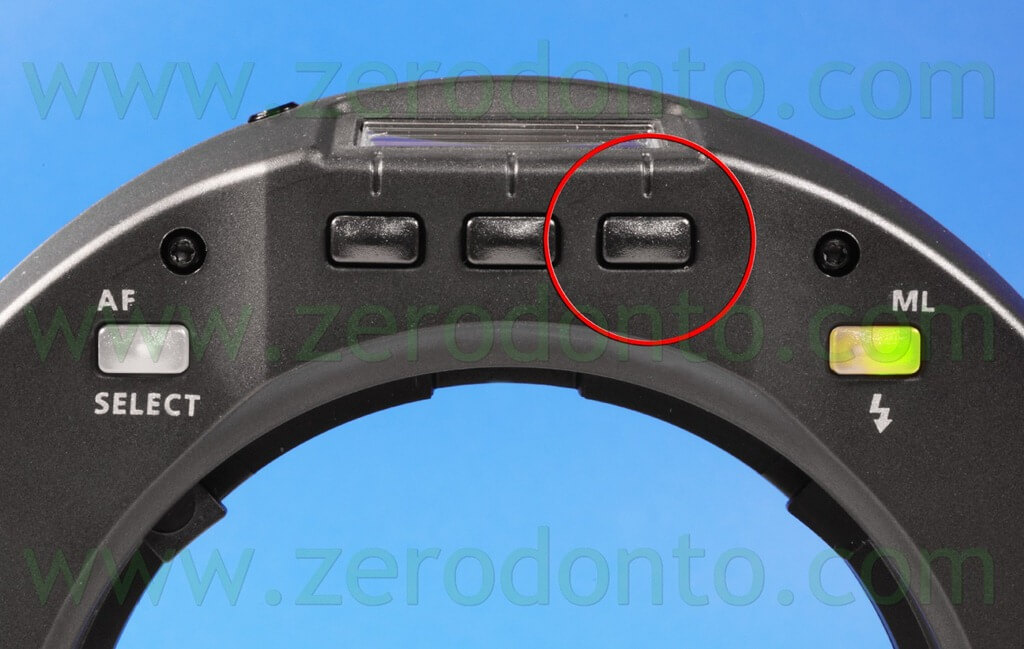
by pressing multiple times we can increase the amount of light on one side and we can cancel out one of the two lights completely, but I would recommend leaving at least one notch on the other light,this gives us great results for pictures of lateral teeth.
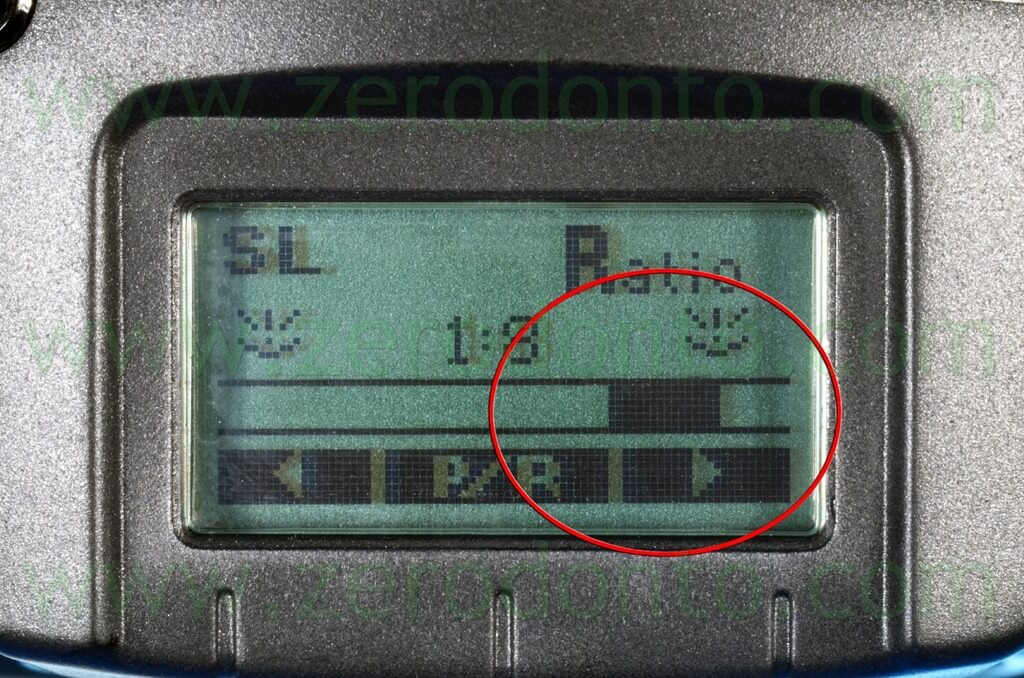
For cameras that are not read in TTL the flash is used in Slave position.
The display shows the cursor in the center with two lines similar to train tracks, we can with the left and right buttons to move more light on a parable or other like before, but the flash is used in manual, we have to decide for each photo power with which we have to take.
Just press the button in the center, the two lines disappear, we see a black bar, and the buttons of the left or right we increase or diminish the power of the flash, the solid bar (indicating full power)

is used for pictures of the face or at a distance of over 60 cm in focus, when take pictures using frontal mouth at half power, the bar is no longer full.
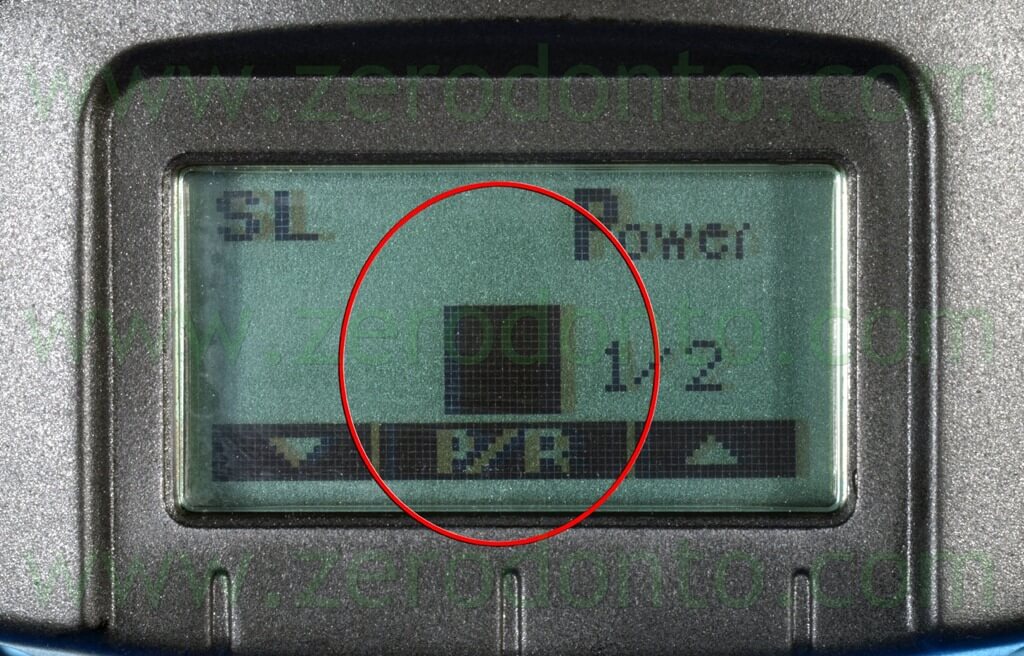
When take pictures of two or four teeth, the power must be reduced up to 1/16.
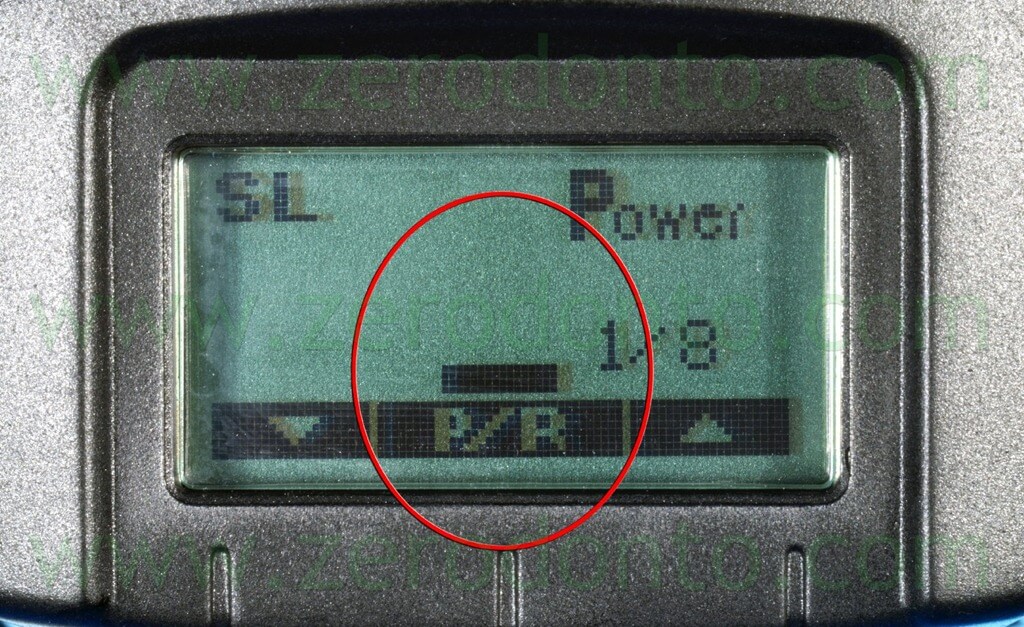
These guidelines may need to be completed for each type of machine, also with the buttons on the left and right can get clearer photos or darker, always increasing or decreasing the flash output.
Thus in addition to the possibility will be able to move the light of a single parabola, we can increase or decrease more power out of a parabola or of both and the light will never be direct but always laterally to 20 ° degrees.
In the photo of face advice to unplug the flash from the lens and place it next to the target or to the right or left, you will decide where you feel most appropriate to keep it, with a series of tests.
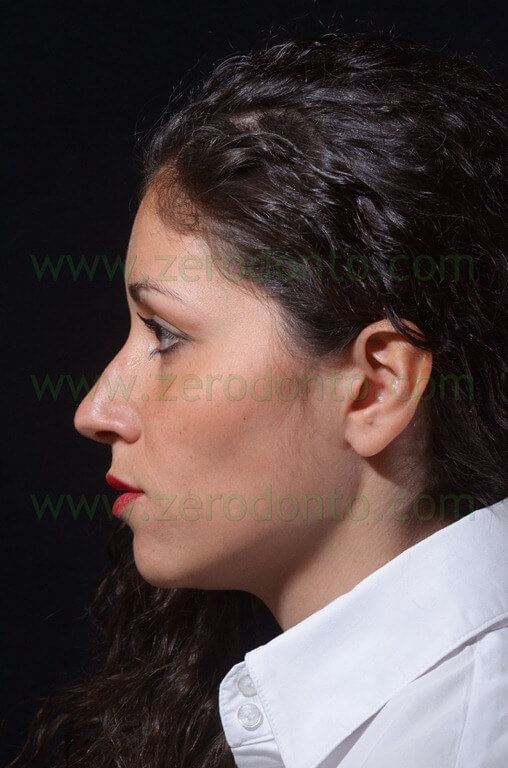
Instead, in the picture side of the patient’s face, I suggest you keep it between the operator and the patient’s face from the side of the nose, up slightly endorsed or held by hand.
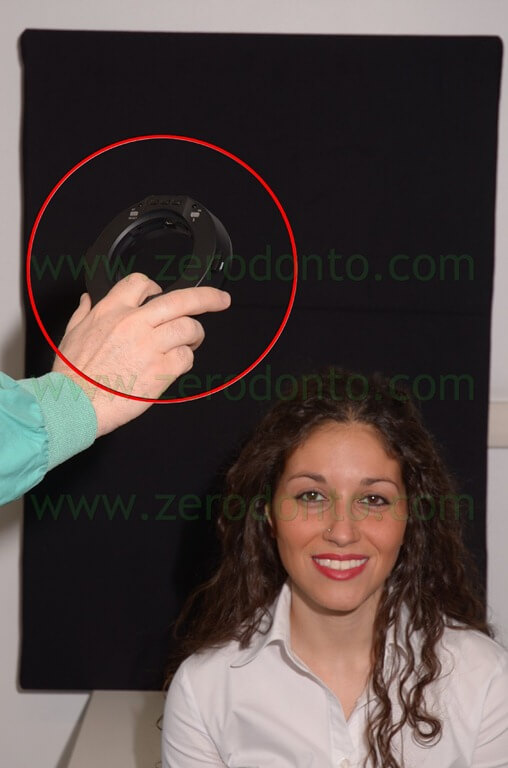
The results are completely different from the use of the flash lens. The photo of the face, with the Flash kept away from the lens, creating a gray area under the chin, giving a real dimension of the face.
DUAL POINT FLASH
Over the years, companies have even built smaller flashes that can be used in “TTL flash” or connected to the camera by cables,
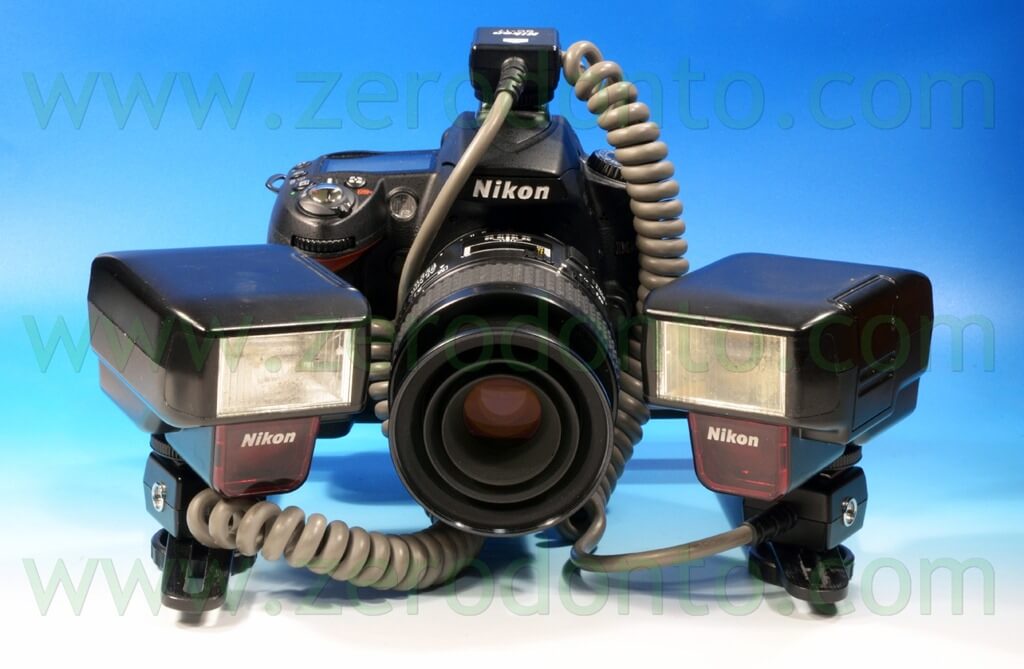
or away from the camera with a wireless connection.
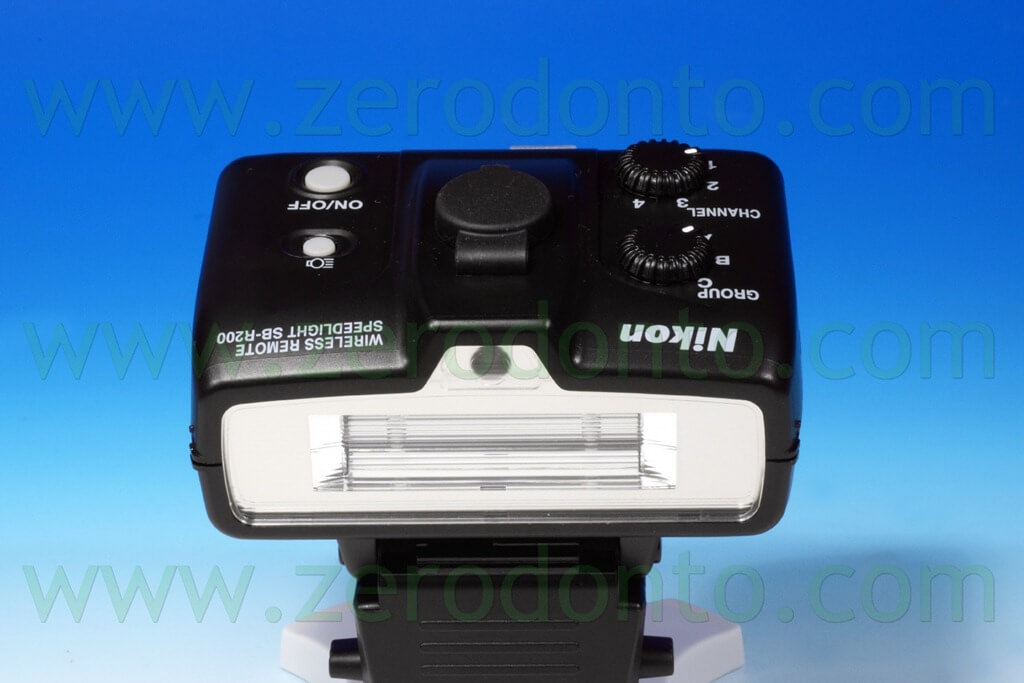
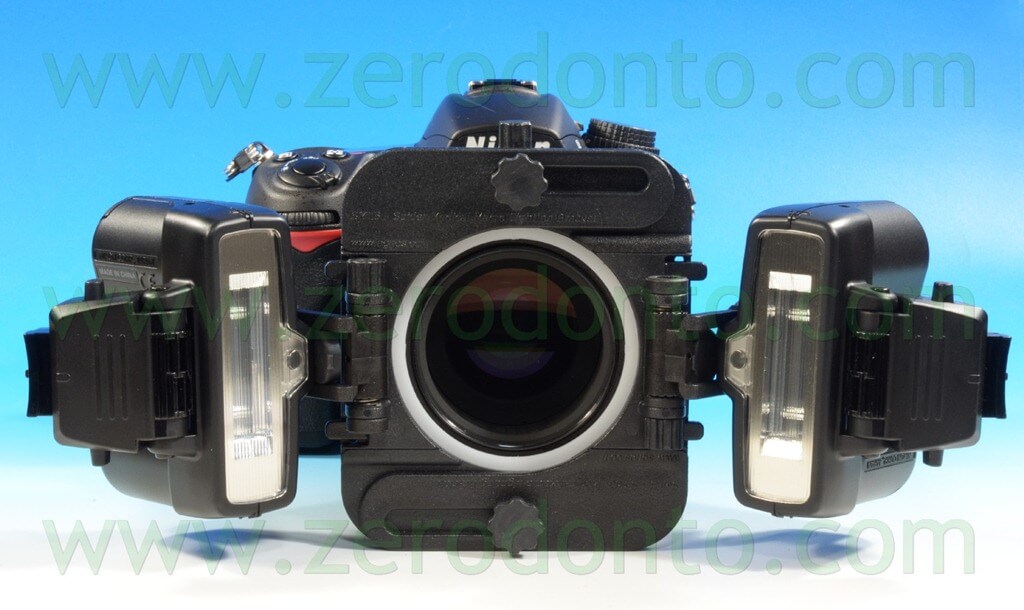
These are currently the most widely used flash systems, with the “Scorpion and Spider” brackets produced by Agnos,
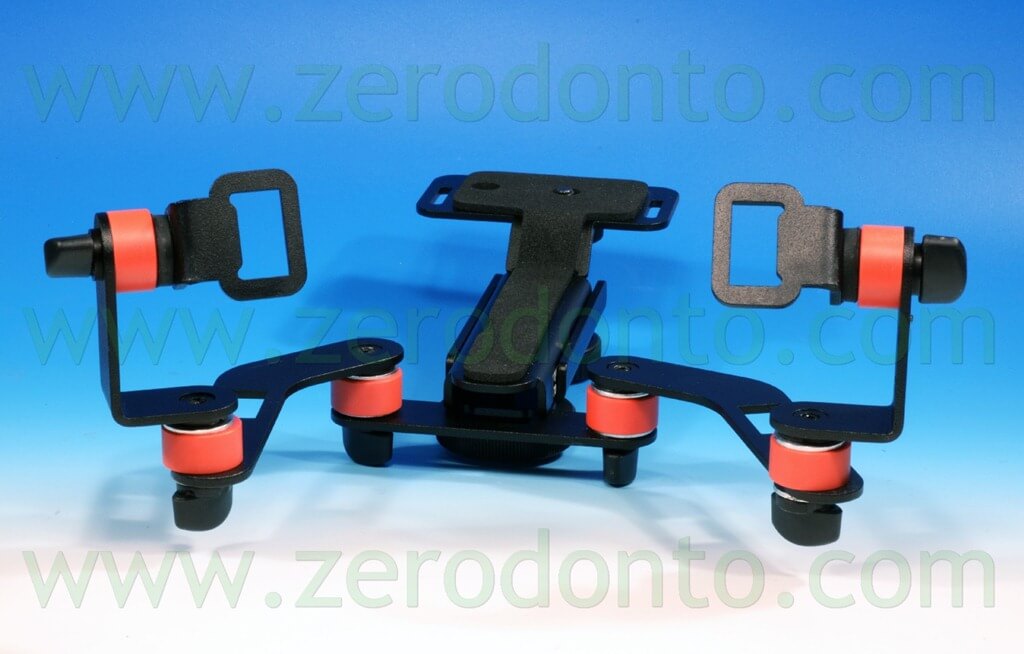
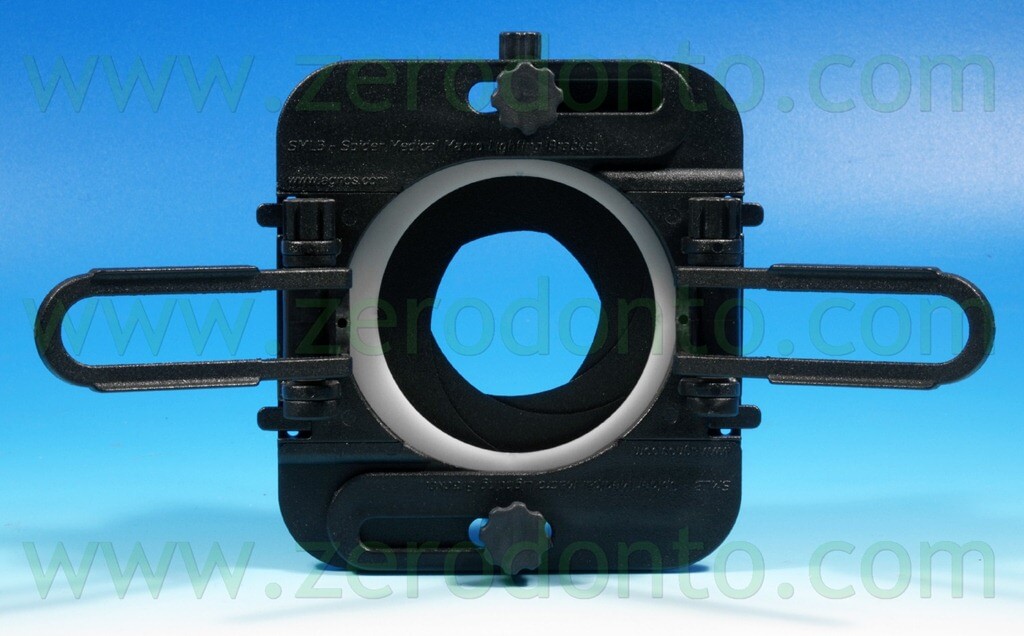
you can use the dual point flash in many different positions, the light is no longer direct like with the ring flash, but the operator will decide how to position the flash allowing light to reach the tooth not only on the front, but from the side as well.
The light spreads differently on the tooth (it goes through the tooth laterally), giving the images a three-dimensional feel, besides being able to see details of the teeth that would otherwise not be visible with the light emitted from a ring flash any or two point ring flash, like the Metz flash if we leave the two reflectors at “0”.
Now after years of use and testing I have found that if we learn to use the two flashes not only in a 45 degree position,
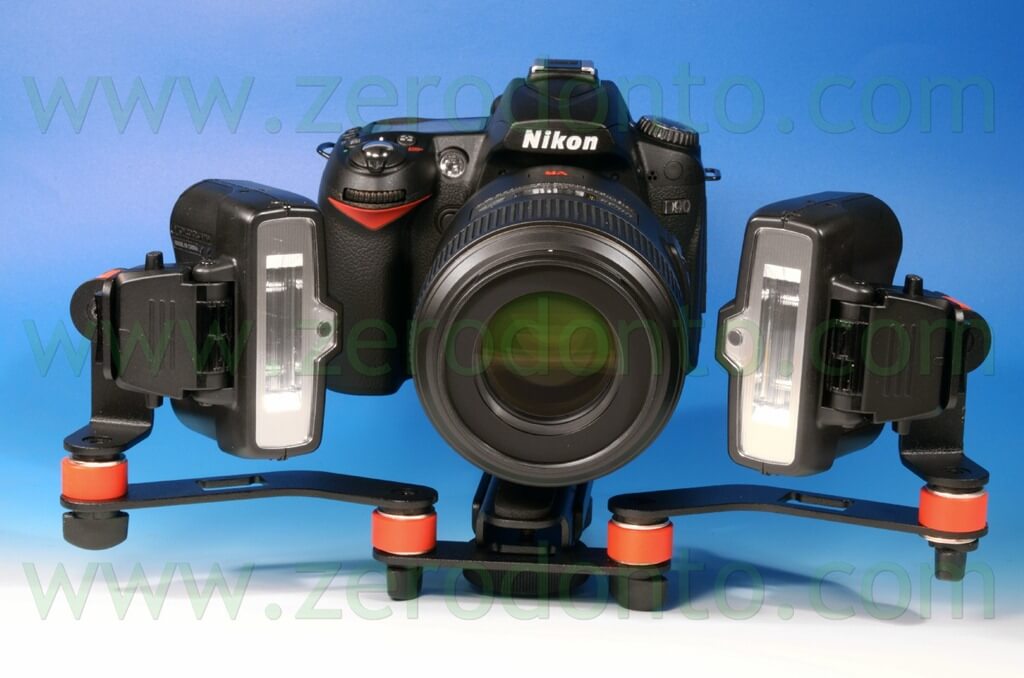
but also in other positions, we discover details that would not have been noticeable if we had left the flash at 45 degrees.
The results we get allow us to give as much information to our dental technician as possible, as well as to show the patient the possible faults or merits of his teeth.

In the reconstruction of missing teeth if the technician is able to reproduce, in addition to the color, even the smallest details, such as transparencies, microfractures, etc. you will not notice a tooth is a reproduction if it has the same characteristics of the patient’s teeth and the reconstructions are in harmony with all the details of the other teeth.
Great aesthetic work is noticeable mainly in tooth reproduction: the reproduction should give the idea of “always having been there.”
How many times have we seen people smile and we immediately notice that some teeth are reconstructions, you will immediately notice the difference, in the color, or lack of details that all teeth have.
The dual pointflash can be used with two different brackets, the first bracket is the “Scorpion”, this is the best in my opinion, but like all equipment it requires some practice in the use of different positions , for some it may seem too bulky and it is a bit heavy, since it is often used by some female staff many decide not to purchase it.
I have proven time and again that if the correct positions of the flash on the brackets are explained everything becomes easier, I will try to help you with the correct positions to ensure that even those who have never used them can get great results just by setting the flash correctly.
This bracket has the ability to move its arms, supporting the double flash, in different positions, we can use the light of one flash or both when we need it.
Let’s start with the basic position that I advice when you want to photograph surgery orthodontic work, we use this position when do not have time to move the flash in the correct position, but we want to get good pictures.
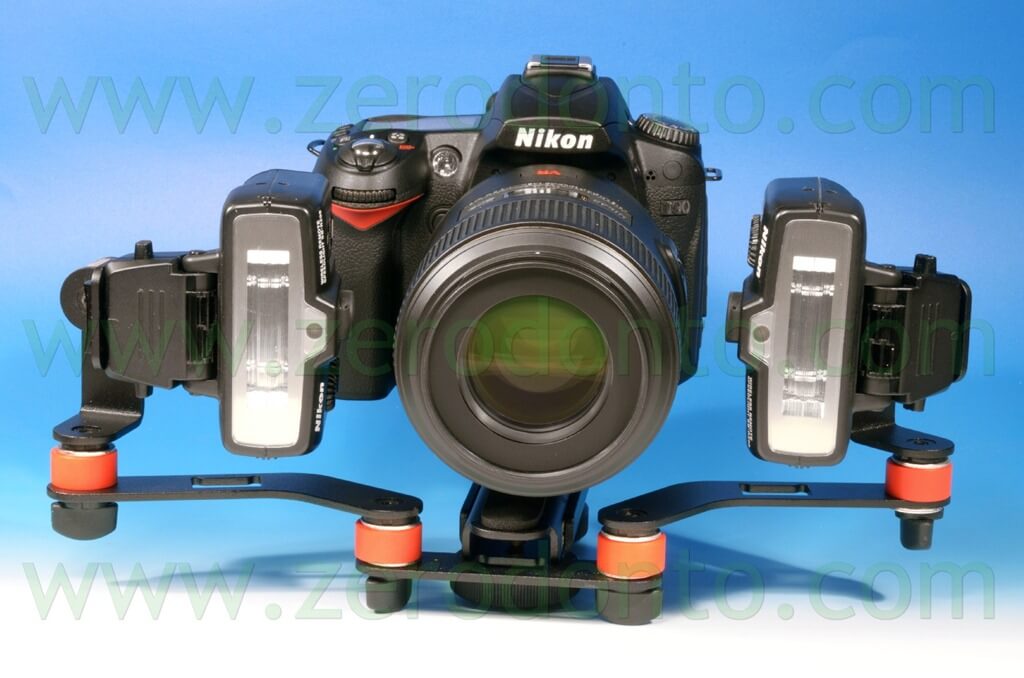
In this position the light of the flash is not direct, but it comes from the side, giving a more three-dimensional effect.
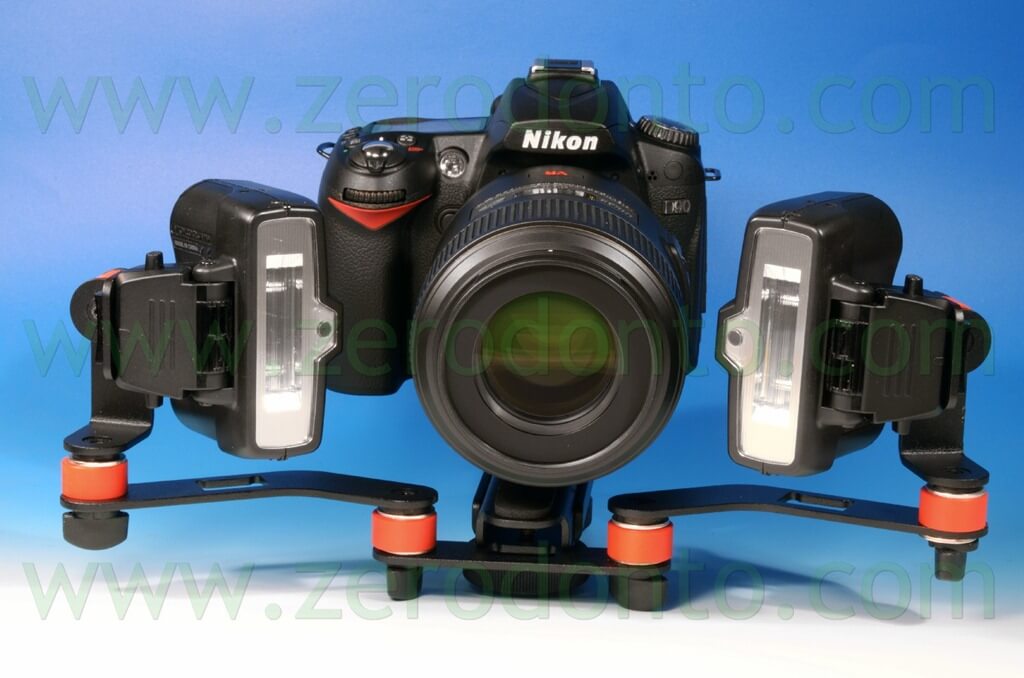
Leaving the two flashes in this position is like using a ring flash, but the flashes are not direct but positioned at 45 degrees, all the photos are still better, both in three-dimensionality, quality and details compared to any ring flash.
The light of the ring flash on the front teeth highlights the shape of the teeth due to the light reflected on them.
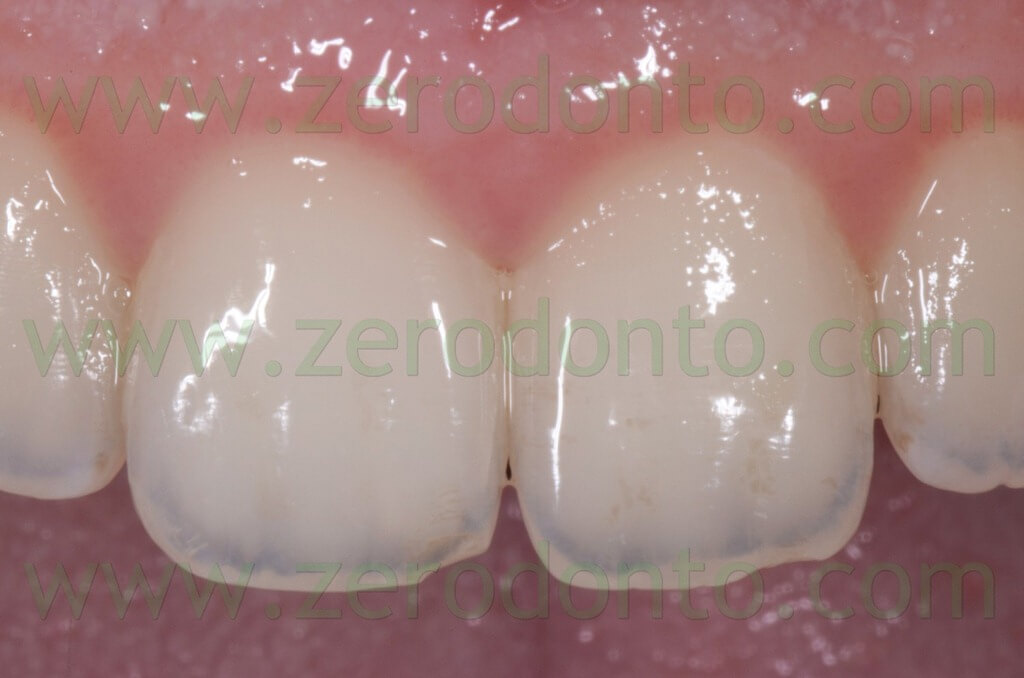
If we want to get this result just put the two flashes in the direct position, like with a ring flash.
The “aesthetic” area of the teeth is the front area, we have to take at least three photos to get all the information we can from the front teeth like: three-dimensionality, transparency, microfractures, chroma value, color, shape. We must take the first two positioning the flash like in the following photo,
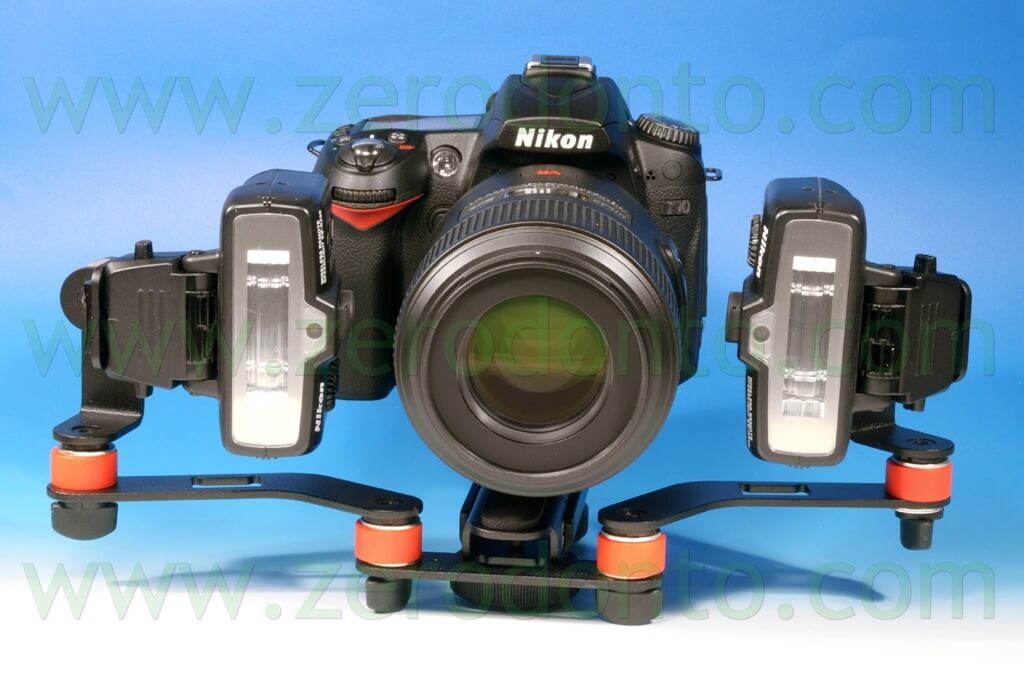
then we will shoot a third photo with the two flashes pointing from above and placed at 45 degrees,
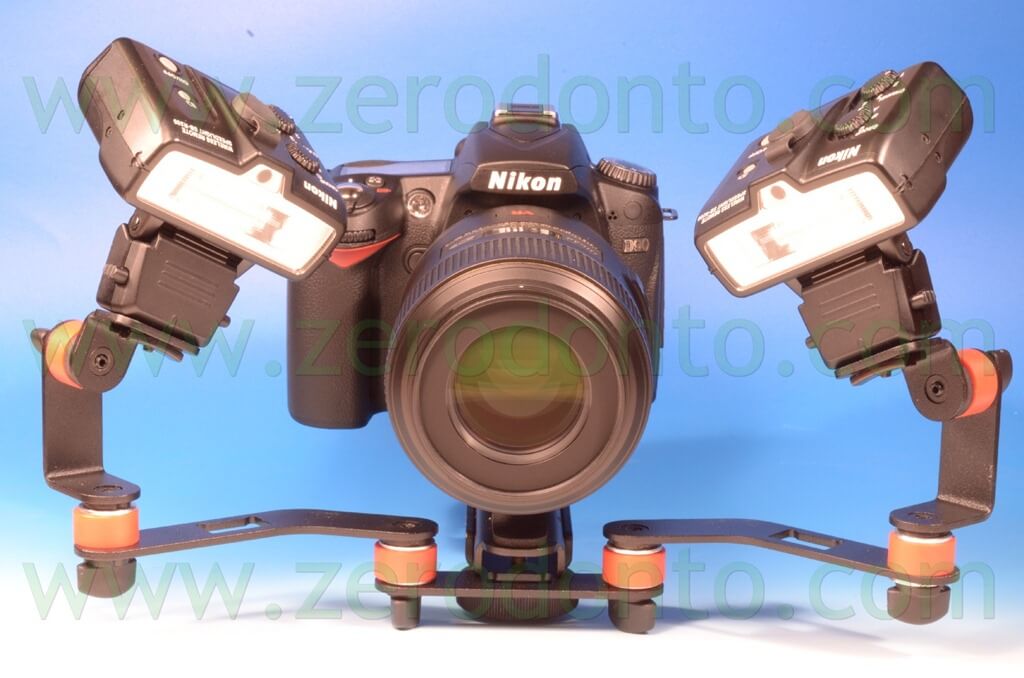
if we have the patient slightly open the mouth, showing some gum, we will focus only the four upper teeth, with the flash emitting light from above, the bottom of the mouth will appear black,
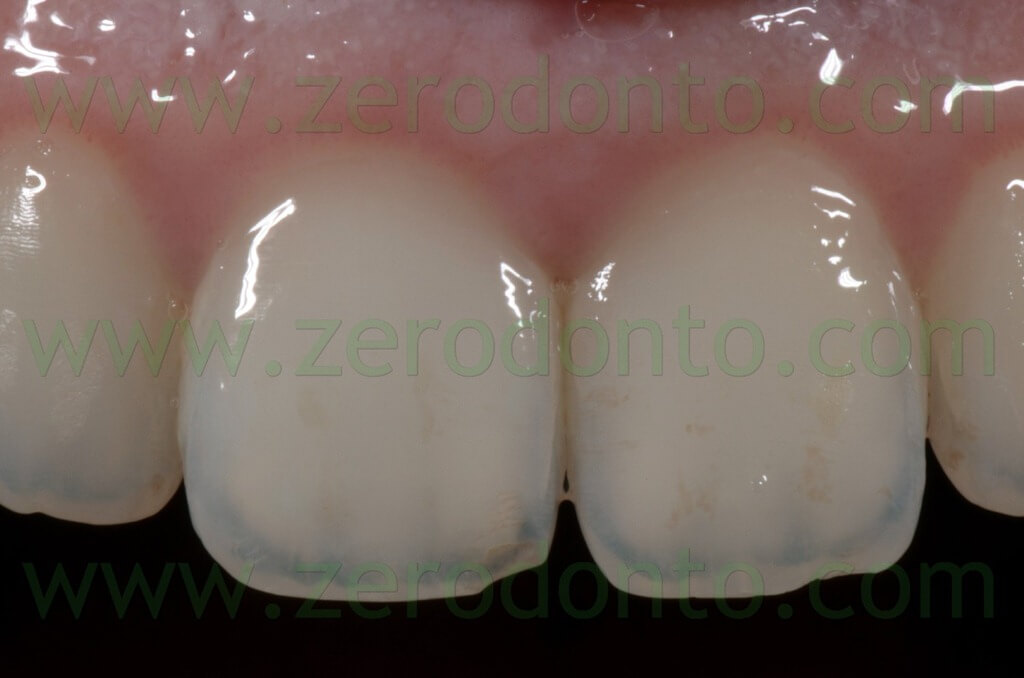
we do not need use the contrasters built specifically to to get the black background under the front teeth.
These are now used by many doctors, with the problem that if they are not positioned correctly, however, the picture will not appear completely black, it is necessary to intervene with the computer.
Using the dual point flash with the bracket from above at 45 degrees, we will avoid this problem.
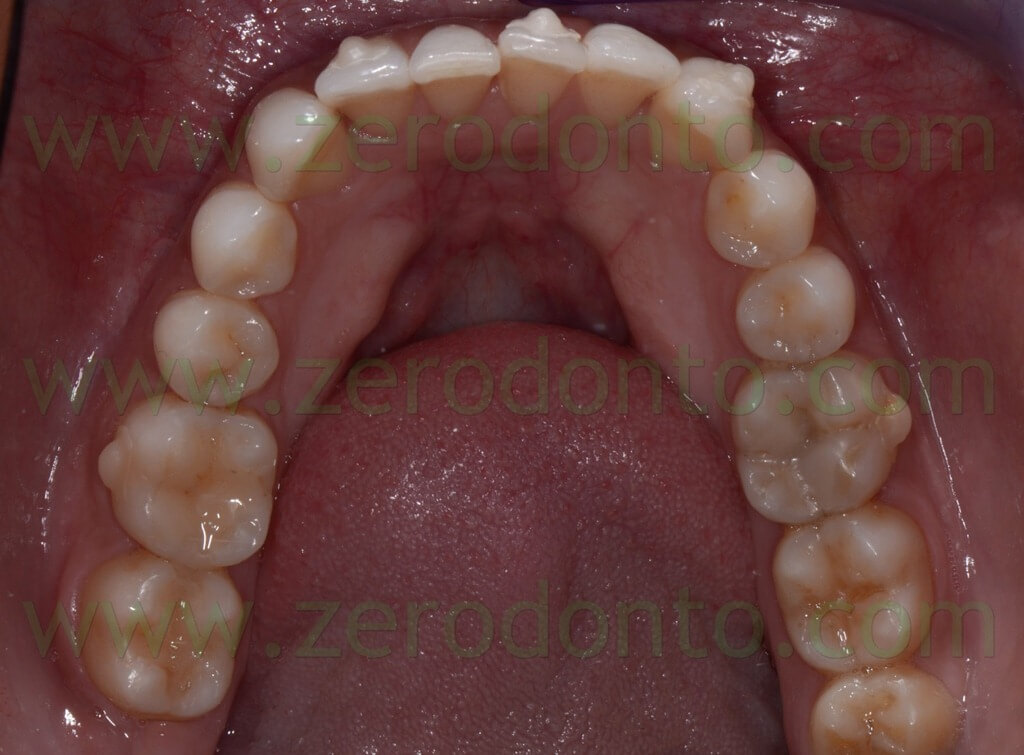
In the photos upper and lower occlusal photos, position the flashes somewhere between 45°and 0°(at approximately 20-25 °),
this position creates less shadow on the side of the mouth, the exposure is more uniform, like with the ring flash, giving the picture more light.
For the lower occlusal we keep the flash in the same position giving a slight overexposure to the flash of +0.7.

To do this, simply hold down the plus and minus button and rotate the knurled dial back the result will be like the picture below.
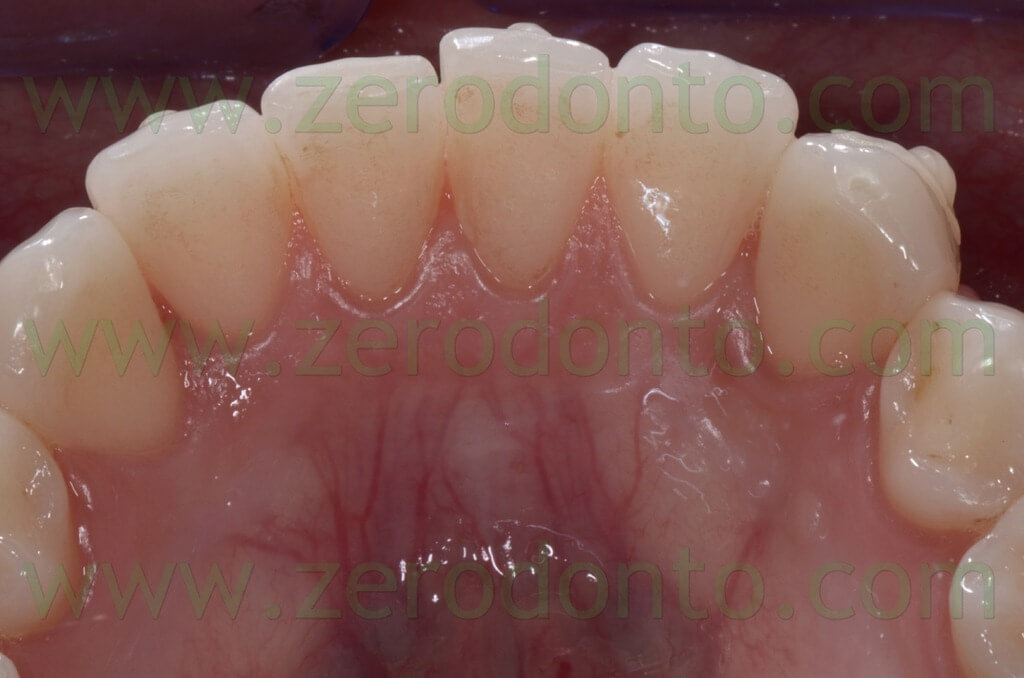
Use the same flash position for the details of the lower anterior teeth (cuspid to cuspid), but in these pictures the flash exposure has to be underexposed, less light, as opposed to overexposure as in the previous photo, to do this simply repeat previous steps by turning the knurled dial in the opposite direction until the display shows -0.7.
The result will be like this.
For photos of lateral teeth I almost always use only one flash but only in the forward position and placed so that it can provide good lighting all the way into the fornix.
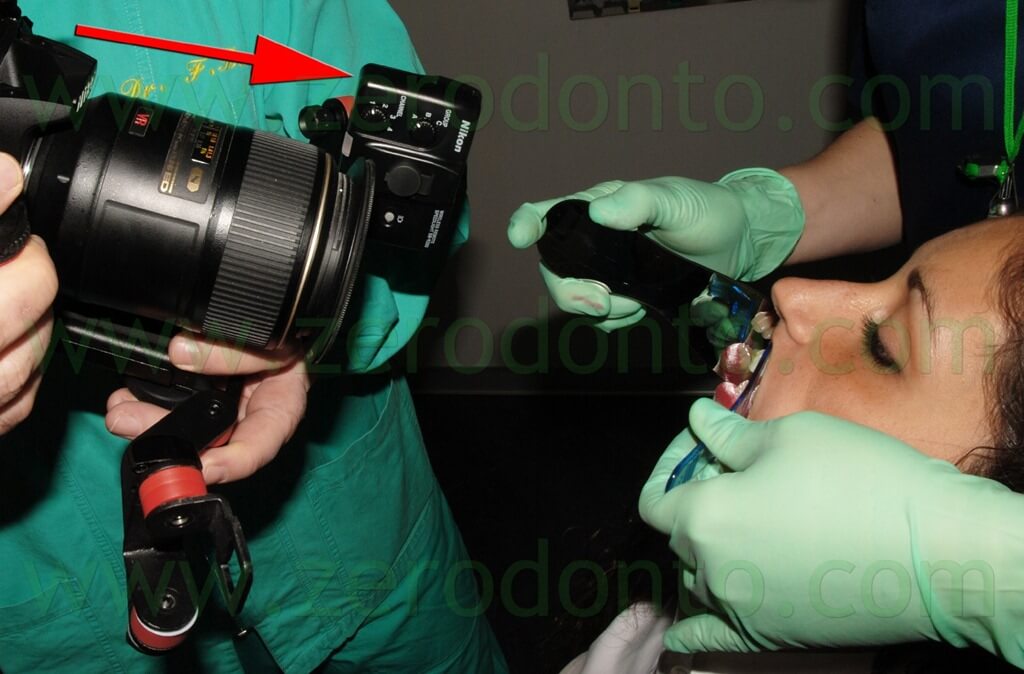
The result will be like this.
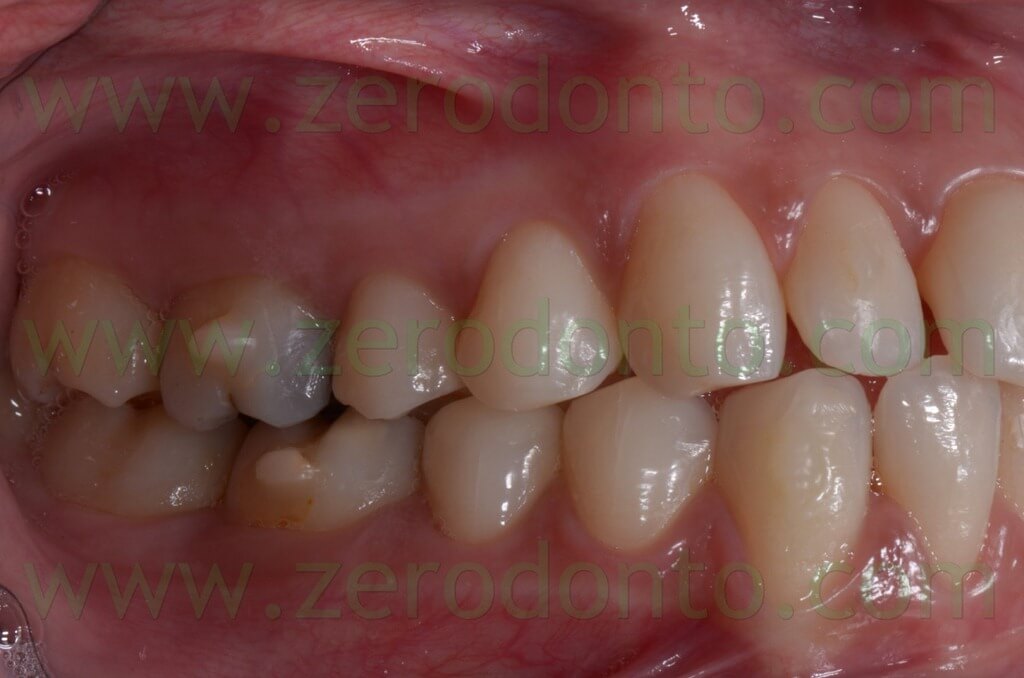
For photos of four teeth or a single tooth in occlusal view, palatal or lateral, I use a single flash and position it so it gives enough light to all the teeth, but the light has to very evenly illuminate the teeth also laterally, by highlighting the cusps the tooth will have a three-dimensional shape.
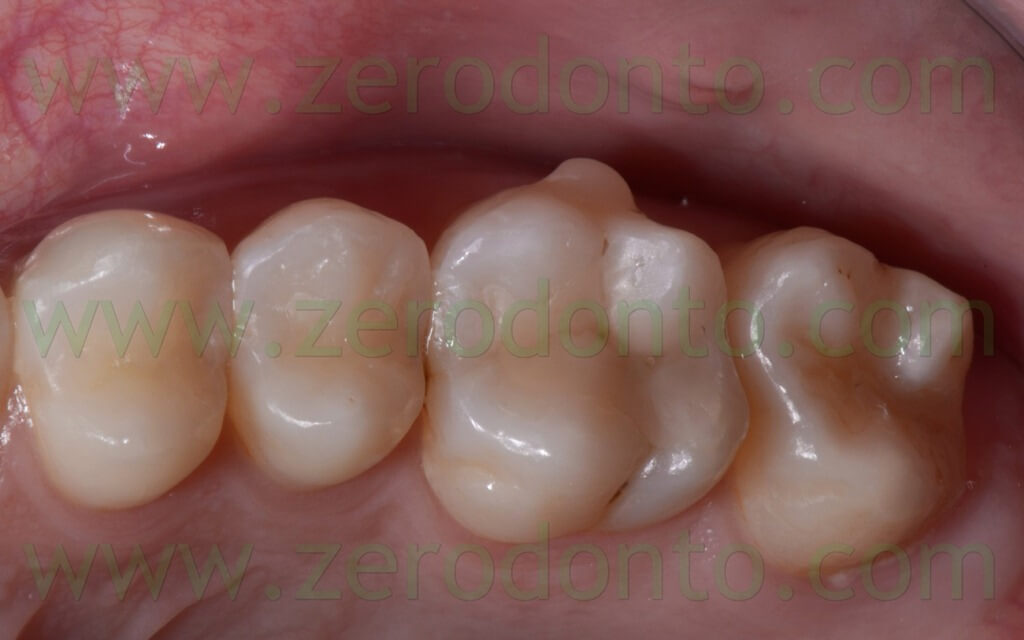
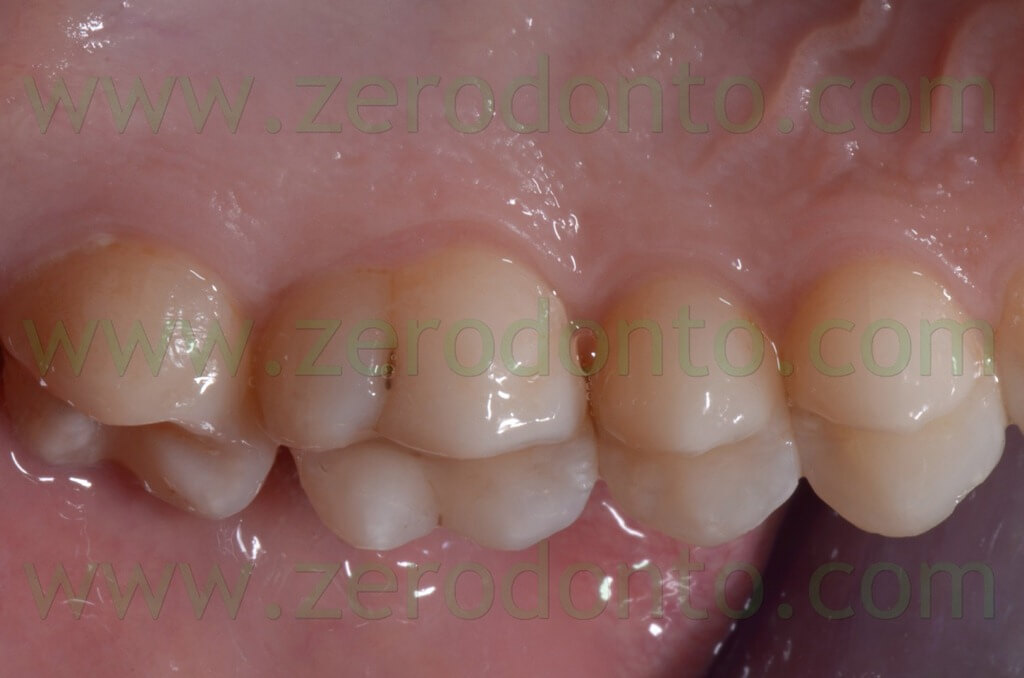
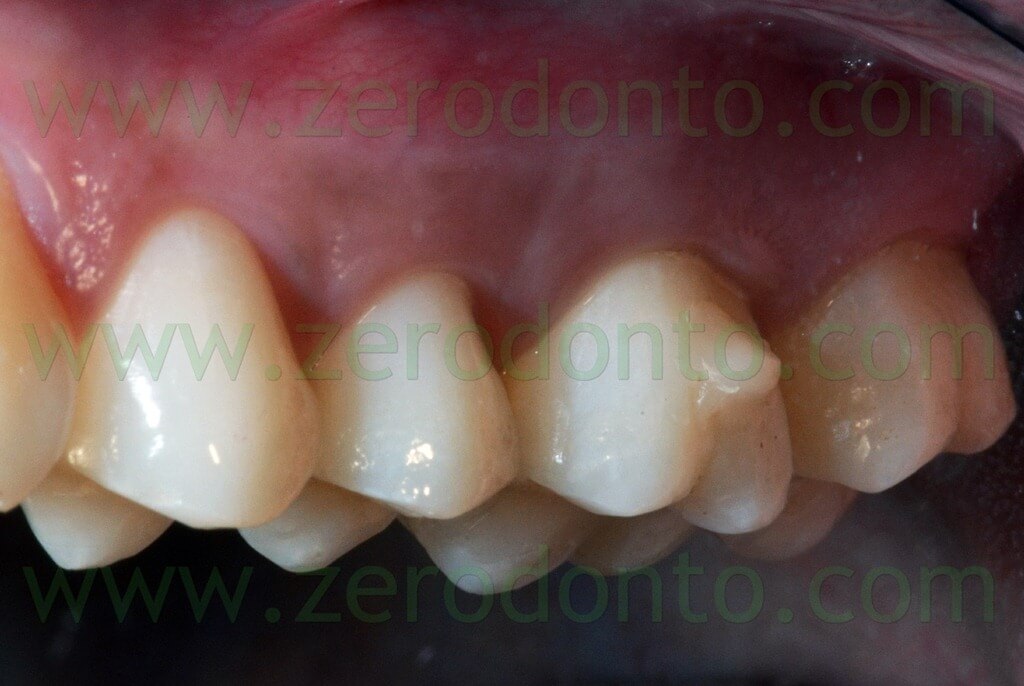
I use the dual flash in the ring position at 45°degrees only when the mouth of the patient allows it, but the 45°position is required.
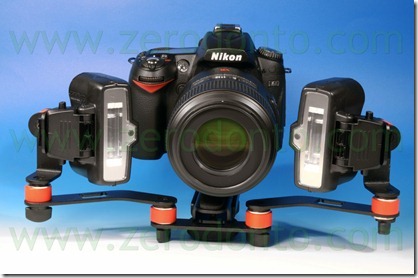
On all the Nikon cameras we can use as many different SB-R200 flashes as we want, for all intraoral photos I use a flash or two at the most, as just described above.
For photos of the face instead I use a total of three flashes, one remains fixed on the bracket, a second held laterally to the left between the operator and the patient, but in order to obtain a better overview of the entire patient’s head I make use of a third flash placed over the patient’s head (we could also leave it fixed) that highlights the face from the bottom, giving a better three-dimensionality to the whole picture.
We use the same techniques photographic studios use when shooting photos identity cards.
The photos of the face from the front, left and right, should always be the same magnification, even the diaphragm is changed, it will be chosen automatically as is the case for all intraoral photos.
The distance from the patient, that is advised for these photographs, is a meter and a half.

The diaphragm that is normally used for photos of the face is F11.
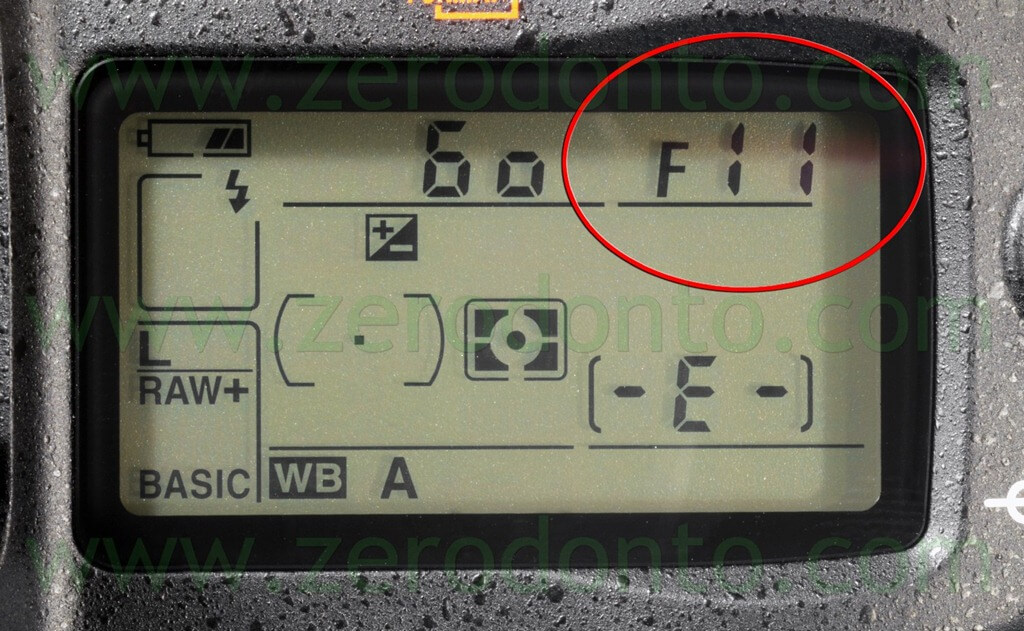
Set the distance at one and a half meters and aperture at F11, the camera must point at the center of the face, both the patient and the operator must sit on stools with wheels, the patient has to remain still in an ideal spot and detached from the wall, with the background we decide to use (I recommend black or white)

or any color you want.
The operator will be sitting, moving backwards without focusing until they eyes are well in focus, which are the ideal place to focus on to maximize depth of field for photos of the face, the camera should not move from this position, only the patient will need to turn to the right and left side for the photos, they should be taken one after the other so that the height of the photos will remain the same.
To help with the linearity of the eyes we should bring up the horizontal and vertical lines on the camera, that most DSLRs have in the menu.
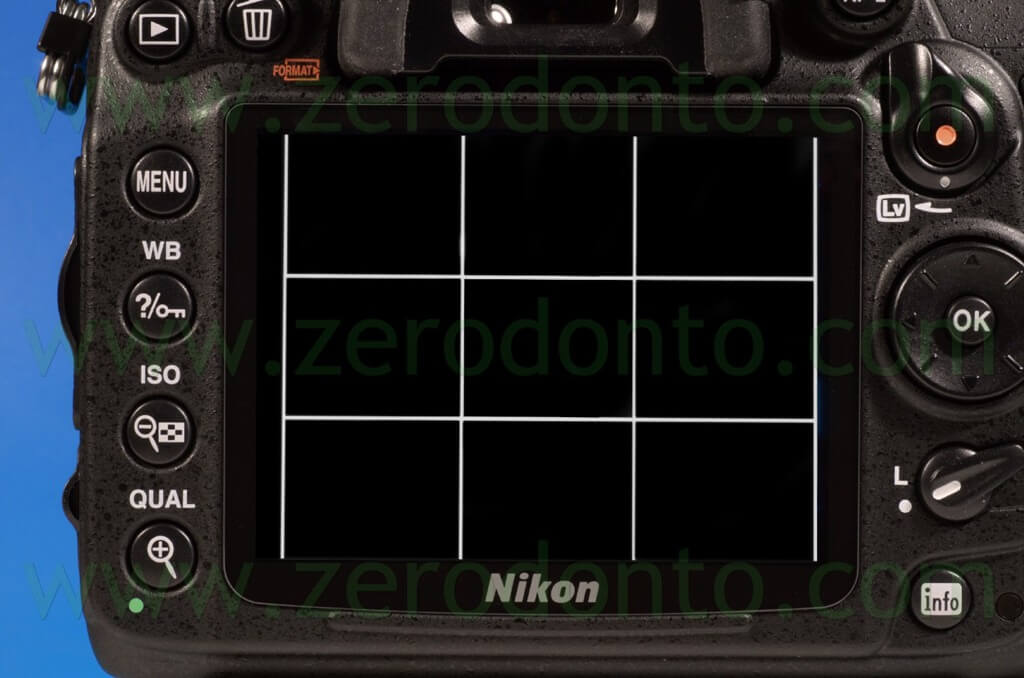
If we impose on ourselves to take all the photos, ensuring that the horizontal and vertical lines are always essential to achieving straight and framed pictures, we will always get nice photos, both for us and everyone who looks at them (patient or students); I inserted some pictures as an example.
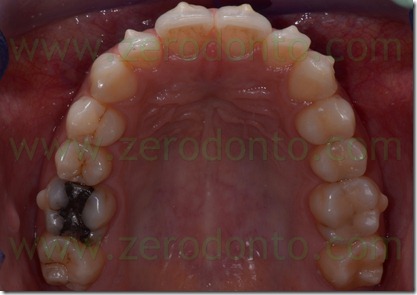
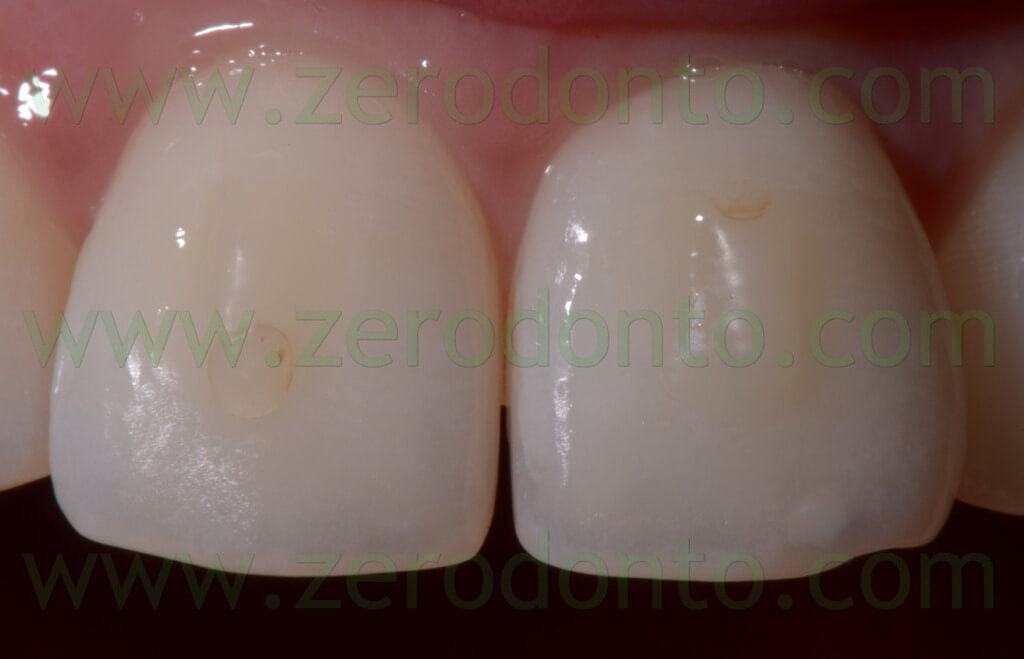
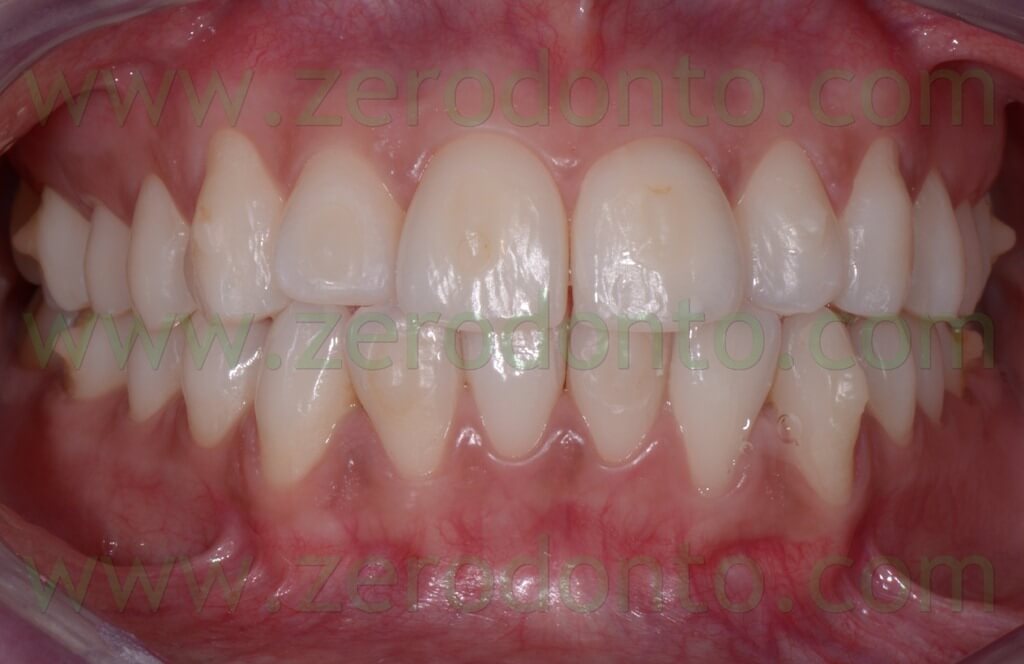
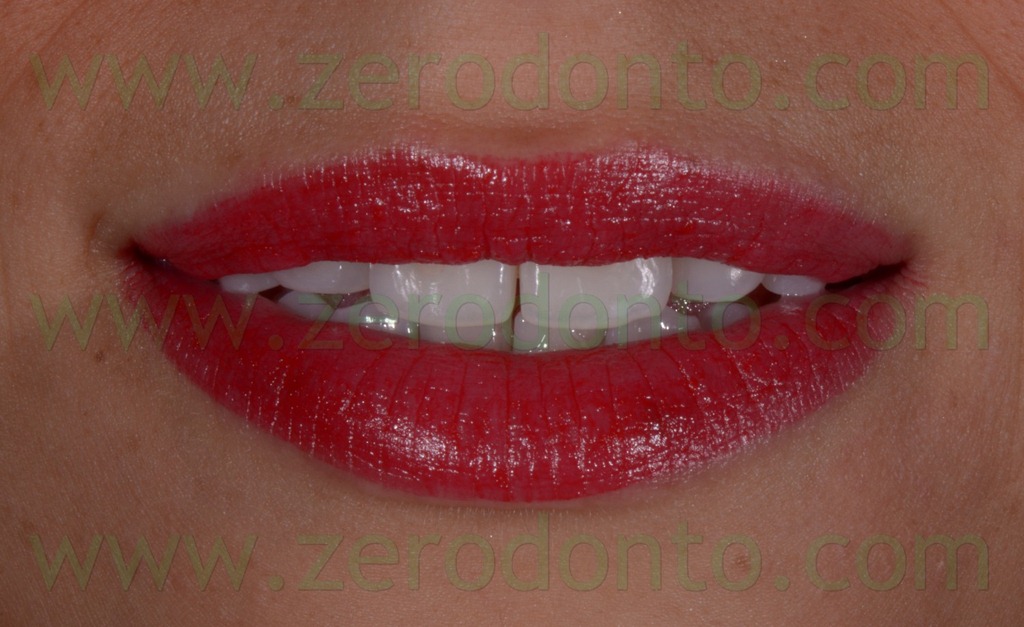
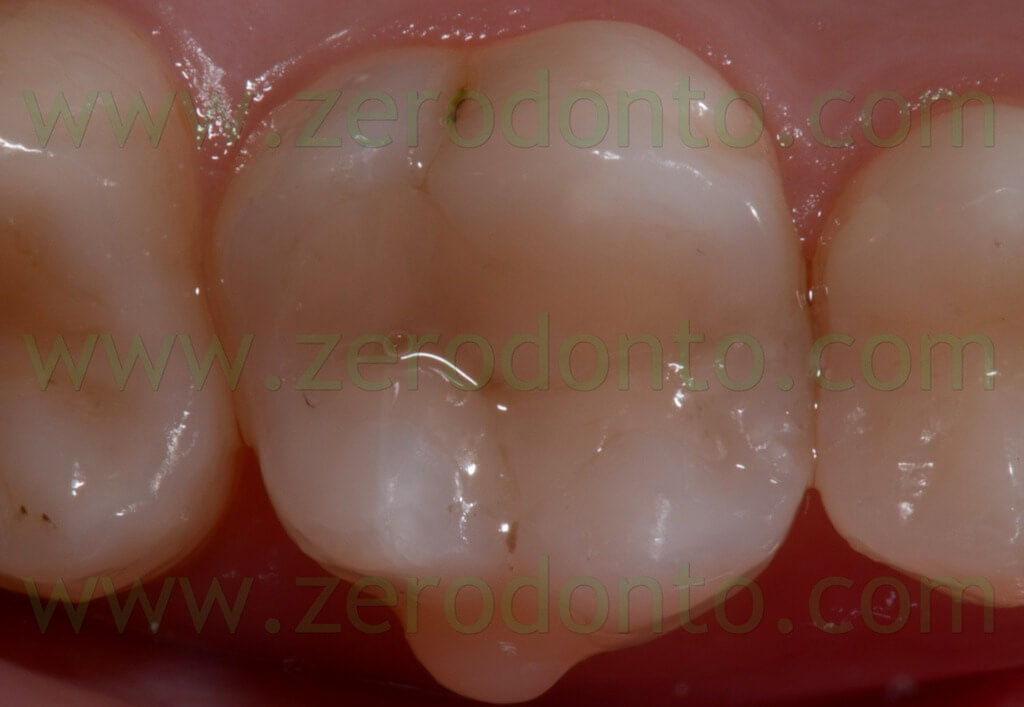
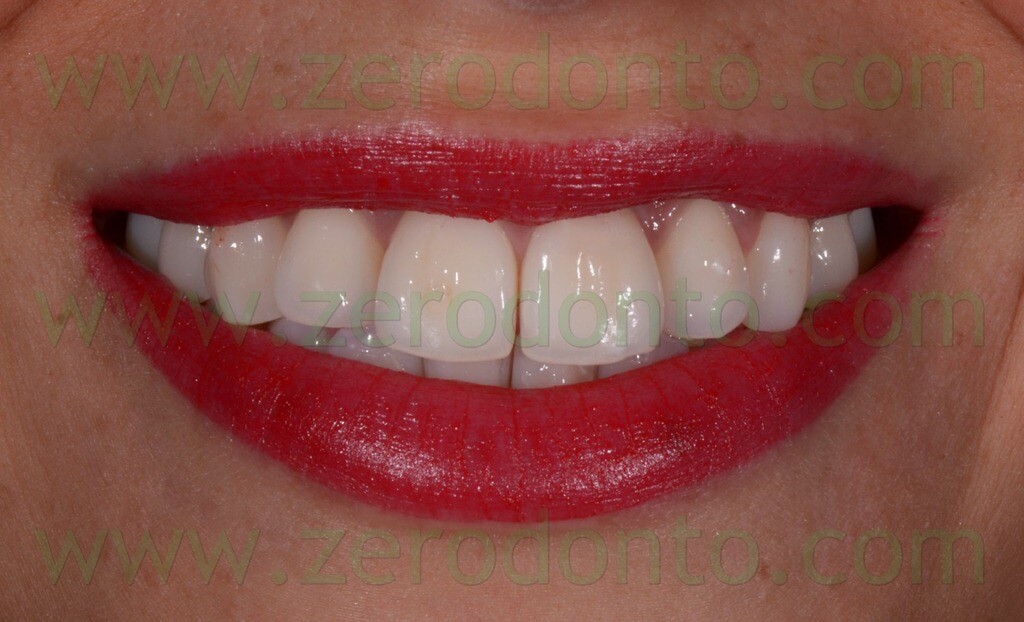
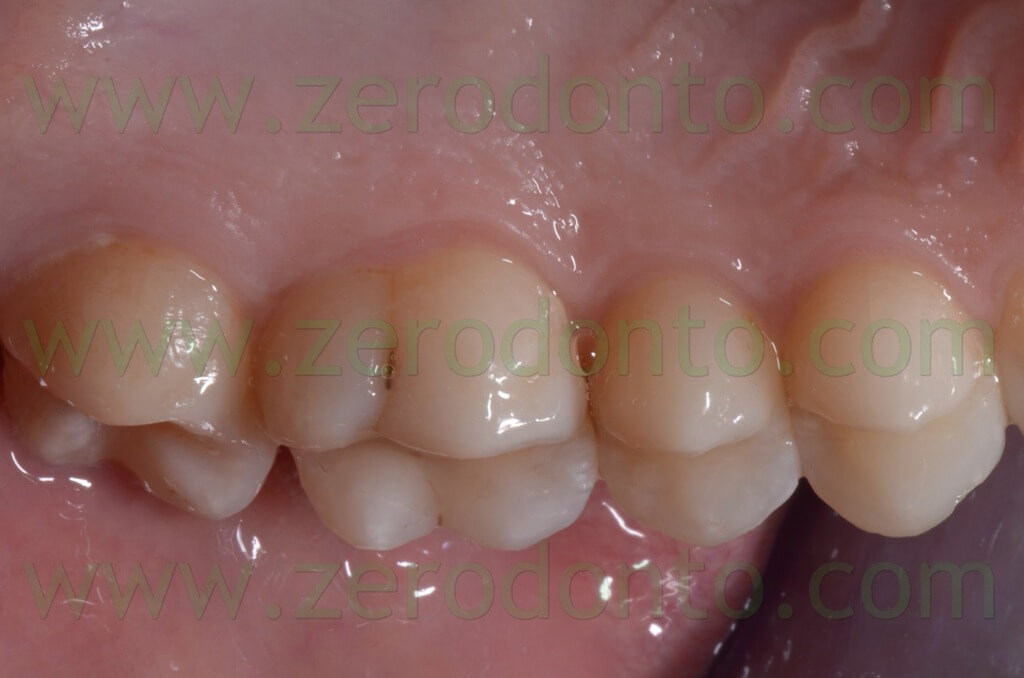
At the end of orthodontic o esthetic treatment I advice to take more photos of the smile and face that are different from the documentation photos, these pictures will serve as an example for the next patient or to give to patients at the end of their treatment.
The final picture will no longer be at a distance of one meter and a half, but we’ll focus until the entire torso of the patient is visible, about two and a half meters, three at most.
The final photo will be like this.
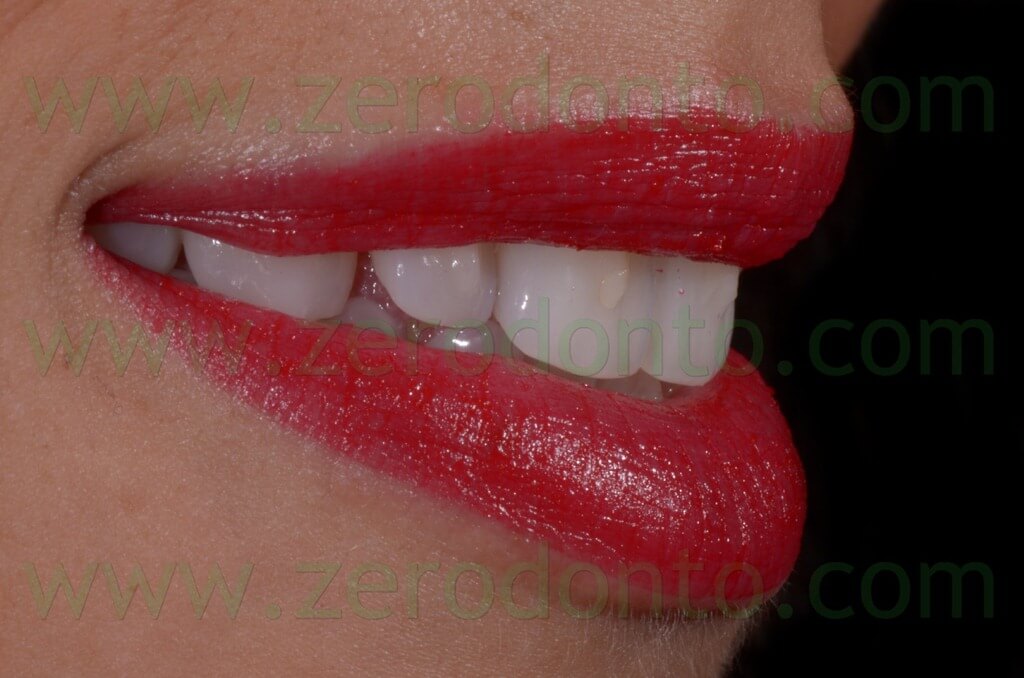
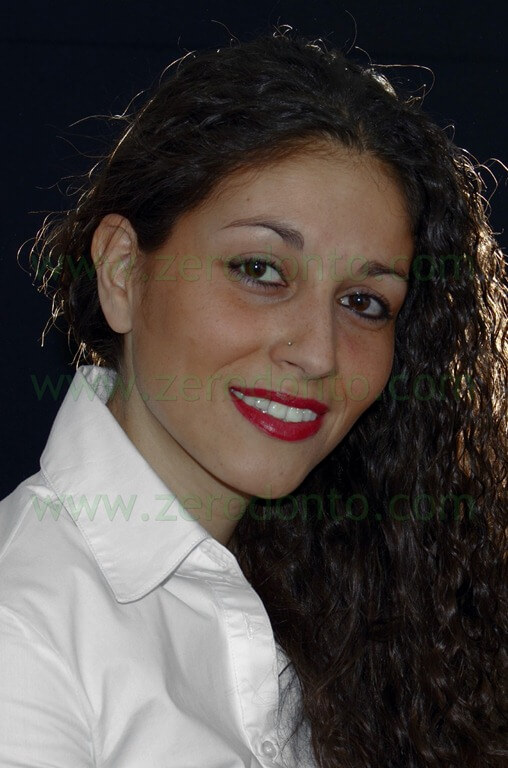

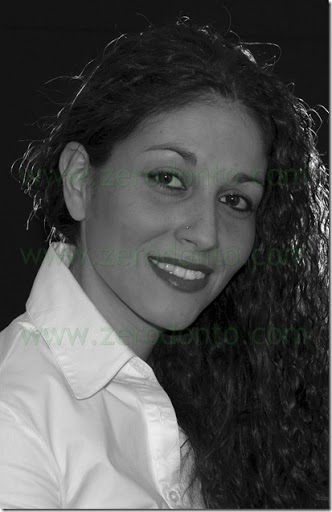
We can give the patient, at the end of the treatment, a framed black and white picture (with the office name printed in the lower right corner) and the picture will look like this.
Acknowledgments:
A special thanks to Dott.re Ferdinando Burla office, for his availability. Thanks also to Rita from Dott.re Burla Ferdinando’s office. Thank you to dental technician Angelo Soria. To my family that supports me in all my ventures, in particular my son Alessandro, who has taught me all I know of computer science. Carlo Alberto Piacquadio
Info:
zerodonto@gmail.com
piacquadiocarlo@gmail.com

